
Written by Jennifer Stamps
Love the look of sprockets? Yes, me too.
I almost bought a sprocket-rocket, but since I’m on a hiatus from buying cameras in 2018, I decided to do a little do-it-yourself hack to shoot 35mm panoramic images in my Holga. You can also use this to create Holgaramas.
Plus…hacks are super fun!

What you’ll need:
This is a TRUE DIY. Ideally, you won’t have to buy anything for this, assuming you have the Holga and roll of 35mm film.
- Black gaffers tape OR black construction paper and masking tape (Amazon: Gaffers Tape)
- A Holga with a 120 spool (Amazon: Holga Cameras)
- Roll of 35mm film (The color images in this post were taken with Fujifilm Superia 400 (find on Amazon) and the black and white images were taken with Holga 400 film (find on Amazon))
- Darkroom bag or pitch-black room (Amazon: Film Changing Bags)
- Cardboard, packing foam, or even a paper plate
You can also use 35mm adapters if you want a method that’s a little less DIY.

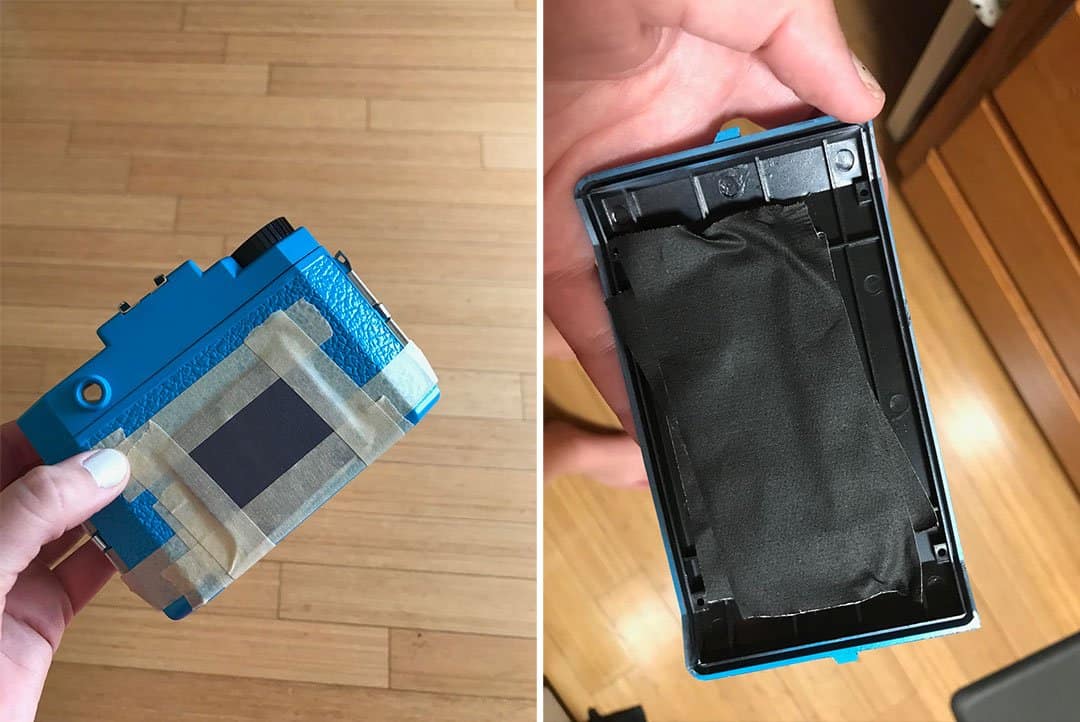
Step 1: Make Sure The Holga Is Light Tight
First thing’s first. You want to make sure the camera is light-tight.
That means closing up that red window on the back of the camera. You can’t be too careful with this. I tried it twice, and both ways worked, so get creative if you don’t have the tools mentioned below.
Method 1: The first time, I took black construction paper, colored it with black marker, folded two pieces so they were four sheets thick, and taped them on the inside AND outside of the camera window. I used regular masking tape to secure the construction paper.
Method 2: The second time, I used several layers of black gaffers tape on both sides. Just tape that ish up and make sure there is no chance light will ever come through that window. Ever.

Step 2: Securing The Roll Of 35mm Film In Your Holga
Now that the window is on lock-down, you want to make sure the 35mm roll will stay in place.
Take some strips of cardboard (or strips of a paper plate or similar material) and fold it like an accordion to place above and below the 35mm roll.
It’s important to make sure it’s on top and bottom so your negative runs right in the middle of the camera.
Take the leader out of the 35mm film roll, feed it through the slot on the empty 120 spool, and tape the leader to the 120 spool. Wind it a little so you know it’s taking (just like you would with a 120 roll). And BOOM. You’re ready.
Then, tape the back of your camera shut, if you need. I do just to be safe. The last thing I want is for that back to pop off and the roll to be ruined.

Step 3: Shooting And Winding The 35mm Film Roll
Now, you’re ready to shoot.
But…how do you know how much to wind, right?
Tests have been done, and 34 clicks is the magic number! So take your photo, and, then, advance the film knob until you hear it click 34 times. This will give you 12-13 panoramic frames on a 36 exposure 35mm film roll.


Step 4: Removing The Film After Shooting
Ok – now that you’ve shot your roll…DO NOT OPEN THE CAMERA. Remember, 35mm film doesn’t have a paper backing like 120 film does. So if you open the camera, you’ll expose that roll to light.
Put it in a darkroom bag (or pitch black room), untape everything, and carefully remove the 35mm canister and 120 spool.
You’ll need to rewind the film by hand by twisting the knob at the top of the 35mm canister until you can start to feel the negative unwind from the 120 spool and into the 35mm canister.
You’ll need to keep winding until all of the film is in the 35mm canister.

Step 5: Developing The Film And Scanning For Sprockets
Take it to your lab or develop yourself (you can learn all about developing b&w film right here on Shoot It With Film!).
You can ask your lab if they scan sprockets, or you can scan them yourself with a flatbed scanner and negative holder (Find 120 negative holders on Amazon).
Just put your 120 negative holder on your scanner, and place the cut negatives (I use 3 frames at a time) gently against the 120 holder to keep it straight. Individually scan each frame.

Last, but not least. HAVE FUN!
This Holga is a magical little light box. And putting 35mm film in it on a DIY hack is just one of the many reasons that makes it SO MAGICAL. I kinda never want to shoot 120 film in it anymore. Only slightly kidding…but come on! It’s just so fun!
Thank you so much, Jen! You can check out Jen’s other posts on Shoot It With Film here, and be sure to follow her work on her website and Instagram.
Leave your questions about this DIY Holga hack below in the comments, and check out more film tutorials here!


Leave a Comment
Shoot It With Film on Instagram


Blog Comments
Todd Campbell
November 15, 2022 at 2:51 am
Do you have any tips for framing your photos and using the view finder when using 35mm in a Holga?
shootitwithfilm
November 16, 2022 at 5:01 pm
Hi Todd! The viewfinder doesn’t look through the lens on the Holga, so it definitely takes some practice to get what you want in frame. Once you line up your frame through the viewfinder, you’ll want to move the camera a little bit up and a little bit to the left to try and adjust for the difference between the viewfinder and the lens.