
Written by Amy Elizabeth
Freelensing photography is a creative technique that is useful to have in any artist’s toolbox. Knowing how to use your lenses off of your camera will expand their use into tilt shift and macro substitutes.
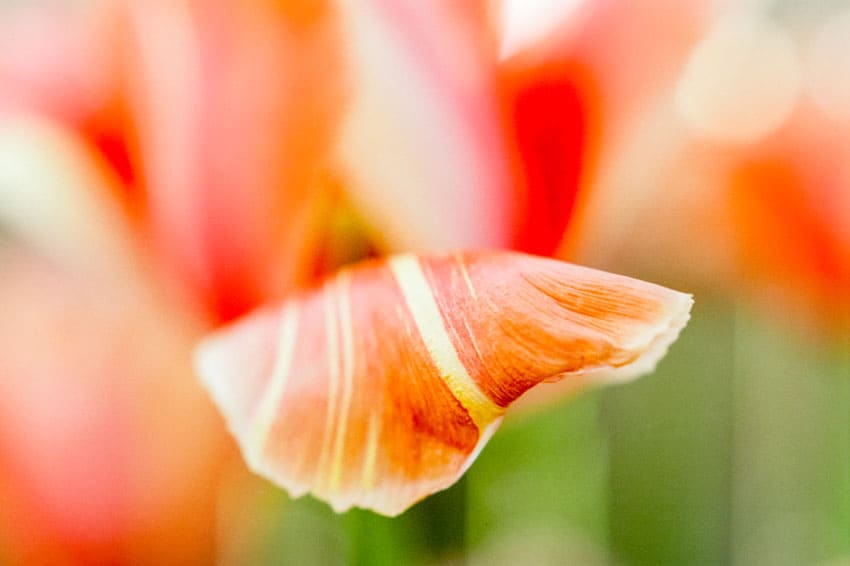
I found myself really embracing freelensing when I went on a bike ride and only had my 24mm lens on my camera. I ended up at a local garden and wanted to photograph some of the flora, but was severely limited by my poor lens choice.
Knowing I could take my lens off to get a macro effect, I thought I might as well experiment and ended up loving the results of freelensing.


What is Freelensing Photography?
Freelensing is a photography technique where you detach your lens from your camera and hold it in front of your camera to take photos instead of having it mounted to the camera body.
You literally free your lens from the constraints of the mount and have the liberty to play with it.
You can move it further from your body, tilt it so the glass isn’t parallel to the film to create a tilt-shift effect, or even turn the lens around and have the mount facing toward your subject to create a macro effect.


What Are the Benefits of Freelensing?
I always think of freelensing having two purposes, and they aren’t mutually exclusive.
I will use freelensing in order to have macro capabilities, to have tilt-shift capabilities, or to have both. (And usually if I am using it for macro photography, I also tilt the lens, because why not?)
1. You Can Use Freelensing for Tilt-Shift Photography
Normally, when we photograph with a lens on, the image plane, lens plane, and focal plane are all parallel to one another. Freelensing lets us tilt the lens plane so that it is no longer parallel to the image plane, creating tilt-shift effects.
What does the tilt-shift effect look like in your images? Using freelensing for tilt-shift photography allows for selective focus of objects that are a similar distance away. If you have two objects next to each other, with a tilt-shift lens, you can make one object in focus and the other object blurry.
Using freelensing as a tilt-shift also let you selectively focus on both near and far objects while the rest of the image is blurry. In the image below, you can see that people close to the shore and far away from the shore are in focus, but everything to the side of those people (whether the objects are close or far away) is blurry.
This article has a goof visual of the focal plane of a regular lens compared to a tilt-shift lens.


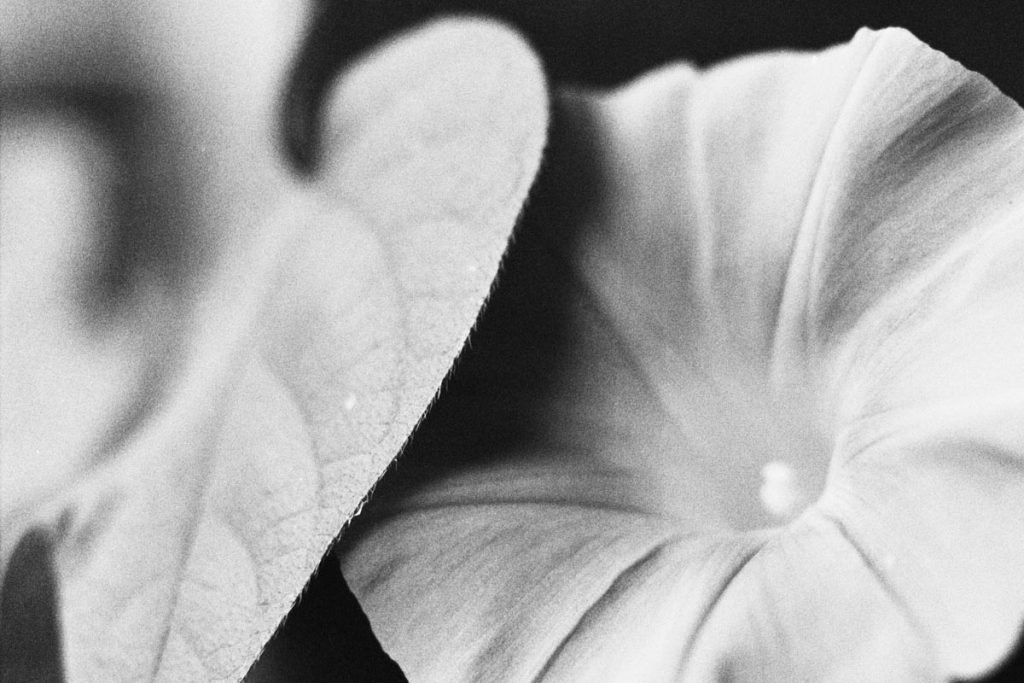
2. You Can Use Freelensing for Macro Photography
Freelensing also lets you create macro images.
Macro photography is having the ability to get very close to your subject, which is often used for photographing subjects like flowers, isolating features in a portrait, or any sort of detail you want to capture.
When you remove your lens from your camera for freelensing, the farther your lens is from the camera, the more it will magnify your image.
You can also flip the lens around so the lens mount is facing your subject for a macro effect.


How to Do Freelensing Photography
Here is the step-by-step process for freelensing.
Step 1: Meter Your Scene
Make sure to meter first and set your shutter speed and aperture, using the widest possible aperture for your lens. You’ll be taking off your lens, so your internal meter won’t work.
If you’re going to be doing freelensing as a macro substitute, get pretty close to your subject to take the meter reading. This will make sure the light reading is accurate.
I always use my internal camera meter, and I meter for middle grey and use a zone system, but you can use an external light meter as well. You can read more about my metering process here.

Step 2: Set Your Focus
With freelensing, you will also set the focus before removing the lens.
For most freelensing, focus at the closest possible setting on your lens.
If you are turning the lens around for macro photography, focus to infinity.
Step 3: Remove Your Lens and Start Shooting
You’re ready to remove the lens and start shooting.
Hold your lens in front of the lens mount pressed up against the camera. You’ll want to have your lens as close to the mount as possible without it being attached. Then, you can play with tilting the lens in any direction.
If you tilt the lens to the right, the right half of the image will be in focus. Tilt it to the left, and the left half will be in focus. You can also experiment with tilting the lens up, down, or at different angles.
For macro effects with freelensing, pull the lens away from the camera a little bit or flip the lens around so the lens mount is towards your subject.


Tips for Freelensing Photography
Tip 1: Embrace Light Leaks
When you are holding your lens out from your camera body, you are going to let in ambient light leak onto the frame, giving you light leaks.
The further out you hold your lens, or tilt a side of it, the more light you’ll be letting into the camera body.
You can try to cup your lens to block out light, but you can also just let the leaks do their thing.
Because of this, the dehaze slider in Lightroom will become your best friend. (If it isn’t already. It’s been my best friend for a while now.) It will take those light-washed frames and bring in detail and color where there wasn’t much before.


Related: How to Create Light Leaks on Film
Tip 2: Use a Wide Aperture Lens for Freelensing
What lenses work best for freelensing? I always use prime lenses for freelensing, because you are going to want to work with the widest aperture possible.
Make sure you are using a lens that opens up to the widest aperture when removed from the camera. For Canon autofocus lenses, they do this automatically when detached from the camera body. Whereas Nikon autofocus lenses automatically close up when detached from the camera body.
So if you only have Nikon G-series lenses, you actually won’t be able to freelens. If you have something like D-series lenses, you will just have to unlock the aperture ring so that you can manually open up the aperture.
If you only work with manual cameras, all of your lenses have a moving aperture ring, so you’re good. Just be sure to make the aperture as open as possible.

Tip 3: Watch Out for the Lens Mount when Freelensing
When freelensing, the lens mount will get in the way of your ability to tilt the lens in certain directions, and will also provide a buffer from getting any part of your lens as close as possible to the mount.
I have heard of people buying a cheap lens to break off the mount, but I haven’t been brave enough to take this step myself. Just know it’s an option if you get really into freelensing.
Tip 4: Do Not Use a Camera with a Leaf Shutter
Also note that freelensing cannot be done with many leaf shutter cameras, since the shutter is often in the lens.
If your shutter is in the lens and not attached to the camera, it won’t be able to fire. You’re not going to end up with an image, but a completely light-drenched frame.

Tip 5: Use Lenses with Different Focal Lengths for Different Freelensing Effects
Lenses with different focal lengths will give you different effects when freelensing and can be used for different purposes.
Wider Angle Lenses (24mm/35mm)
This is the lens I had on my camera when I decided to freelens for the macro capabilities.
I opened up the aperture, focused to infinity, detached my lens, held it a bit away from the body, and tilted until I got my subject in focus.
Is this fussier than traditional macro lenses? 100%.
Is it nice to know I have a macro lens on me at all times that I can also get a tilt effect from? Also 100%.


Longer Lenses (85mm/135mm)
Lenses with longer focal lengths are a bit more versatile for freelensing.
You can pop them off your camera and use them as a macro just as I do with my wider angle lens. You can’t get as close of a macro shot as you can from the 24mm lens, but you can turn the longer lens around and reverse freelens to get a tighter macro shot.
Yes, because taking your lens off your camera isn’t wild enough, you can literally turn it backwards and go to town.
Once again, the rules remain, definitely keep your lens at its widest aperture and focus to infinity.
I will say this technique makes for a rather plastic lens look, which might or might not be your cup of tea. It’s almost like you’re shooting through saran wrap.
The interesting part about freelensing photography with longer length lenses is it’s easier to focus further and get a tilt-shift effect on objects that aren’t inches away from your lens. (Try focusing on something more than a few inches away with the 24mm, and it’s just not gonna happen.)
You still won’t be able to focus to infinity, but it appears the longer the focal length of the lens and the closer you can get your lens to the mount, the further out you can focus.
The lens can’t focus to infinity because removing the lens pushes the flange focal distance past its capacity. You can check this out for a technical over of that process.


50mm Lenses for Freelensing
The 50mm lens is the middle ground between the two (as it usually is), which makes it a good companion for freelensing photography.
It gives a tighter macro shot than the 85mm when regular freelensing (not reverse), and it focuses further out than the wider angle lenses when going for just the tilt effect.

Final Thoughts on Freelensing Photography
And there you have it, these are the tips I have gleaned from experimenting with freelensing. But my biggest tip is to go out and experiment yourself!
Even just take your lens off and see what happens when you move it around…no actual photos need to be taken to make your own freelensing discoveries.
You have nothing to lose (as long as you don’t drop your lens like I do.)


Thank you so much, Amy! Amy is a regular contributor here at Shoot It With Film, and you can check out her other articles here, including FAQs for developing your own film and Arista EDU Ultra 100 B&W Film Review!
To see more of Amy’s work, be sure to visit her on her website and Instagram!
Leave your questions about freelensing below in the comments!


Leave a Comment
Shoot It With Film on Instagram


Blog Comments
Erwin
September 16, 2022 at 10:38 am
Amazing, and very well and detailed description!