
Written by Kathleen Frank
My history with Polaroid goes quite a ways back. The original OneStep and 600 Closeup were a major part of my childhood, and the collection has been growing ever since (because who can resist that Polaroid SX-70!).
So when Polaroid Originals announced an updated version of the classic OneStep, I was first in line for the preorders.
In this Polaroid OneStep 2 review, here’s a run down of the specs and my experience shooting the OneStep 2, along with a great double exposure hack and a few extra tips for working with Polaroid Originals film.
Find on Amazon: Polaroid Originals OneStep 2, Polaroid Originals i-Type Film, Polaroid Originals 600 Film

The Design of the Polaroid OneStep 2
The design of the Polaroid OneStep 2 is a perfect homage to the original with a similar black and white design and big, red shutter button.
It’s a bit sleeker with an addition of a flash and self timer for a nice modern update. (It also comes in a dark gray and black color scheme, but, for me, that loses a bit of the nostalgia.)
As a big fan of the original, I love their updated take. It’s modern enough for newcomers to love, and it has plenty of nostalgia to keep old film heads like me happy.

Build and Specs
Build: The Polaroid OneStep 2 has a plastic but durable build. I can be pretty rough on instant cameras, throwing them in a backpack without a case and bumping them into pretty much everything. Clumsy is definitely how I roll. Even so, the polycarbonate and plastic on the OneStep 2 holds up great.
It doesn’t scratch easily, and the lens, while flush with the camera and without a lens cap, has a protective border around it.
Lens: The lens is a fixed length 106mm lens made from optical grade polycarbonate. It focuses from two feet to infinity, so you’ll need to be at least two feet from your subject or expect a lot of blur.
While the film tends to give the Polaroids a dreamy quality, I do notice some sharpness and detail with this lens.

Battery/Charging: It has a lithium-ion battery and charges by USB, which is awesome. So when you’re on your way to a shoot and realize you forgot to charge your camera, you can just plug it in in the car.
The charge also lasts an incredibly long time. Polaroid Originals claims it will last through 15-20 packs of film. While I haven’t shot that much film, I only charged it once in the last nine months. It wasn’t even dead when I charged it!
The battery light is on the back of the camera by the charging port. When it’s fully charged, the light will be green.
It also flashes green between shots and will be a solid green when it’s ready to use. The light is orange at partially charged and red when it is out of battery.
Note about the battery light, it is almost impossible to see when your outside in full sun. I pretty much ignore the light. As long as the battery light shines green or orange at the start of my shoot and I make sure to wait a few seconds between each shot for the camera to be ready, I’m good to go.


Functions of the OneStep 2
There are a few functions on the OneStep 2. You have the flash with flash override, the light/dark switch, and the self-timer.
Flash: The flash fires by default. This is probably my main critique of the OneStep 2. I end up using the flash override for almost every photo.
This comes down to your preference for subjects and lighting situations, but you’ll only need the flash for subjects at close distances when you’re inside or in the shade. I primary shoot in bright sun or landscapes, rarely needing flash.
The flash override button is on the back of the camera by the charging port. You need to hold it down while you’re shooting. It’s not an on/off switch. I find it to be both a pain to remember and a pain to hold while shooting.
Light/Dark Switch: This is basically your exposure compensation switch. If you’d like your image to be brighter and exposed longer, switch it to right where you see the “+” sign. If you’d like it darker, switch it to the “-” sign.
Generally, I leave this switch in the middle. All of the images in this article are shot with the light/dark switch in the center, except for the double exposures.
You may want to experiment with it if you are looking for a certain artistic effect, if you’re shooting with expired film, or if you’re dealing with some extreme lighting conditions.

Self-Timer: There’s a self-timer on the front of the camera next to the flash, great for group shots and low light images without the flash. Since you need to be at least two feet from your subject to focus, it’s a bit tough for selfies.
To turn the self-timer on, press the timer button to the right of the flash. Next to the button, an orange light will light up, indicating it’s in self-timer mode.
Then, press the shutter. You’ll have 8 seconds from the time you press the shutter until it fires. The orange light by the self-timer button will flash during the 8 seconds. Then, the shutter will fire.
The flash will automatically go off as well. If you don’t want the flash to fire in self-timer mode, you need to hold down the flash override while you press the shutter.
The camera also has a tripod mount on the bottom, which is helpful in self-timer mode.

Shooting the OneStep 2
The Polaroid Originals OneStep 2 is beautifully simple to shoot. At it’s heart, it’s a point and shoot instant camera. Aim and press the big, red shutter button. That’s all you really need to do.
And even though it has a few quirks here and there, it is just a fun camera to use. The nostalgia and simplicity of it makes me smile every time I pull it out of my bag.
While it’s certainly not small, it’s a nice size and has a compact shape, making it easy to carry around your neck or in a bag.
The viewfinder is large and clear. It’s offset from the lens, which is typical in instant cameras, but easy to use, and, with a little practice, you’ll be able to line up your shots exactly how you want.
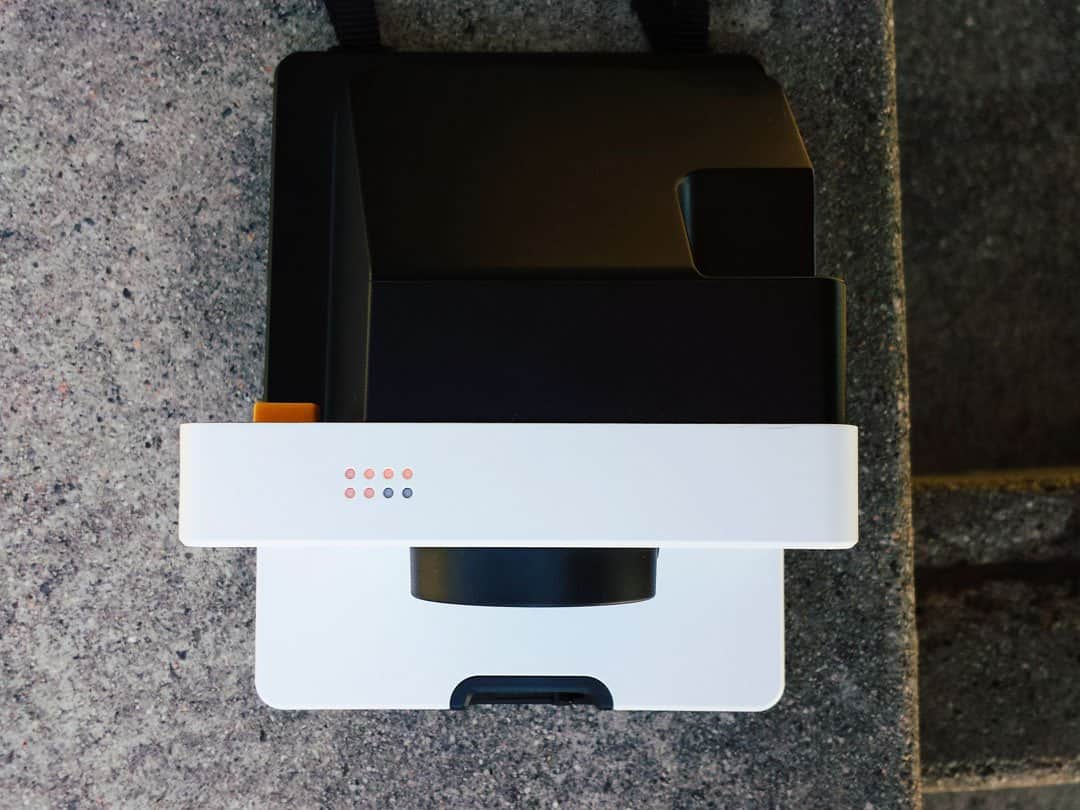
The film counter is on the top of the camera. There are two tiny rows of four LED lights, which show you how many shots you have left. With a full pack, all eight lights will be lit up orange. If you have two shots left, you’ll see two orange lights.
Related: Polaroid Lab Instant Printer Review
You’ll load the film into the front of the camera by pushing the film door release, which is right above the film ejection slot. You’ll slide the film door release switch right, and the film door will pop open. You can do this with the camera on.
Make sure the film pack has the darkslide facing up, and push the pack into the slot. If the film door doesn’t close easily, just give the film pack another little push. Sometimes it doesn’t go in quite all the way.
Once the film door is shut, the darkslide will automatically eject, and you’re ready to go!

If you’re not familiar with Polaroid Originals film (formally called Impossible Project film), the film needs to be shielded from light immediately after it’s shot.
The developing process can take a good 10-15 minutes (longer with older versions of the film), and it needs to be shielded from light this entire time.
With most Polaroids, you have to hold your hand over the image as it’s ejected from the camera to help shield it from light. I used to hold the empty film cartridge box over the ejection slot so the film would eject into it. It’s definitely an awkward way to shoot.
But the OneStep 2 has a special tongue that fixes this whole issue! The tongue rolls out over the image as the Polaroid ejects from the camera and shields it from light. Then, you just need to put the Polaroid into a bag or under your shirt until it’s done developing.

Using Polaroid Originals Film
This camera is compatible with Polaroid Originals i-Type film and 600 film, both of which come in b&w or color. (Find on Amazon: Polaroid Originals i-Type Film, Polaroid Originals 600 Film)
Many of the older Polaroid cameras use a battery built into the film pack instead of in the camera. The OneStep 2 and the other Polaroid Original cameras have the battery in the camera.
This means they could develop a new film cartridge without a battery, their i-Type film. And no battery means cheaper costs and cheaper film for us! Wahoo!

I tried out the i-Type color film and the 600 b&w film. To be honest, I don’t love the tones in their color film. I find them unpredictable and washed out with very pink tones. It’s just not a look I love.
I would like to experiment more with the color film and flash. That might bring out some bolder and more stable colors.
But their b&w! I am in love! It’s a lighter b&w with a bit of contrast, but not too heavy. Also, it seems to be a very true b&w without a color cast. Will be picking up some more of the b&w for sure.
My sweet spot and favorite way to shoot is the black and white film on a bright, sunny day without using flash.

Double Exposure Hack for the OneStep 2
So… the OneStep 2 does not have a double exposure feature. Boo. But there is a pretty simple hack if you like shooting doubles.
First, it helps to flip the lighten/darken switch to darken. This will underexpose your image a bit which will help with creating a double exposure that isn’t too washed out and overexposed.
Here’s where it gets fun… When you press the shutter button, do not let go! Continue to hold the shutter button down, and then turn the camera off. This will keep the camera from ejecting the film.
Then, wait about five seconds or so, turn the camera on, and take your second image as you normally would.
Double exposure! It can get a little tricky, especially if you are holding the flash override at the same time, but it totally works.

Final Thoughts
I really do enjoy the OneStep 2. It’s an awesome throwback to the original Onestep and fun to use in every way.
My feelings about Polaroid Originals film are not quite so glowing, but, for me, the camera is a home run. It’s perfect for beginners and more experienced shooters alike.
It’s simplicity makes it great for anyone just getting into film and anyone who enjoys the unpredictability and ease of point and shoots.
While it may not be for you if you like more control over your imagery with focus ranges and exposure control, it is a camera that is fun, easy to use, and has all the joy classic Polaroids bring to mind.
I hope you enjoyed our first article in our new film review series!
If you have questions about the Polaroid OneStep 2 review, leave them below in the comments! And if you want to pick one up for yourself, find it on Amazon here.
I’m Kathleen, the founder here at Shoot It With Film, and you can check out my other articles here, like how to shoot film on a budget and 5 awesome medium format cameras for beginners.
if you want to see more of my personal work, feel free to check out my website or Instagram!
Want to learn more about shooting film? Read all of our film photography tutorials here!


Shoot It With Film on Instagram


Leave a Comment