Written by Amy Elizabeth
The process of trichrome photography is not new. In fact, it appears to be the original way photographers created color photos when black and white film was the only option.
So, as our technology has advanced, the need for this process has evaporated, but being an analog photographer means one of my favorite pastimes is recovering the processes we no longer have “need” for.


What is Trichromatic Photography?
Trichromatic photography is the process of taking three identical black and white photos, each taken with a different color filter (red, green, and blue), and then combining the three photos to create a color image.
Originally, the photographer would take the three b&w photos – one through a red filter, one through a green filter, and one through a blue filter, and then use a projector to project the images through the corresponding filter.
But now we have the convenience of combining the images with just a few clicks right in Photoshop. This modern take on an old process is what I’ll be covering today.


Why Would You Try Trichromatic Photography?
Because we do have access to color photography, why in the world would you want to take on this very fussy process?
Well, because it’s fun and oddly satisfying to get a color image from three black and white images.
I was also chatting with Jennifer Stamps, film photographer and another writer for SIWF, about this, and she remarked that it’s also useful for people who only develop black and white. It’s their chance to create some color images without having to bother with C-41 chemicals.
And two reasons is about two more reasons than I usually have for experimenting, so that feels like winning.
Alright, let’s dive into it!


Click to enlarge
Supplies
Here are a few things you’ll need to try trichromatic photography on film.
- Camera
- Roll of black and white film
- Tripod
- Red, Green, and Blue filters
- Ideally you’d use these filters: #25 Red, #58 Green, and #47 Blue (make sure you get the right filter size for your lens), but I bought cheap flash gels just to have my hand at it.
- Photoshop
How to Create Trichromatic Images
Choose a subject. Beware that the process will take a few seconds. You will need your subject to stay still while you take three separate images and put on three different filters.
If the subject is moving, the final image will have a separation of colors in the area with movement.
Set up your camera on the tripod, ideally with a remote trigger, but this isn’t super necessary, it’s just nice to have.


Click to enlarge
Metering for Trichromatic Images
You will be taking each of the three images with a different filter, so you will have to meter separately for each image to account for the different filters.
I meter using my internal reflective meter, so I will point the camera into something middle grey, and then put my camera in position on the tripod.
You can also meter for each filter by placing the filter over the lens and metering to see how much you’d need to increase exposure for any given filter. You really only need to do this once to determine how many stops to overexpose for each filter.
If you use a handheld meter that has a bulb in feature, simply place the filter over the meter and take your light reading.
This is actually what I did, and I only did it the one time. I found that the blue and green filters needed about 2 stops of overexposure, and the red filter needed about 3.5 stops of overexposure.
So once I found my initial reading, I knew to overexpose accordingly.


Click to enlarge
Keeping Track of Your Images
You will want to remember the order you shoot your filters, so you can place each image into the corresponding color channel later in Photoshop.
To keep my life easy, I shot alphabetically (blue, green, red). I also found this helpful for exposing, since blue and green need the same overexposure (+2) and red needs 1.5 stop more (+3.5).
I kept my aperture the same and just moved my shutter speed accordingly. So if the initial reading gave me a shutter speed of 1000, I would use a shutter speed of 250 for the green and blue filter and 80 for the red filter.
Because I was working with flash gels, I would simply place the gel in front of my lens (as flush as possible) and take each photo.
Develop and scan normally, but take note of the order of the scans. My film ends up scanning backwards, so I know the order of the filters switches to red, then green, then blue.
Editing in Photoshop
Next, I bring everything into Photoshop. Here’s a video walkthrough of the Photoshop process I use to create a color image from the three black and white images.
Step 1: Open All 3 Images in Photoshop
You’ll want all three b&w images in the same Photoshop file. (Video timestamp: 0:10-1:05)
First, open all of the images in Photoshop. Then, drag the images into the same file so each image is a separate layer.
It can be very helpful to rename the image files with the color filter you used for that image, and then in Photoshop, rename the layers with that filter color as well. Just helps keep everything organized!
Then, I locate the layer with the red image and place the image with the green filter on top of that and the image with the blue filter on top of that. Not that this order matters, but to maintain my sanity, I always do it this same way.
You just don’t want to put the wrong image into the wrong channel (which we’ll cover in a later step).
Your bottom image will be locked as the background, so I go ahead and unlock that so it acts as a normal layer.


Click to enlarge
Step 2: Auto-Align the Images
Next, I auto-align the images. Most likely the images will not be exactly aligned, and this is a quick way to get them perfectly overlapping. (Video timestamp: 1:05-1:43)
Select all three layers, click Edit in the top toolbar, select Auto-Align Layers, leave all of the settings as-is (Auto is selected under Projection and neither lens correction option is selected), and click OK.
I have found times where the auto-align feature in Photoshop is NOT a useful tool, so I go rogue and just make each layer less opaque and move the layers to align manually.
Auto-align gets super confused if a subject has moved (like a cloud), and sometimes we’re just smarter than technology.


Click to enlarge
Related: How to Make Instax Transparencies
Step 3: Changing the Color Channel
The last step is to place the corresponding image into the channel that matches the filter. (Video timestamp: 1:43-2:25)
This is where I started to struggle. I found a different way to do this for every tutorial I read up on, and none of them seemed to work.
Not sure if it was because of the varying versions of Photoshop, or what, but it took me quite a while to find a way that worked for me.
Finally, I figured out a super easy way to change the color channel for each b&w image, so I hope it works for you, too.
What we need is the the image shot with the blue filter to go into the blue channel, etc. To do this, right click on the layer in the layers panel, then choose Blending Options.
Under the Advanced Blending heading you’ll see R, G, and B checked. Uncheck the two channels that don’t apply to the given layer, so if you want an image in the red channel, uncheck the G and B so that only the R is selected.
Repeat this process for all the layers, and voila! You’ll be left with an image in full color. It’s as easy as that!


Click to enlarge
Final Thoughts
I tried this process primarily with 35mm film, and the noise gets to be a bit much when combining the three photos.
If you just want to mess around and get a feel for it, go for some 35mm. If you want a cleaner look, bust out that medium format
I’ve only tried cheapo flash gels just to give trichromatic photography a whirl. I’d be curious how the quality would be affected by actual filters.
I’d love to try my hand at this with actual people. Okay, I did try it with my middle son and neighbor boy, but holding still is an acquired skill, and though they did well, there was still quite a bit of movement.
Will I do this again? Yes. Probably not often, but it is fun to mix it up and experiment in this way. It’s fussier than my usual experiments, but slowing myself down isn’t necessarily a bad thing.
I hope you give it a go, too! Let me know if there’s any way I can help or questions I can try to answer!


Click to enlarge
Thank you so much, Amy! Amy is a regular contributor here at Shoot It With Film, and you can check out her other articles here, including How to Develop B&W Film at Home and Self-Portraits on Film: Tips to Get You Started!
To see more of Amy’s work, be sure to visit her on her website and Instagram! Amy also shares tips and tutorials for shooting film over on her IGTV channel. Go check it out!
Leave your questions about creating trichromatic images from black and white film below in the comments!


Blog Comments
Matt
June 18, 2021 at 11:18 am
Well, I’ll be trying this out. This looks cool. Thanks, Amy, for the instructions.
Amy Berge
June 18, 2021 at 12:46 pm
Fantastic! Happy to help!
Rich
June 18, 2021 at 2:39 pm
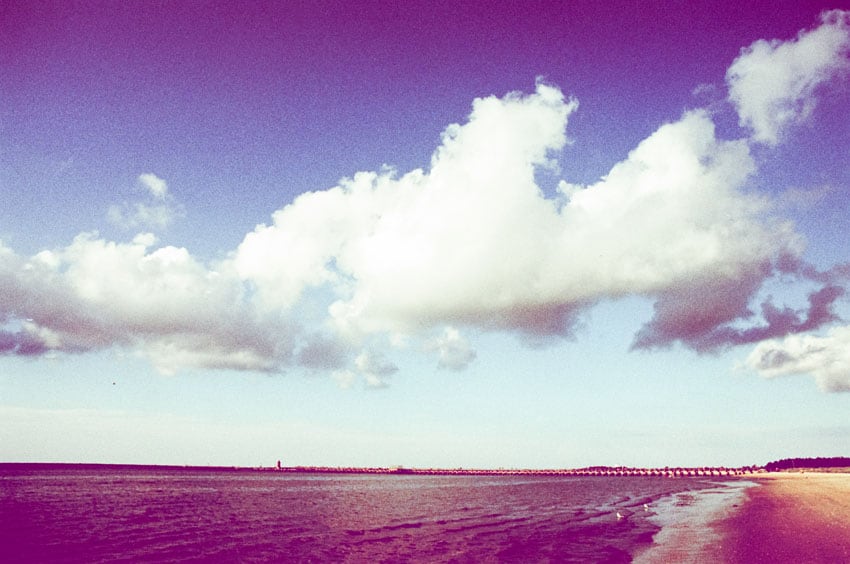
The chromatic effects you get with motion can be amazing. A little of it can be seen in the reflection of the bridge in the river, where there are red, green and blue wavelets.
Now, to go totally crazy, have you tried changing the intensity of the R, G & B layers? Or swapped layers? That is, use the Blue negative in the Red layer, etc.?
–Rich
Amy Berge
June 18, 2021 at 4:12 pm
Hi Rich! Yes, the chromatic effects are super wild for things like water or clouds! I also photographed sailboats and their slight bobbing in the water was suuuuuper trippy. I couldn’t tell if I liked it or not lol. I have switched channels and it’s fun to play around with! There’s one order that gives an almost Lomo Purple look! Thanks so much for stopping by!
Tina
June 19, 2021 at 10:31 am
So how did they do this back in the day, without Photoshop? Was it in the development process?
I agree that the images with slight movement to them have a really cool effect, this will be a fun one to try!
Steve C
June 22, 2021 at 4:29 pm
It looks like you are using full-blown Photoshop. I have PS Elements 2020. Can this be done well with Elements? I actually use Lightroom more than PS. I still have quite a bit to learn and discover about it.
Amy Berge
June 24, 2021 at 1:35 pm
Hi Steve! I think this is why I had such a difficult time finding how to do channels….I assume every tutorial on channels was working with a different version of Photoshop! Here is what we could find about Elements….I hope it helps! http://www.photokaboom.com/photography/learn/Photoshop_Elements/layers/separate_RGB_channel_layers/1_separate_RGB_channel_layers_introduction.htm
Mark A Jensen
January 9, 2023 at 4:59 pm
Steve–I do mine in PSE. See my comment below. GIMP also works but I find it harder to use.
Francis Chow
January 20, 2022 at 5:00 am
Alternatively, can use pop filter – Pure R, G&B filter with color film. Make use of the double exposure function to make 3 exposures (RGB) on one film. Certainly, each exposure has to be under to make correct exposure overall. That will have same effect.
Greg Faris
August 31, 2022 at 6:55 pm
Just a couple of comments;
First off, if you are seeking success with this, you must use the correctly calculated filters. It’s not just “kinda red, kinda green, kinda blue”. You have to use separation filters. From a reputable brand like LEE FILTERS these will be identified as such – TRI RED(#25), TRI GREEN (#58), TRI BLUE (#47B) . Secondly, DO NOT follow the author’s advice to create your own filter order. Use the industry standard, which is RGB. Doesn’t matter what day your grandfather’s anniversary was, it’s RGB. The reason you should follow this is it will be used by every piece of hardware and software you ever use (that’s what standards are for) so you’re just creating a world of confusion for yourself by ignoring it and inventing your own. Third; you want to take a “straight” panchromatic shot in addition to the RGB frames, which you can import as a positive and a negative in your stack, which will help you balance your luminance and contrast values without affecting your color balance. Finally, the tri-color process is intrinsically superior to any color film or digital format you can get today, but is fatally flawed by the fact that separate exposures do not allow you to shoot anything with even the slightest movement, which means almost everything. There ARE cameras that allow you to expose all three images at the same instant.
Mark Jensen
January 9, 2023 at 4:56 pm
I do mine with Photoshop Elements and therefore the process is a bit different. I open each image, then open a new file and copy each image onto it, making sure to rename the layers red, green, and blue. If PSE has an autoalign feature I can’t find it, so I set one layer to “normal” and the other two to “difference” and I can use the move tool to get them aligned properly. To colorize, I go into Enhance/Adjust Color/Adjust Hue/Saturation. I click “colorize” in the box and then set the Hue, Saturation, and Lightness for each layer. Red is 0/75/-33, Green is 120/75/-33, and Blue is 240/75/-33. I used those values because I found them in someone else’s online tutorial and they seem to work–most of the time. Sometimes I just get garbage for no apparent reason and have to start over. When I’m done, I set two layers to “screen” and the third to “normal”. I have no idea why but it does work. Most of the time. I tried your sunset example and mine came out looking pretty close to yours but I didn’t quite get one of the layers aligned. Sometimes I can “nudge” the layers for fine tuning using the cursor keys but again, for reasons I can’t figure out, usually I just end up cycling through the various layer settings.
On exposure–I have found that it’s the blue filter that needs to be adjusted most. Lately I’ve been compensating 3 stops each for red and green and 4 for blue. If I don’t overexpose I’ve gotten thin negatives that show every little flaw and bit of dust from scanning. Maybe I have to open up so much for blue because my filter is 47B rather than just 47? Anyway, it’s quite fun and I’m always looking for interesting colorful things to try this with.
Anyway, it’s lots of fun and I am frequently looking for interesting subjects to try this out on.
shootitwithfilm
January 9, 2023 at 5:36 pm
Hi Mark! Thank you so much for sharing your process with Photoshop Elements and your exposure tips! This is so helpful!
Paul Raymond
November 3, 2023 at 10:32 pm
Greetings Amy,
Really like your article on Trichrome Photography. I plan to take it on.
Thought I have a couple questions on details how to meter from your two paragraphs below.
“I meter using my internal reflective meter, so I will point the camera into something middle grey, and then put my camera in position on the tripod.
You can also meter for each filter by placing the filter over the lens and metering to see how much you’d need to increase exposure for any given filter. You really only need to do this once to determine how many stops to overexpose for each filter.”
With camera set to aperture priority mode, I meter first without the filters and then meter with filters on the lense? Based on shutter speed of meter with no filter on the camera, how do I set the proper shutter speed with filter on?
Maybe providing an example with values would possibly help?
TY & Regards,
PaulR
Tony Bowles
April 5, 2024 at 6:14 pm
You could use black and white slide film; combine the slides, project them onto a wall and take a photo using a digital camera. Different textures could be used for the background as well.
FALCHI JOSE
November 2, 2024 at 9:47 am
Merci beaucoup pour cette très belle et très utile publication !