
Written by Aleksandra Wolter
Instant photography was invented in 1947 by Edwin Land, the owner of Polaroid. His technique allowed images to self-develop within a few seconds after shooting.
Thanks to that feature, it revolutionized modern photography, and the word “Polaroid” became synonymous with instant photography. The popular and fashionable Polaroid era began, lasting nearly 60 years.
But, unfortunately, nothing lasts forever. Polaroid lost it’s fight with digital photography, and, in 2009, the last manufacture of instant film closed.

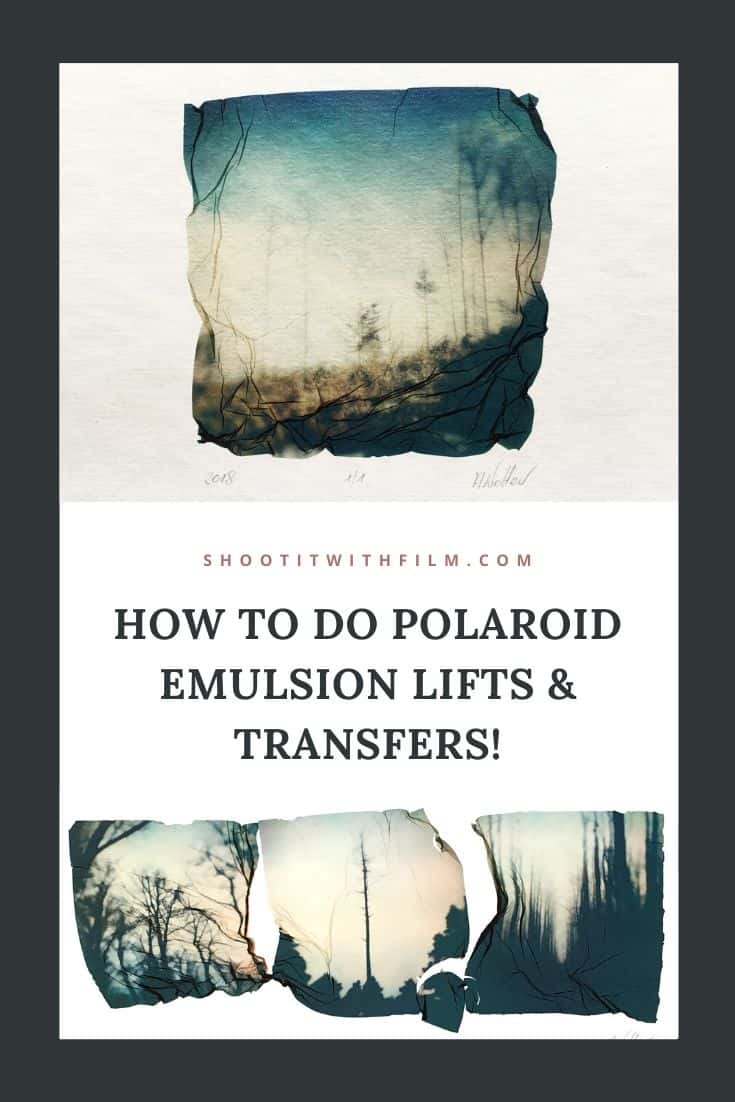

What Is A Polaroid Transfer / Emulsion Lift?
A Polaroid transfer is an image manipulation technique in which you transfer the image from a Polaroid instant print onto paper, wood, or other substrate.
Similarly, a Polaroid emulsion lift involves separating the top layer (emulsion layer) from a Polaroid and placing it on paper or other substrate.
Originally, Polaroid transfers and lifts were made with pull-apart Polaroid films such as 669, 59, 559 and 809 (find them on eBay) or Fuji FP-100C (find on eBay), but all of those films are discontinued.
The only films that are still available and suitable for this technique are Polaroid’s i-Type, 600, and SX-70 films.
But, enough playing the smart guy 🙂 Let’s make a Polaroid emulsion lift!


Supplies
- A fully developed Polaroid Print (the fresher the better) – I recommend using Polaroid Originals 600 or SX-70 film. (Find on Amazon: Polaroid Originals Film)
- Two trays – one with hot water, the other with cold water (Amazon: Developing Trays)
- Watercolor paper, or other paper that is suitable for water techniques (Amazon: Watercolor Paper)
- Scissors
- Soft Paintbrush (Amazon: Soft Paintbrush Set)
- Tweezers (optional) (Amazon: Curved Tweezers)
How To Do Polaroid Emulsion Lifts
Here are step-by-step instructions for a Polaroid emulsion lift, and you can also watch below for a time-lapse video of the process.
Step 1:
Cut off the white border of the Polaroid print. You can bravely grab the print with your fingers; you will not damage the print.
Step 2:
Now gently pull the image apart and remove the plastic cover from the emulsion.
In older prints, it could be easier to remove the background instead of the transparent plastic. Remember to do it gently, and try not to tear the emulsion.
Step 3:
Soak the image in the hot water tray. The hotter the water the faster the emulsion will release. If your print is old or the water is too cold, it will take more time.
If the emulsion still sticks to the background (or front plastic cover), brush it gently. Be sure to remove all white parts from the emulsion. Otherwise, the emulsion will peel off the paper after drying.

Step 4:
Now, put a sheet of watercolor paper into the cold water tray, and use a brush to gently move the emulsion from the hot water to the cold water tray.
The hotter the water in the first tray, the more the emulsion will curl after putting it in cold water. The emulsion isn’t as delicate as you might think, but avoid being too aggressive with it or the emulsion might tear.
Try to straighten the emulsion over the paper. You can grab the emulsion at corners and pull the paper out from water. Doing this will straighten the emulsion on the paper.
Step 5:
You can easily move the emulsion across the paper while it’s wet. Remove it from the tray, and use a wet brush to add some folds and wrinkles to the image.
You can play with the image as long as it is wet. After it dries, everything you’ve done to the image will remain, and you won’t be able to add more wrinkles or straighten the emulsion.
I hope you have so much fun doing Polaroid transfers!

Thank you so much, Aleksandra! This is going to be so much fun to try! Be sure to follow Aleksandra on YouTube to see more how-to videos, and you can find more of her amazing work on her Instagram and Facebook!
Check out all of our film photography tutorials here, and if you’re interested in learning more about experimental film photography, check out these articles!


Leave a Comment
Shoot It With Film on Instagram


Blog Comments
Jen
April 13, 2018 at 12:45 pm
This is unbelievable. I want to try it!
shootitwithfilm
April 13, 2018 at 4:08 pm
Cannot wait to see!!! <3
Eve
September 27, 2020 at 7:22 am
I find it easier to do emulsion transfers on glass. The look is great and you can get glass at most hardware stores.
shootitwithfilm
September 27, 2020 at 4:14 pm
Thank you, Eve! Such helpful tip!
Ashley Holstein
April 13, 2018 at 2:02 pm
I can’t wait to try this! I’m going attempt it with instead to see what happens lol!
shootitwithfilm
April 13, 2018 at 4:09 pm
Let us know how it goes!
Ashley Holstein
April 14, 2018 at 10:15 pm
Instax***
Lol it does not work with Instax?
Colleen MacMillan
April 13, 2018 at 3:36 pm
I didn’t realize you could still make transfers! I used to use 669 all the time. I’m going to try this soon! Thanks!!!
shootitwithfilm
April 13, 2018 at 4:10 pm
We’d love to see some of your old 669 transfers! Such an awesome film.
Colleen MacMillan
April 26, 2018 at 8:33 am
I have a few on vases from college. Not sure where any of the others are. Lol.
I did just find a box of 669 in my bookshelf at work. 🙂
Sarah Pierson
July 21, 2018 at 11:08 pm
Have you done this using a slide printer? If so which one would you recommend?
Aleksandra Wolter
July 22, 2018 at 11:46 pm
Hi Sarah!
I’ve done this using my old SX-70 camera, but with a slide printer it should work too, so far you can print on Polaroid Original films 🙂
I do not have a slide printer, so I can’t recommend any.
Best regards,
Aleksandra
Rebecca
February 10, 2019 at 11:24 pm
Sarah,
The DayLabs work fantastic for exposing your slide onto the Polaroid film.
Emma
August 29, 2018 at 10:56 am
Hi there,
Has this been done using Polaroid Originals new film or the Impossible project film? I ask as I used to do emulsion lifts all the time with impossible project film but since using the 600 film by Polaroid Original after the take over I find that it breaks so easily now. I have also noticed the image is breaking away leaving a transparent layer on top of it. Any tips would be appreciated as I used to be able to do emulsion lifts without thinking and now I cannot seem to get it right anymore! Thank you.
Aleksandra Wolter
August 29, 2018 at 11:45 am
Hello ?
It’s an Impossible film. I’ve noticed thesame issue with Polaroid Originals and noticed that the fresher ( even few hours after it develops) the print is, the easier the lift can be done.
Best regards
Rob Ruttan
April 22, 2019 at 2:35 pm
Hang on — in the days of peel-apart Polaroid film, a transfer involved letting the image develop for 19 seconds, then putting it face down on watercolour paper and using a roller to push the image into the paper. I made dozens of them. What you are describing here isn’t a transfer, but it’s an emulsion lift — that, you have correctly described. I’d like to know if the old style of transfer is possible with this new film that isn’t peel-apart.
Kasper Demeulemeester
May 20, 2019 at 9:57 am
Hello, thanks for this great tutorial!
I have been reading up on this topic a bit and I wonder how transfers (“dry prints”?) were used in the old days to enlarge Polaroids. Do you have any info on that. If you e.g. see these prints (https://www.bozar.be/en/activities/3652-cy-twombly) I’m very curious how that would work.
looking forward to your ideas!
kasper
Rudy
August 23, 2019 at 1:21 pm
“The Polaroid Transfer (also called a Polaroid Emulsion Lift)”
Not the same thing.
Kasper Demeulemeester
August 24, 2019 at 1:09 pm
Hello Rudy,
Please explain? Interested in your opinion.
Kasper
Rudy
August 24, 2019 at 1:42 pm
Hi Kasper
It is what Rob Ruttan said earlier. After a certain time during the development, you pull the film apart and place the emulsion face down on a piece of paper (he said watercolor, I used Rice paper, but any type is good that absorbs the emulsion, but not so much that the image gets lost), roll it down with a roller, let it sit for 20 minutes, rinse, and let dry. So, you don’t lift the emulsion after development, but transfer the emulsion during the development. Obviously only pull apart film was suitable. I used Polaroid 59 with a 4 x 5. Fuji FP-100C works too, but the result is not the same. I have some samples on my site.
Glenn Duerr
October 17, 2021 at 11:53 am
I have transferred old Velvia slides onto 669 film with a Daylab. I see you let the emulsion set for 20 minutes. I’ve used 2 minutes, but my results have been mixed. I’ll try more next time. 669 isn’t available. I have on pack of Fuji FP 100C left. Two questions: Do you know where to get Daylab compatible film. How do you protect the image from fading. That has been my problem. Thanks.
Bartek
January 29, 2021 at 7:49 am
How did you shoot your images?
Some of the trees look like they were shot using tilt shift lens 🙂
Ella Harden
December 8, 2022 at 10:20 am
Have you found an eco-friendly way to dispose of Polaroid clippings?
Josh Self
February 9, 2024 at 1:42 pm
Was wondering if you do any post drying spray / clear coat or protective layer over the final result or does the watercolor paper hold on to it fairly well? Thanks! Great inspiration for me.
shootitwithfilm
February 10, 2024 at 1:08 pm
Hi Josh! Some Polaroid transfers come out more delicate than others, so it’s a bit of a personal preference. But for some extra protection, you can add a thin layer of Mod Podge to keep it from cracking or peeling.
Liz Krick
July 15, 2024 at 10:01 am
Hi!
Great step by step tutorial. How do you ultimately dry the damp transfer so that the paper substrate is flat and the transfer is undamaged and stays adhered? When I hand print an etching onto damp/wet paper, I then flatten/dry the paper between blotter paper with weights on top. I’m guessing the Polaroid transfer is too delicate for this drying technique?
Thank you,
Liz
shootitwithfilm
July 16, 2024 at 1:15 pm
Hi Liz! Here are some great tips for flattening out the paper if you’re getting warping after an emulsion lift: https://www.photrio.com/forum/threads/flattening-paper.149852/
The transfer should hold up if you put it between blotters and then use weight on top. I would just test it out with a throw-away Polaroid first to be sure.
Christine
March 22, 2025 at 7:41 pm
There is a new emulsion lift. Process . Beyond the tiny pix of the past, this system prints to an emulsion film and a non toxic releasing fluid grabs the pigment inks and transfers to a variety of substrates. Check out DASS ART . I hve used it for 9 years…