
Written by Taylor Blanchard
As film shooters today, digital tools are often part of our workflow. Most of us scan our negatives to edit and share. We use digital apps for metering light, editing, and sharing our work.
Another process that can stray from being entirely analog? Making contact prints.
What is a Contact Print?
With a contact print, you place a negative directly onto sensitized paper and expose it to light. It differs from a print enlargement where you create an image bigger than your negative. In a contact print, because the negative sits directly on the paper, the image that appears on the print is the same size as the negative.
There are countless types of contact printing processes, dating back to the 19th and early 20th centuries, many of which are referred to as “alternative” processes. Examples include cyanotype, anthotype, and gum bichromate.
My first experience with an alternative contact printing process was with platinum palladium. Honestly, I didn’t know much about it, but everyone in my darkroom class signed up for a workshop, so I did too.
Before the workshop, we sent digital scans of a few negatives to the instructor, who arrived at the workshop with transparencies she printed from our digital files. I loved watching the image appear on paper and the resulting beautiful tones, but didn’t make any contact prints again for a while.
After I dove into 4×5 photography, I started making cyanotypes with my 4×5 negatives, and later, prints with the Van Dyke Brown process. Earlier this year in Amy Elizabeth’s The Art Lab, we were inspired by the work of Irving Penn. In addition to shooting negatives with large format cameras, Penn would also enlarge his negatives to print with platinum palladium.
After spending a month engrossed in the work of Penn, I decided to learn how to enlarge negatives without a digital scan. Finally, I started experimenting by enlarging 4×5 film to 8×10.


The Concept and Process to Enlarge a Negative
Years ago, there were multiple methods to enlarge negatives; However, many rely on films and chemistry that are no longer available. After consulting online forums and The Book of Alternative Photographic Processes by Christopher James (2nd edition) and The Darkroom Cookbook (4th Edition) by Steve Anchell, I landed on this process:
- Make an inter-positive (also known as a diapositive)*. In this step, you create a film negative of the same size as the original but rendered as a positive image. You need this stage because if you enlarge the original negative, then you will create a positive negative enlargement, which means your contact print would be a negative. (It took me a while to wrap my head around this concept!)
- Once you have the inter-positive, you then enlarge it in the darkroom onto a larger sheet of film.
- Create contact prints with the enlarged negative/sheet of film.
*An alternate approach to making an inter-positive is to use a reversal film, or to develop a negative film as a positive.
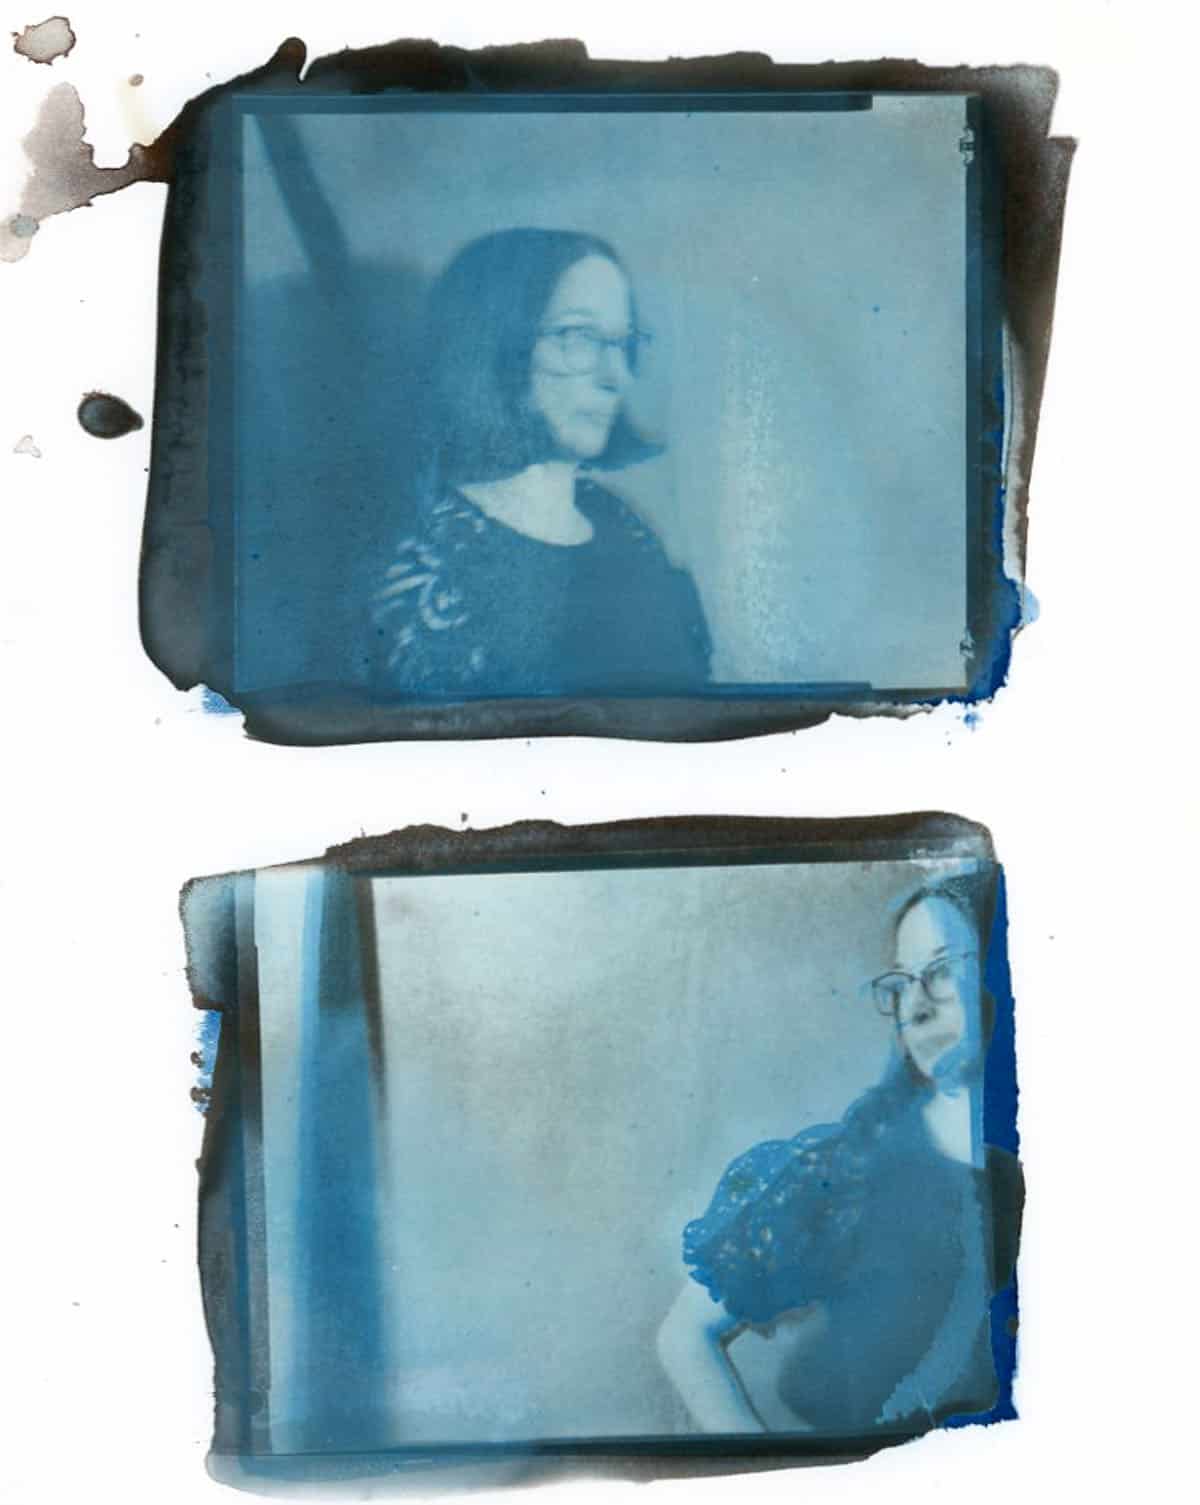
Creating a Positive Image, the Inter-Positive
I used my enlarger as a light source for this process, but you could also make a positive with a different light source that provides even illumination across the negative.
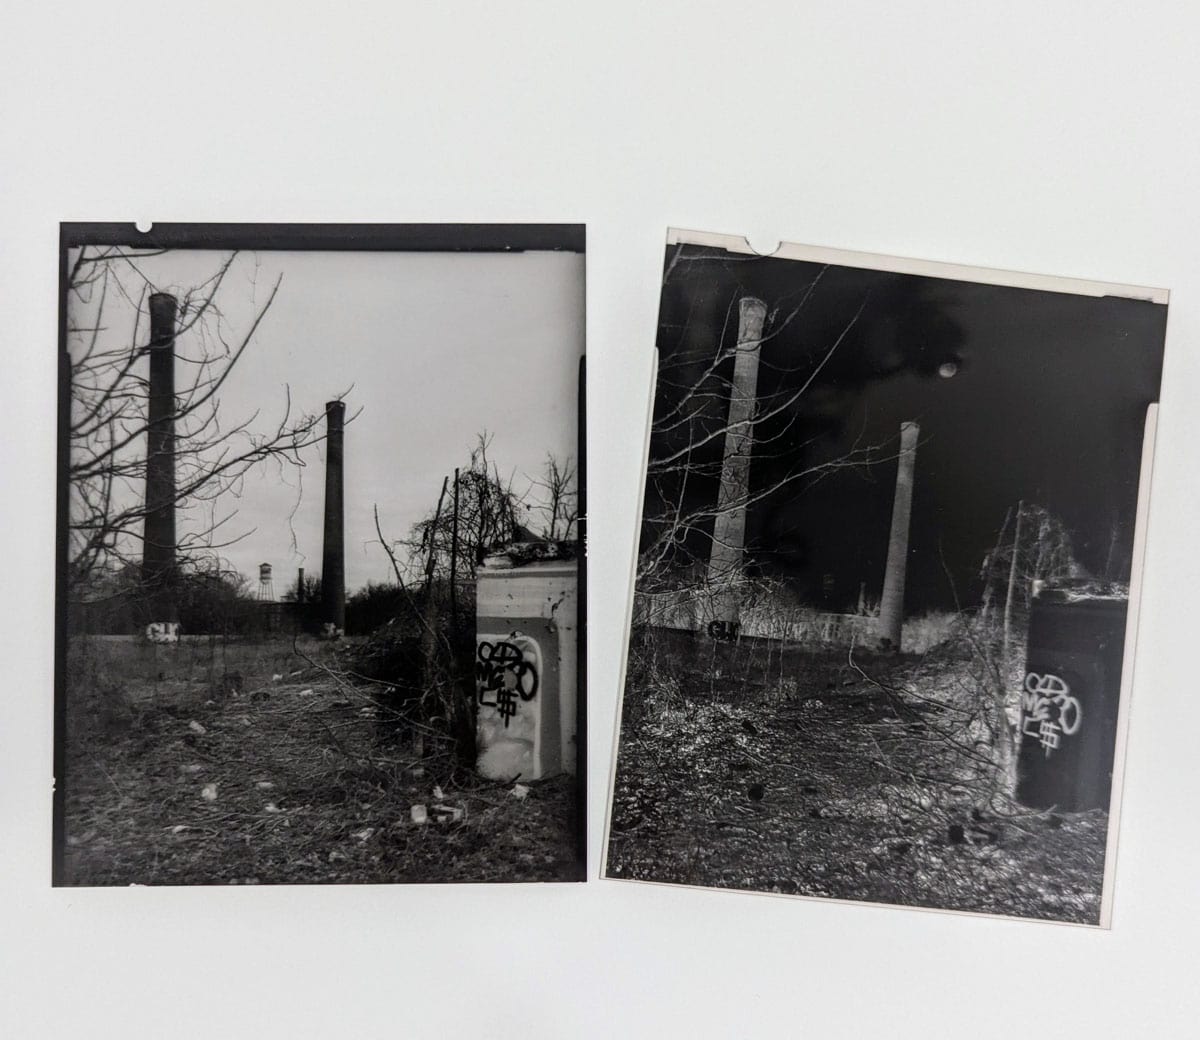
I positioned a fresh 4×5 sheet of Ilford Ortho Plus 80 on top of an existing 4×5 negative, ensuring that the emulsion sides were facing each other. It’s easy to determine which side is the emulsion side on sheet film, as the film is notched.
Then, much like a darkroom test print, I exposed the negative in brief intervals, covering up the negative in strips with a piece of cardboard. The exposure times should be short, ideally between 2 and 9 seconds. If you extend to longer development times, then you may need to add additional exposure time to the negative depending on the reciprocity characteristics of your film.
I used the Ilford 80 Plus Ortho film so I could develop under a safelight – something I’ve always wanted to try. (As a reminder, most of the films available to us now are panchromatic and need to be developed in complete darkness). The safelight provided enough illumination to see my surroundings and monitor the development of the negative in trays.
Initially, I was using a proof print frame to sandwich the two negatives together, but that was introducing quite a bit of dust. I then switched to layering the negatives together on a clean piece of foam board under the light.
Once I determined the correct exposure, I continued the process of developing. I used Kodak X-TOL to develop the positives, followed by Eco-Pro Stop and Fixer, and finally Heico Perma Wash before drying.
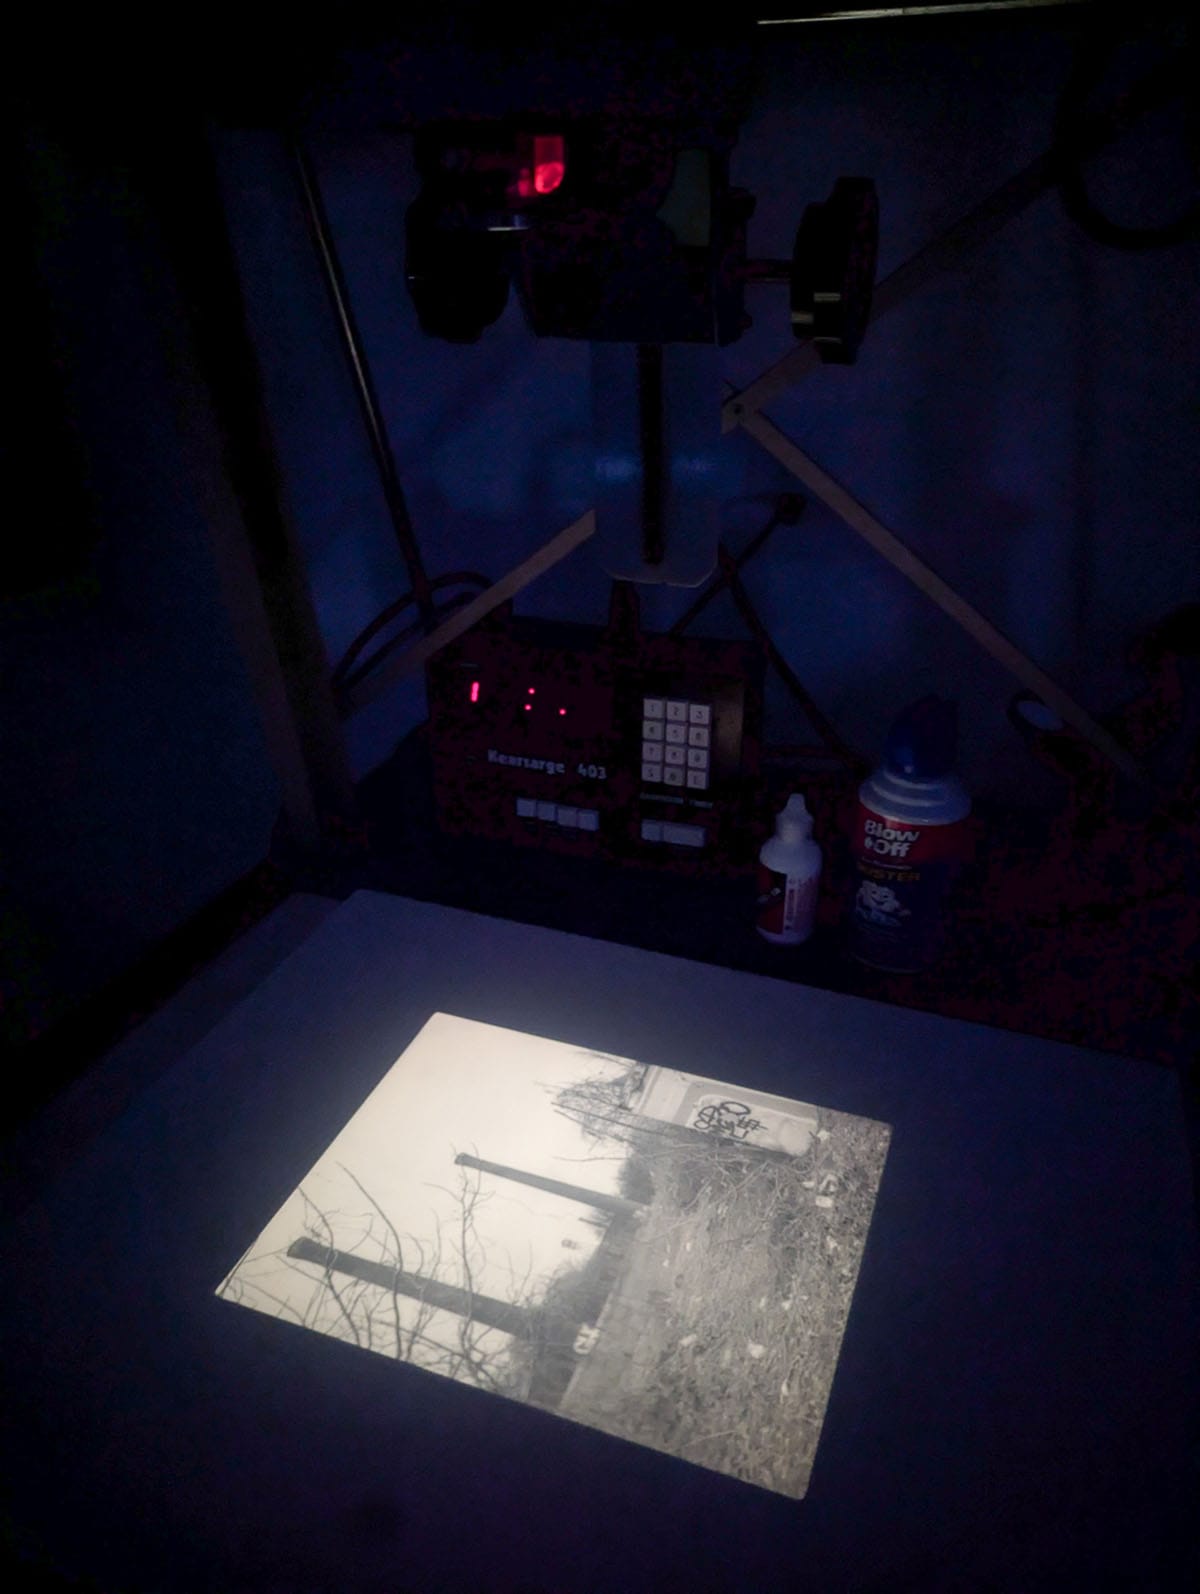
Enlarging the Positive
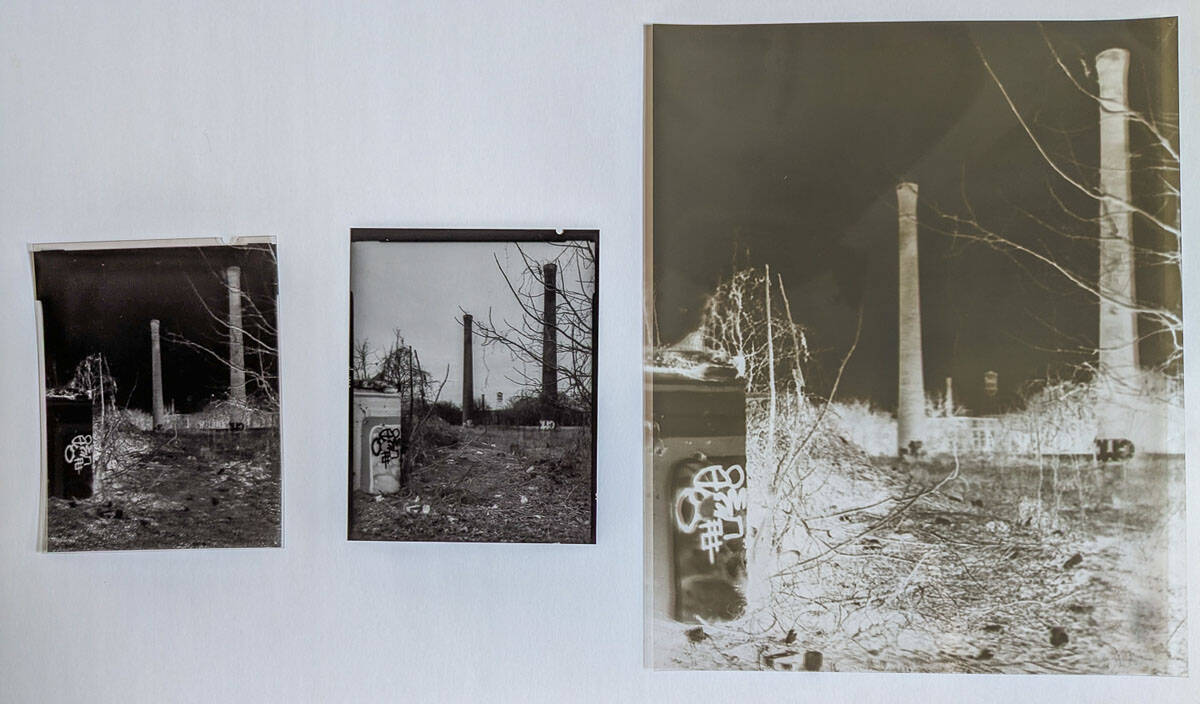
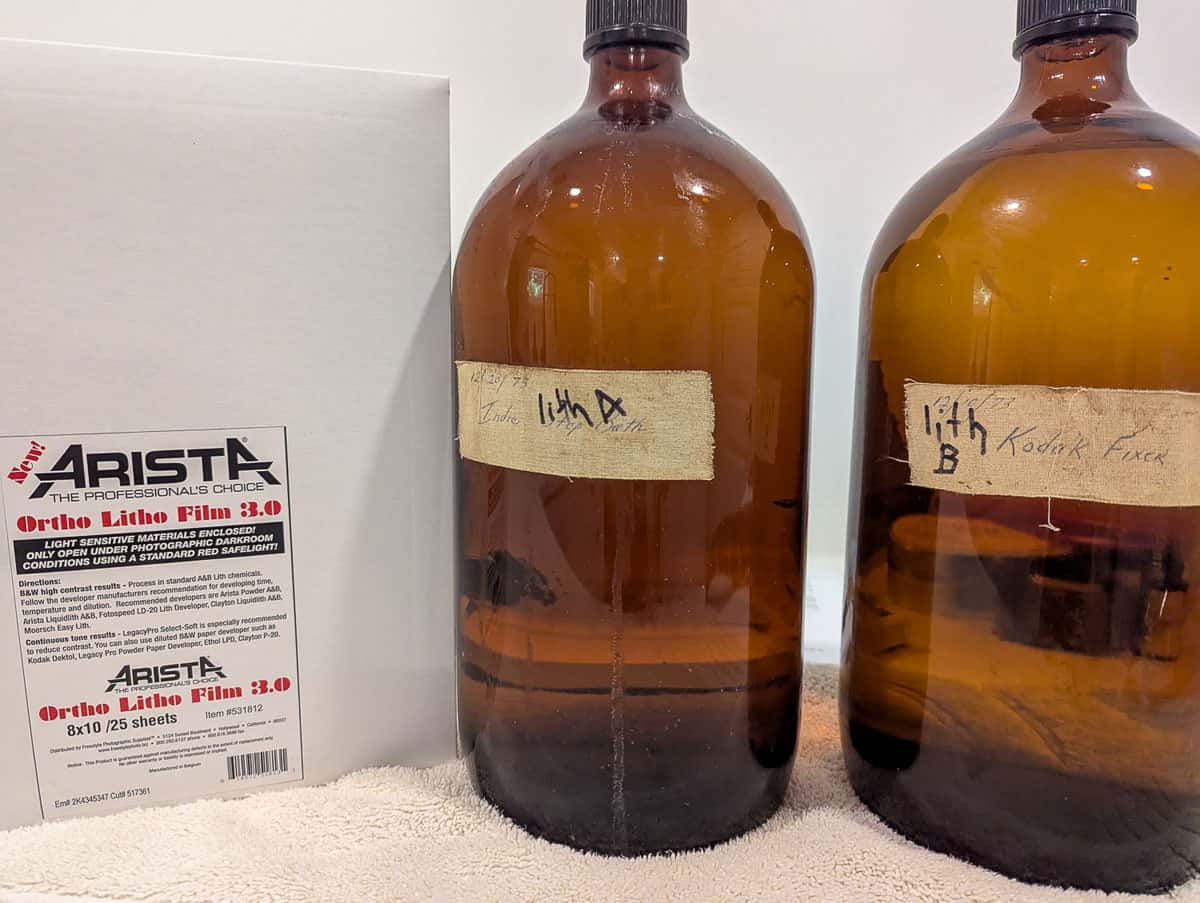
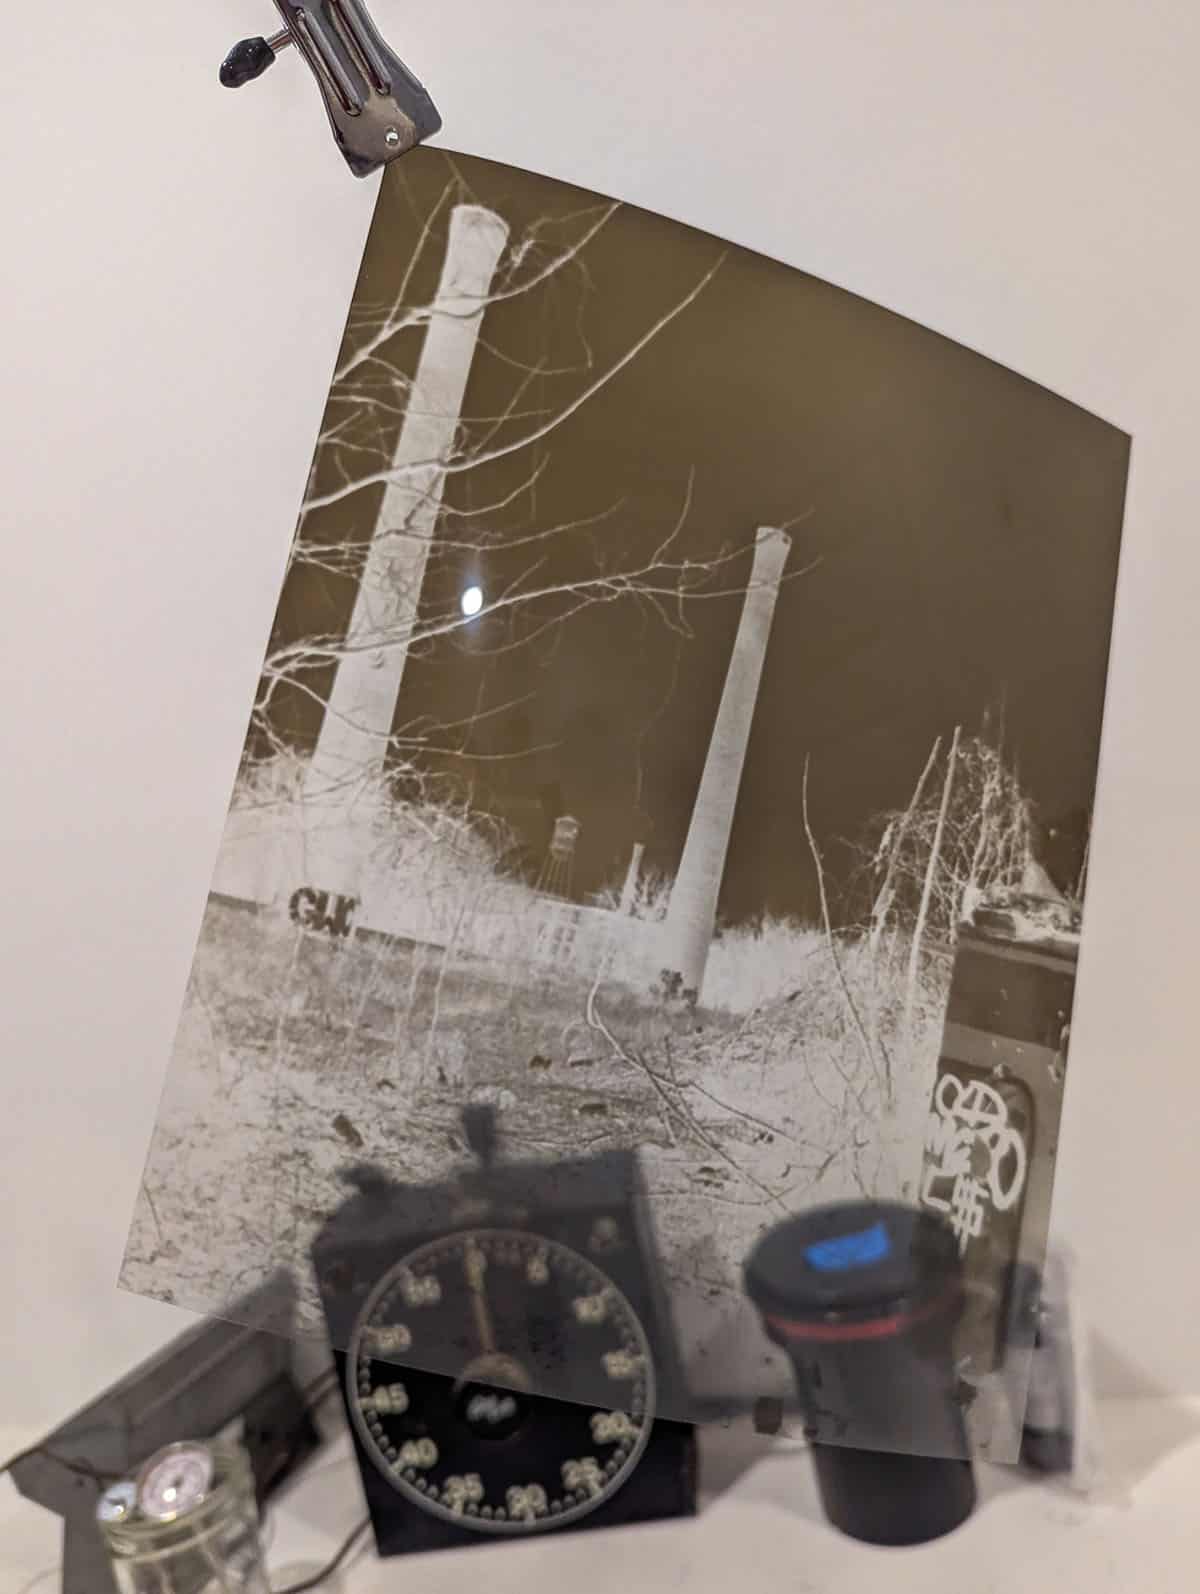
Once you have your positive negative, then you start the process of enlarging it – just as you would with a silver gelatin paper enlargement. Instead of printing onto paper, you print onto a sheet of film. Because of the high cost of 8×10 film, I used Arista Ortho Lith 3.0. This is a very low-cost sheet film that many people use when creating contrast masks for darkroom printing.
I set the positive I’d created into the enlarger. I didn’t use my enlarging easel; instead, I used a clean piece of foam board and drew notches for 8×10 so I knew where to set my negative. Then I focused the image, set the lens to f16, placed the film for the enlargement emulsion side up, and got to work.
Blunders Along the Way
I found that creating the inter-positive was quite straightforward. The biggest consideration is managing dust (it’s always about dust in the darkroom!) Otherwise, I found it quick and easy.
I ran into many more issues with the enlarged 8×10 negative. The first problem? The Arista Ortho Lith 3.0 film is not notched, and I had no idea which side was the emulsion side. I had to experiment with a few sheets to determine the emulsion side.
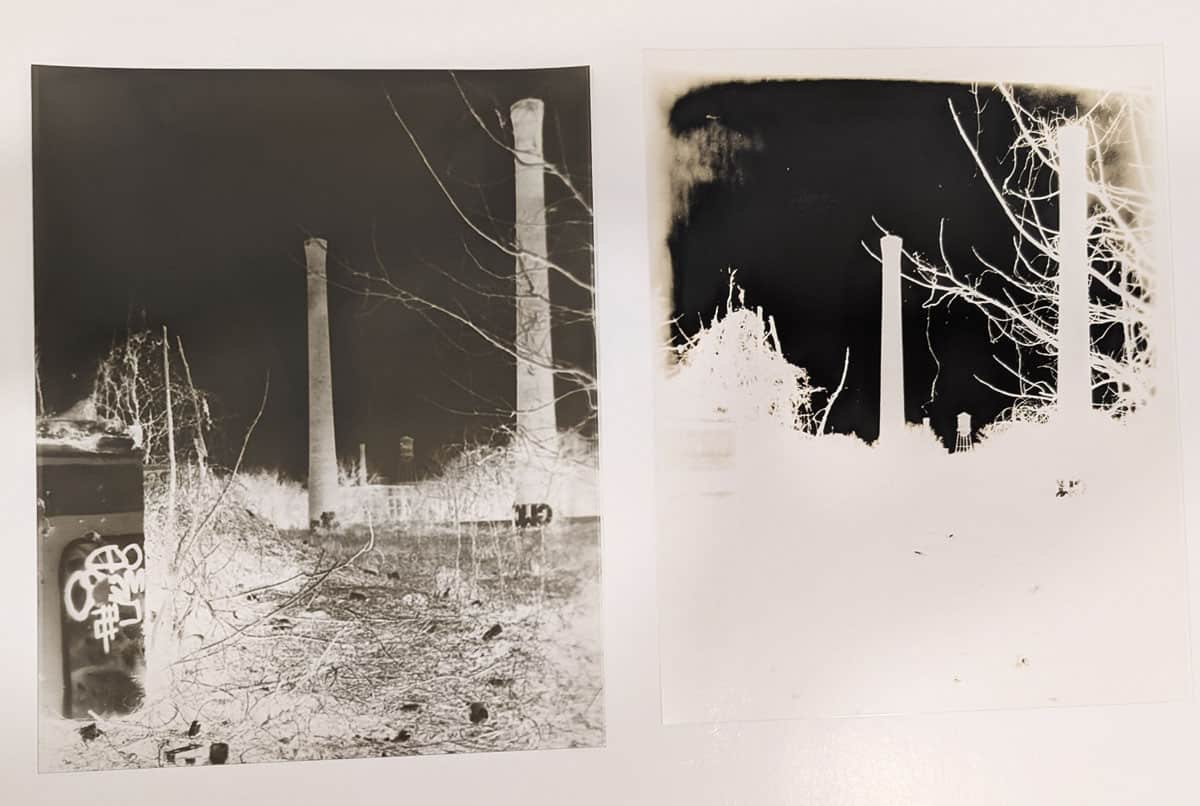
Not having ever used the Ortho Lith 3.0 film, I started off by mixing the Arista Lith developer (parts A&B). I’d read that this process would give more contrast, which is better for contact prints. And wow did it deliver on the contrast! It also gave me zero detail in the highlights. Between wasting film to determine the emulsion side and getting overly-contrasty prints, I gave up.
The next day, I mixed Kodak D-76 and used that as the developer at 5:1, which finally gave me the detail that I was seeking, although not the contrast! The negatives developed in the lith developer gave me true blacks, while the ones developed in D-76 have a wider tonal range, but not nearly as much contrast. I was worried if I would get usable contact prints.
Creating Contact Prints with an Enlarged Negative
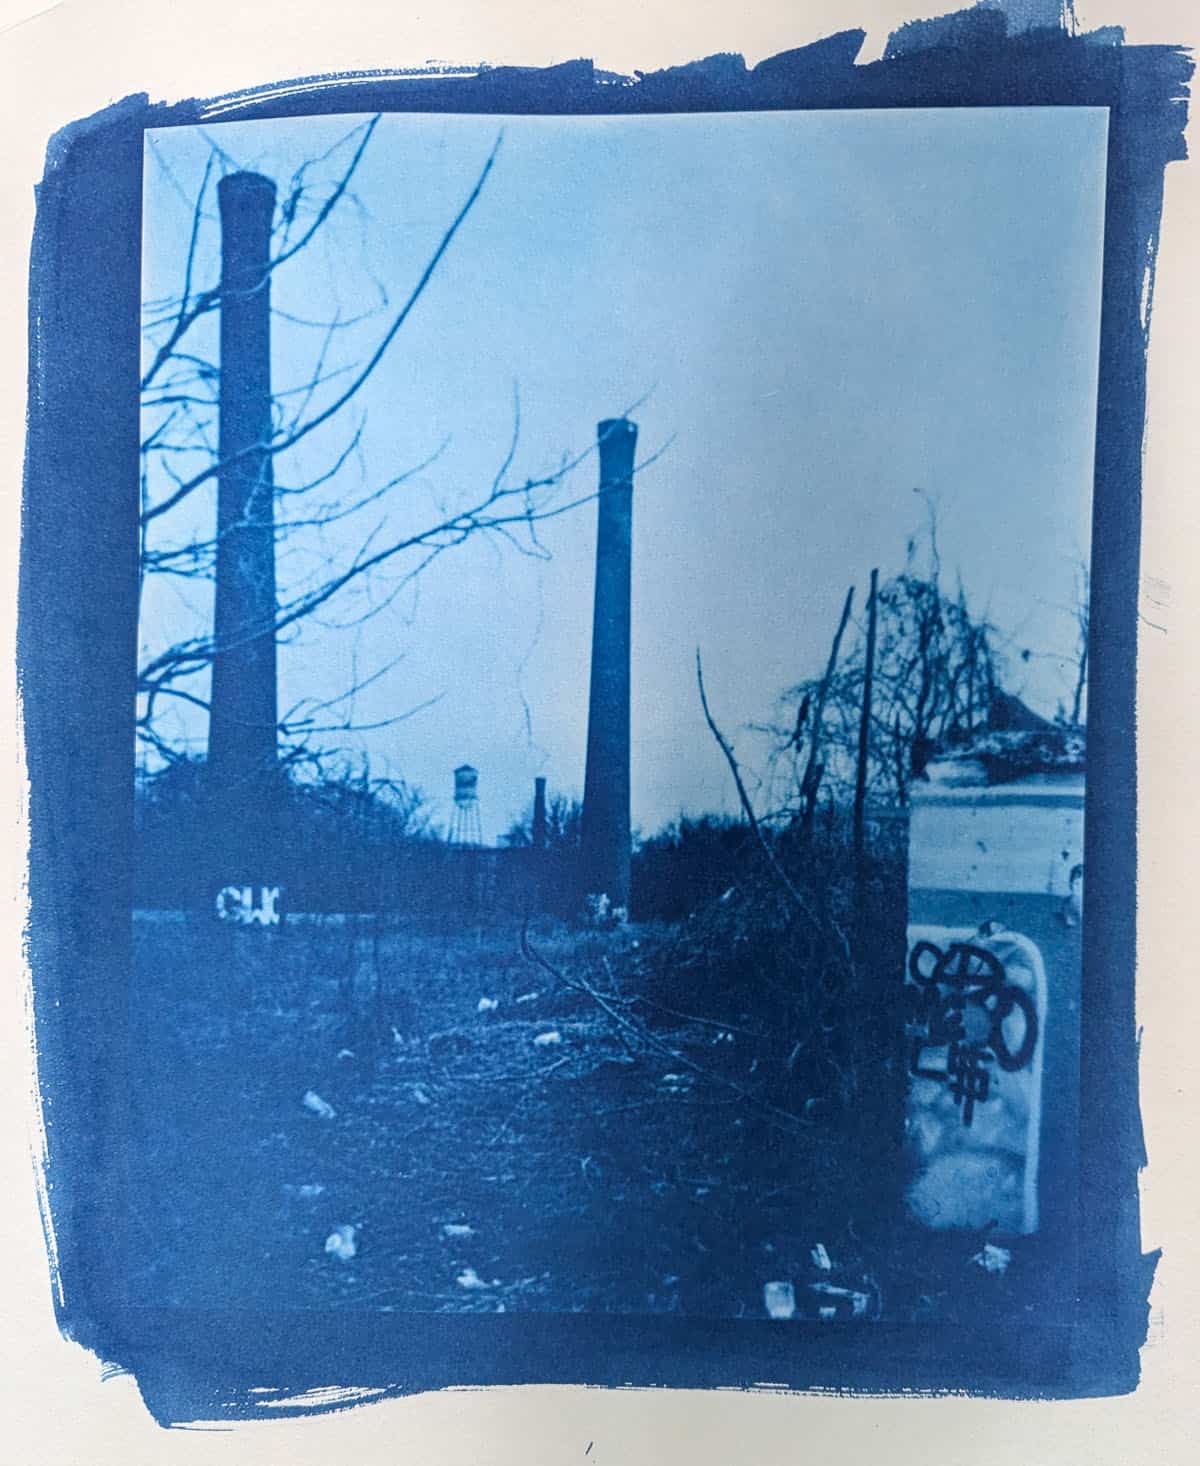
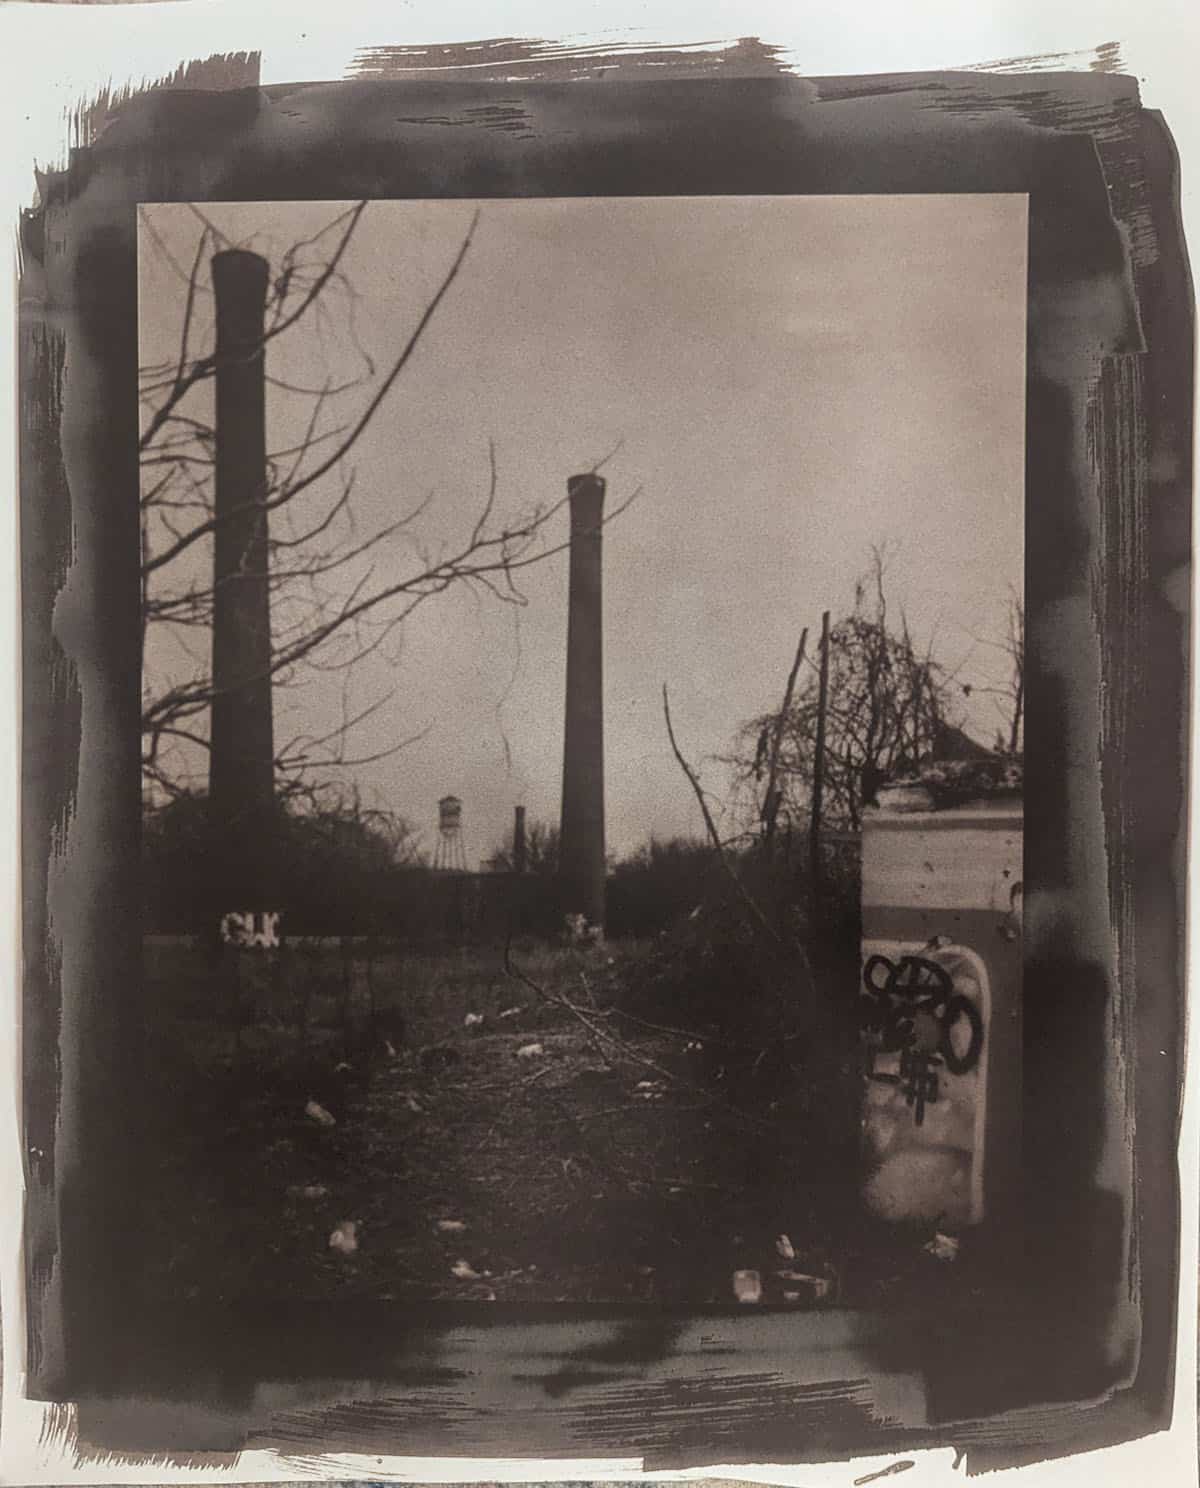
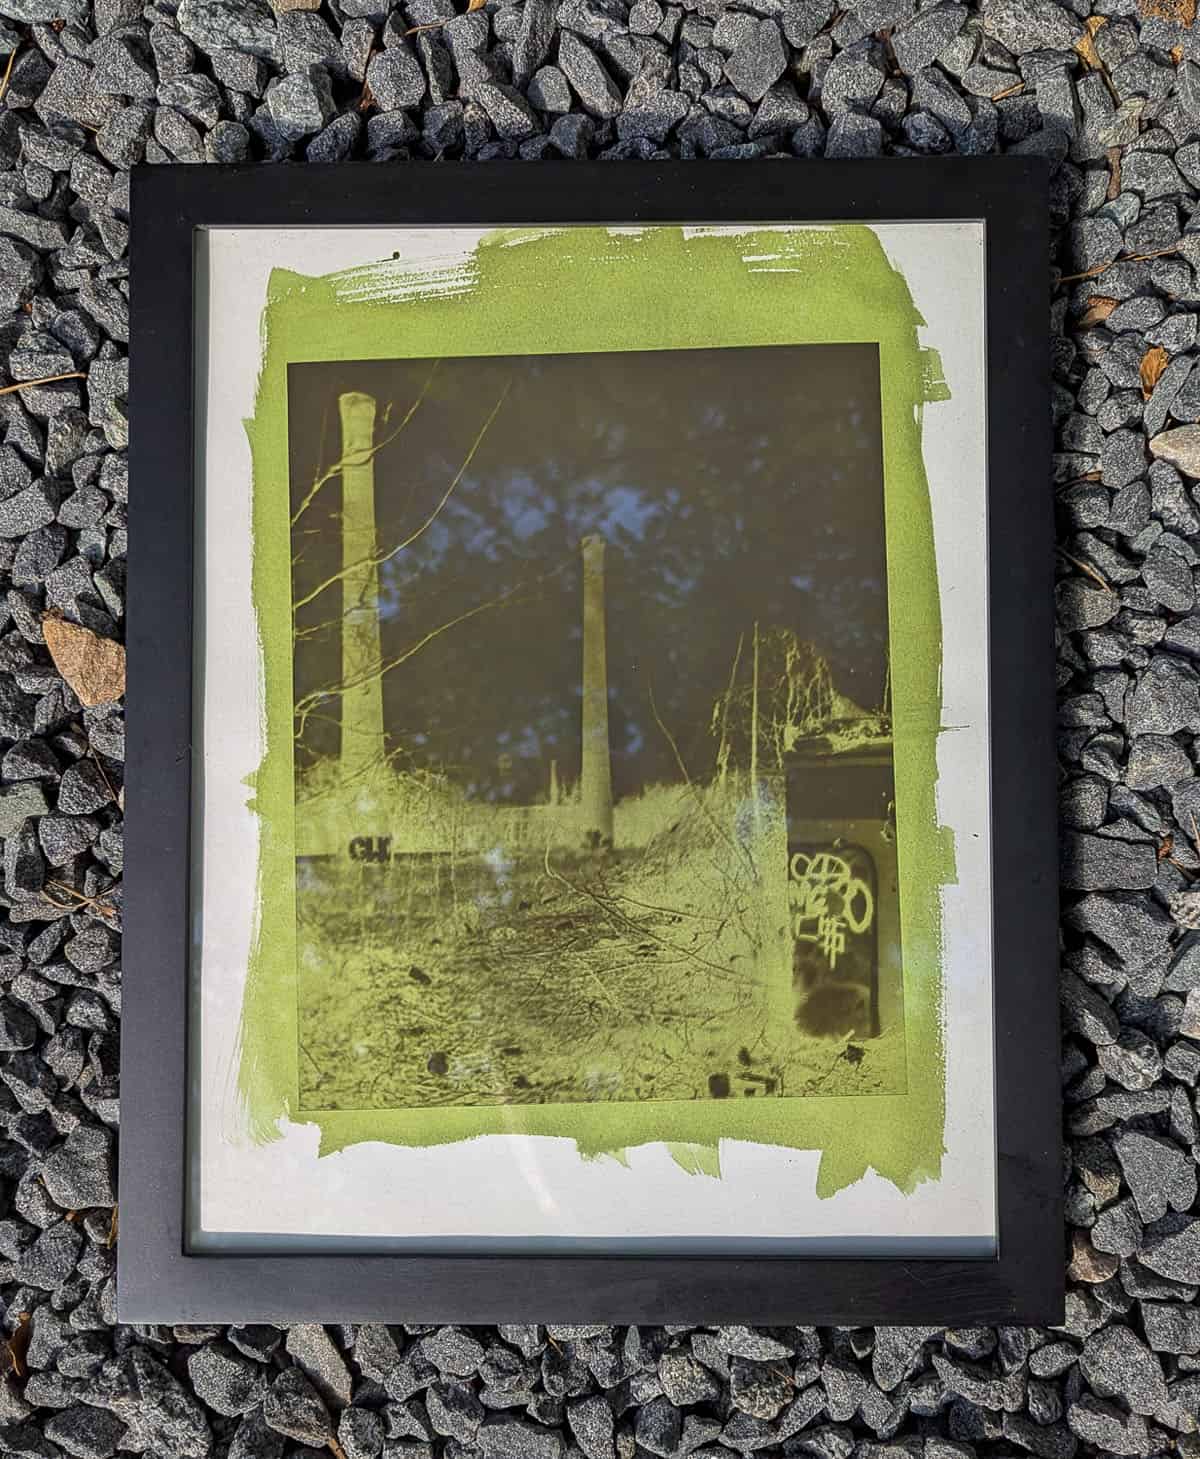
Once I had a few workable 8×10 negatives, I coated a few sheets of paper with cyanotype chemistry and a few sheets with Van Dyke Brown chemistry. Many people who contact print regularly have a UV light box, which gives control over the exposure time. I use the sun as my source of UV light, which means the time of day, season, and amount of cloud cover affect exposure times.
My first day printing with cyanotype and Van Dyke Brown, I felt that I was getting very light images. In fact, my Van Dyke Brown prints showed almost no detail after washing and fixing. I tried again on the following day – making sure to test exposure. I also switched to a thicker paper and changed the wash steps for the Van Dyke Brown.
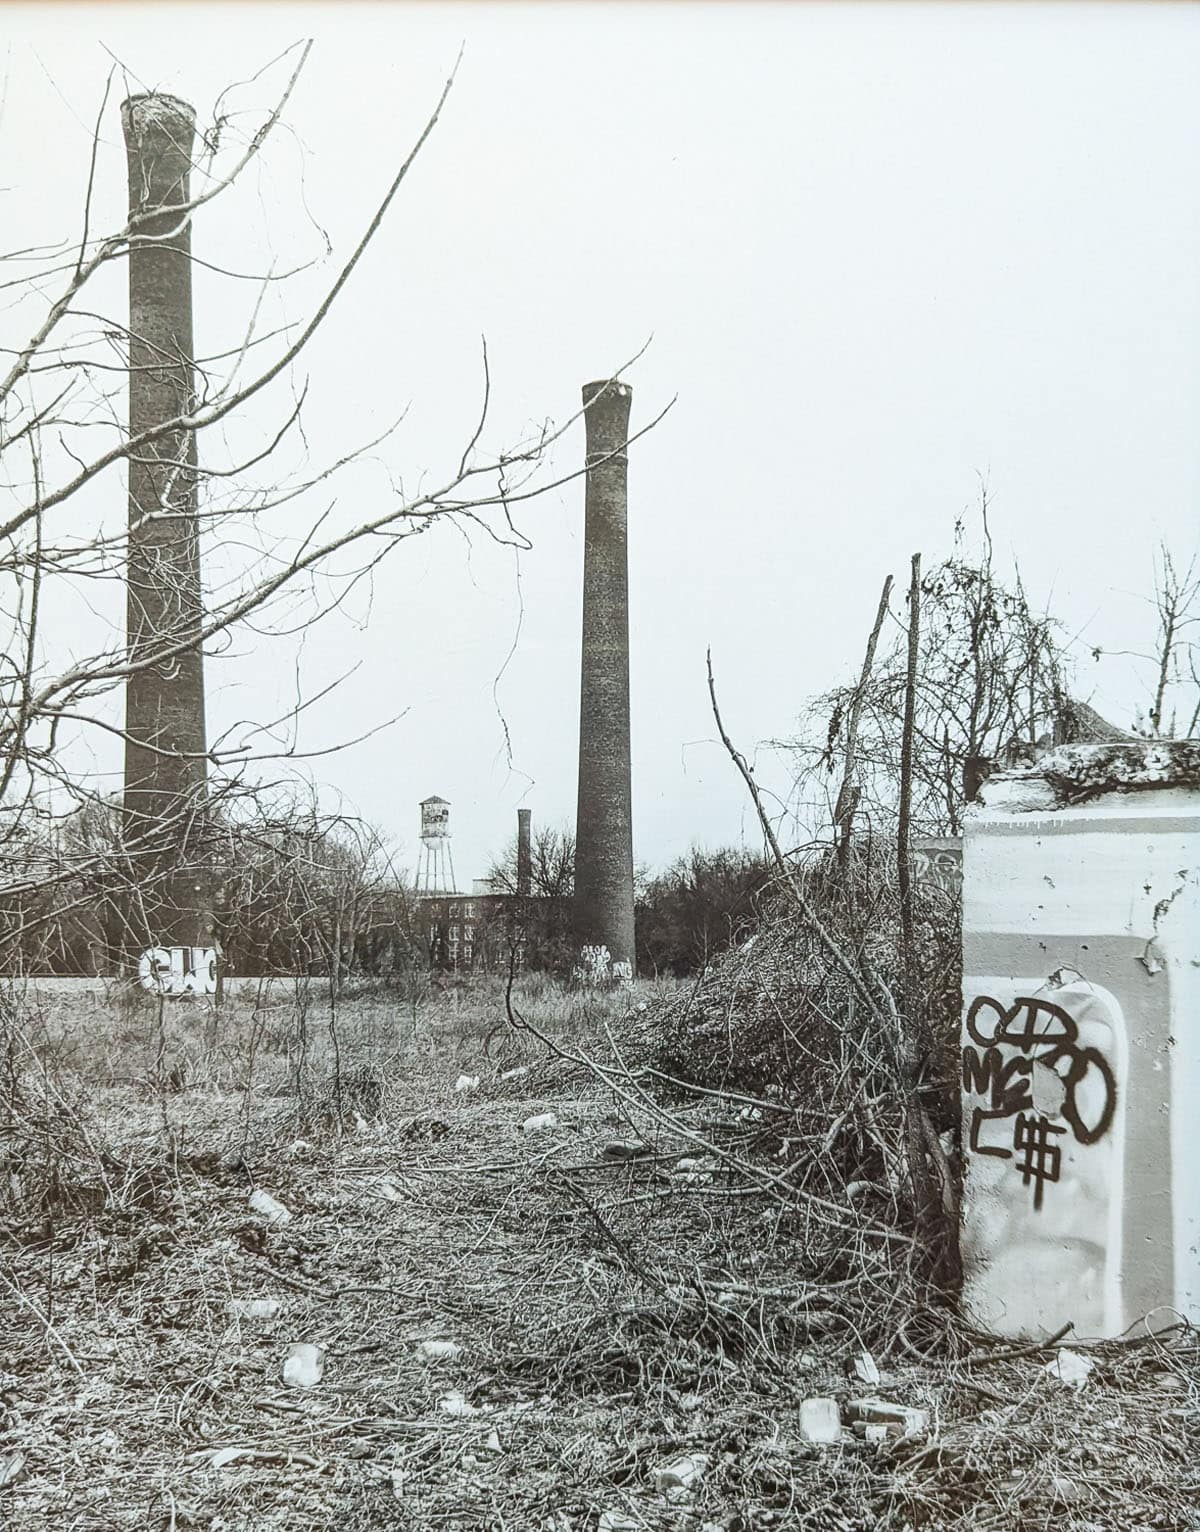
Of the three negatives that I enlarged, only one provided me with the results I was looking for. While I didn’t have any deep blacks in the negative, I had wide tonal range in the print – much like the original negative. I’d previously enlarged the 4×5 negative I used as a silver gelatin print, which was great for comparing results.
A Few Reflections on the Process
- Because of the steps involved, advance planning is your friend.
- You can use any fast and fine-grain film to make the inter-positive. People love Kodak T-MAX 100 for this stage because of the smooth grain and how well the film renders detail.
- I loved using the ortho films so I could maneuver in the darkroom and watch the negatives develop. You’ll want to test that your safelight is “safe” for ortho films; some newer red lights may fog the film. I will continue to use Ilford Ortho Plus 80 for the inter-positive. Now that I’m more confident, I may invest in the Ilford Ortho film for the 8×10 enlargements.
- When developing the film in an open tray, I was never quite certain when I needed to replenish the developer. Next time, I will do more research.
- Each step in the process introduces the opportunity for dust and scratches. One of my enlarged negatives has several scratches and a spot, which was very evident in the final contact print. I’m not going to lie: that was a disheartening part of the process.
- You can use any size original negative to any size enlarged negative, as long as you are comfortable with the detail and grain that results.
It Seems Like a Lot of Work…
I’ll admit that it’s easier to scan a negative, adjust the curves for the contact printing process that you’re using, and print a transparency. That takes a fraction of the time compared to enlarging a negative. The viewer of your final work would most likely never know what kind of negative you used.
You may be left wondering, why bother? For me, I’m drawn to analog processes because I value slowing down and avoiding screens. I also love feeling connected to film photographers centuries ago who figured out these processes. I welcome spending a few hours immersed in these methods without digital distractions. I will take what I’ve learned and try again.
What do you think? Have you tried enlarging negatives or any alternative contact printing? Let me know in the comments.
Thank you so much, Taylor! Taylor is a regular contributor here at Shoot It With Film, and you can check out her other articles here, such as B&W Film Comparison: Are Kentmere 400, Rollei RPX 400, & AgfaPhoto APX 400 the Same Film? and How Low Can You Go? Exploring Low ISO Films.
You can also check out more of Taylor’s work on Instagram.
Leave your questions about enlarging a film negative for contact printing below in the comments!


Leave a Comment
Shoot It With Film on Instagram


Blog Comments
Paul Reeve
July 29, 2025 at 7:02 pm
This is a good article to show why one would not usually choose Litho film when the objective would be to have intermediate density detail, to say nothing about the film not being notched (I always thought that was a nuisance associated with Litho film, and perhaps someday somebody will inform me why the film is made that way, that is, not notched. It seems to me that if one were serious about making enlarged negatives from interpositives, that one might research the subject a bit before starting, and then use one or two full sheets of the 8X10 film to make test strips. It is obvious that Taylor understands the purpose of test strips. It further seems that one would want to evaluate the enlarged (secondary) negative with a contact print and mask bands for exposure evaluations before heading pell-mell to the alternative process prints. However, we also learn somethings better as experiential learners, and perhaps the mistakes or mishaps along the path result in lessons learned better. Perhaps, reading between her lines, others would infer that Lith film negatives are good for their art, or that they are exactly what they don’t want. The results she shows could help many determine what they want and what they don’t want in enlarged negatives and the processes.
Amy Elizabeth
August 6, 2025 at 9:45 am
Taylor! I am so impressed that you tackled such a laborious endeavor! You did it beautifully and thank you for sharing all you learned! Your darkroom practices are always so inspiring.
Taylor Blanchard
August 11, 2025 at 8:56 am
Thank you Amy! I am so grateful to The Art Lab for inspiring me to finally try this process. Of course I still have a lot to learn and try with this process, but sometimes the hardest thing is getting started – and I needed the push. Thank you for reading.
Robert Slotboom
October 13, 2025 at 4:07 pm
Try this:
https://www.retrocamera.be/nl/bergger-continuous-tone-print-film-4×5-inch-50-sheets-rc0000002103