
Written by Astrid Remue
Four years ago, I discovered experimental film photography thanks to Shoot It With Film. I love(d) the surprising effects of light leaks, double exposures, and film soup and how these techniques challenge my perfectionism.
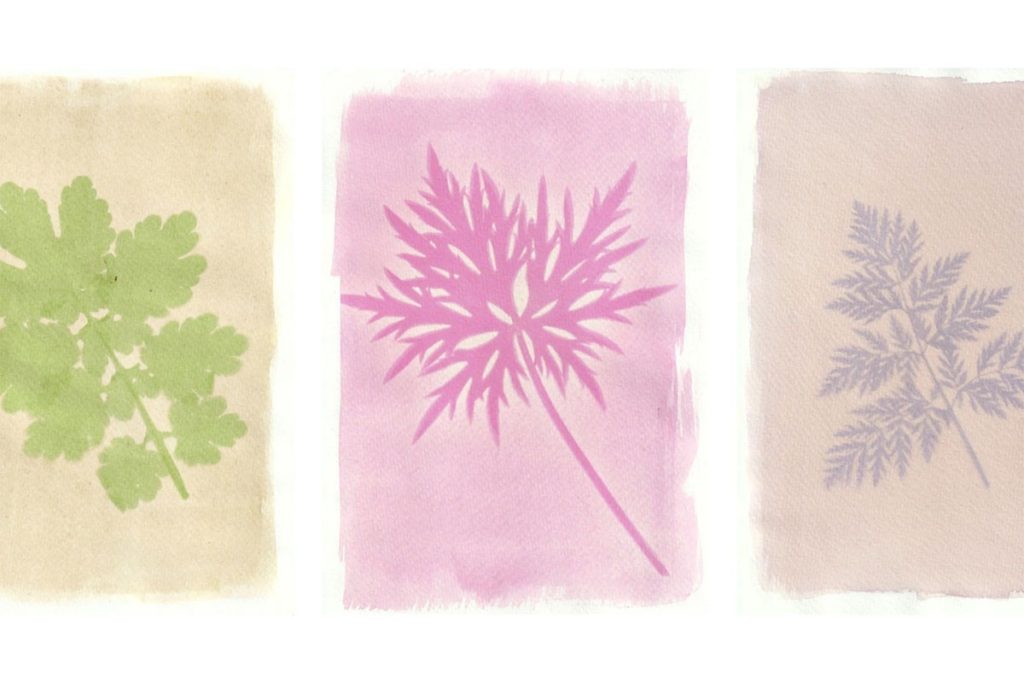
Naturally, when I came across wet cyanotypes, I had to give it a try.
I am not a very patient person (although patience is a reasonably necessary character trait when shooting analog), and so cyanotypes really appealed to me. Almost instant results? Count me in!
Furthermore, making cyanotypes is also less expensive than shooting film. Which is a total plus when looking at the current film prices.

What is a (Wet) Cyanotype?
A cyanotype is a photographic cyan-blue printing process. It is a nineteenth-century photographic method whereby a photosensitive solution of iron compounds is spread out onto a piece of paper and then exposed to UV light.
Check out this article on how to make standard cyanotypes.
For wet cyanotypes, when the chemical cyanotype solution is still wet on the paper, you place other reactive materials on the paper (such as salt, vinegar, or soap) to cause chemical reactions. These chemical reactions will create interesting patterns and effects on your prints.
Wet cyanotypes allow you to create more organic and less controlled results feeding your mad scientist dream.


Materials Needed for Wet Cyanotypes
Here’s a list of materials you need to create wet cyanotypes:
- Cyanotype solution
- Equal parts of potassium ferricyanide and ferric ammonium citrate dissolved in water
- Watercolor paper
- 100% cotton watercolor paper gives me the best results, so far. This technique may also work on other materials such as wood or textile, but I have yet to test this myself.
- A brush
- A paintbrush or foam brush three or four inches wide usually works best.
- UV light
- You can use natural sunlight or light from a UV lamp
- Leaves or flowers or any object you want to use to make photograms
- A photogram is when you take objects (such as leaves or flowers) and place them on top of photosensitive paper to create a print. You can also do this with a film negative printed onto transparency paper.
- A contact print frame
- A contact print frame is a piece of plywood with a piece of glass (for example from a picture frame) on top. You will sandwich the print between the plywood and glass to keep everything in place. You can also use clamps to secure the glass to the plywood.
- Foodstuff and chemicals
- Turmeric, paprika powder, vinegar, soap bubbles or soapy water, water, salt, lemon juice, and/or watercolor… In conclusion: all sorts of foodstuff and chemicals (that you have at home). There are endless options and combinations.

How to Create Wet Cyanotypes
Safety Guidelines
Seeing as mad scientists tend to disregard safety, I feel it is my duty to remind you of the necessary safety regulations when on the verge of greatness.
Keep windows open or provide plenty of ventilation, use protective clothing and gloves, and mind your chemicals.
Caution must be exercised to prevent consumption, inhalation, and skin contact when working.
Mixing chemicals and/or foodstuff may create a dangerous match. You may want to wear old clothes as the chemicals can leave stains. Lastly, ensure that minors are accompanied by an adult.
Prepare Your Materials
Set up all the materials in advance (see list above) and mix both compounds (potassium ferricyanide and ferric ammonium citrate dissolved in water) to make your cyanotype solution.
Brush an even layer of the cyanotype solution on your paper. I like to keep a white border, but that depends on your own preference.

Place Objects and Food Stuffs – Experiment!
Place your flowers or leaves directly on the wet sheet that is coated with cyanotype solution.
Now the fun begins!
Let the mad scientist within yourself run wild and add your chemicals or foodstuff. Less is more does not apply here.
Drops of (soapy) water will create lighter patches on your final print. The soap bubbles will add texture if they maintain their shape.
Keeping soap bubbles intact may be a challenge. I use a plastic spoon to gently scoop the bubbles on the paper. You can create firmer bubbles by attaching a sock with a rubber band to the top half of a bottle, dipping it in soapy water and then blowing them straight onto your sheet.

Sprinkle your spices such as turmeric, paprika powder or salt straight onto your paper or mix them with water and spray them on.
I found that the effect of wet or dry spices differs. For example, with turmeric, you get more yellow-green spots when it is wet, while dry turmeric is more likely to create dark yellow sprinkles.


Salt produces snow-like crystals. Vinegar creates softer blues, whereas lemon juice creates more intense shades of blue.
Secure Everything in Your Contact Frame
Once you’re finished adding chemicals or foodstuff, sandwich everything together with your contact frame between the plywood and glass.
You can use additional clamps to hold the glass and the plywood together.
Make sure your flowers or leaves and your paper remain firmly wedged together.
Some people use a layer of plastic wrap to separate ingredients or protect their glass. So far, I have succeeded in cleaning the glass afterwards, so I have not used any plastic wrap yet.
Expose to UV light
Take your sandwiched print outside and expose it to direct sunlight (or a UV lamp). The yellow, dried solution will rapidly turn green, and next a dark blue.


I wait until the print is pretty much dry and reflects a greyish color, and then take it out of the sun.


Development Times
Since your print was wet when you put it out into the sun, the development time will take longer than normal cyanotypes.
The exact time depends on the strength of the sun or UV lamp and how wet your print is.
On a not-so-sunny day in Belgium, my prints take up to one hour, but some people leave their wet cyanotypes in the sun for hours.
Rinse, Rinse, Rinse and Dry
Remove the flowers, leaves or objects you used to create a photogram.

Rinse your print in a tray under running water, as you would with normal cyanotypes. Keep rinsing your print until all unexposed chemicals are washed off, and the water runs clear.
I take about five minutes to do this.
Exercise patience one last time and allow your print to dry (ideally in a dark place, not in direct sunlight).

Thank you so much, Astrid! You can find more of Astrid’s work on her Instagram.
Leave your questions about creating wet cyanotypes below in the comments!


Leave a Comment
Shoot It With Film on Instagram


Blog Comments
Dani
August 3, 2025 at 3:21 pm
I read quite a few tutorials and articles on wet cyanotype, and this was the most comprehensive and helpful. Thanks!
Cavalié
August 25, 2025 at 2:12 am
Thanks for your excellent tutorial
I love doing cyanotypes with what I collect in the countryside.
I tried wet cyanotypes but I’m not as good as you. So your advices will help me.
Claire
July 2, 2026 at 12:53 pm
Thank you for this. It is so clear and concise and comprehensive and helpful.
And the images are so beautiful of every step of the process!
Thank you so very much. I can’t wait to try it out. Yay, mad scientists go nuts!