
Written by Hansel Ong
What is infrared light?
Without being too technical, imagine light as a rainbow with all the colors we can see, like red, blue, and green. Infrared light is a special kind of light that’s just past the red part of the rainbow.
Humans can’t see infrared light with the naked eye because its wavelengths (700 nanometers to 1 millimeter) are beyond the visible spectrum, which our eyes perceive as roughly 400 to 700 nanometers (violet to red). However, there are multiple ways to see infrared using special tools, such as black-and-white infrared film.
Infrared Photography and the Wood Effect
Good black-and-white photography always has an ethereal quality, distilling the essence of reality into pure light. Good black-and-white photography captures this light and transforms it into something beautiful, but what happens if that light is beyond the visible spectrum? Can black-and-white infrared photography possess the same aesthetic potential?
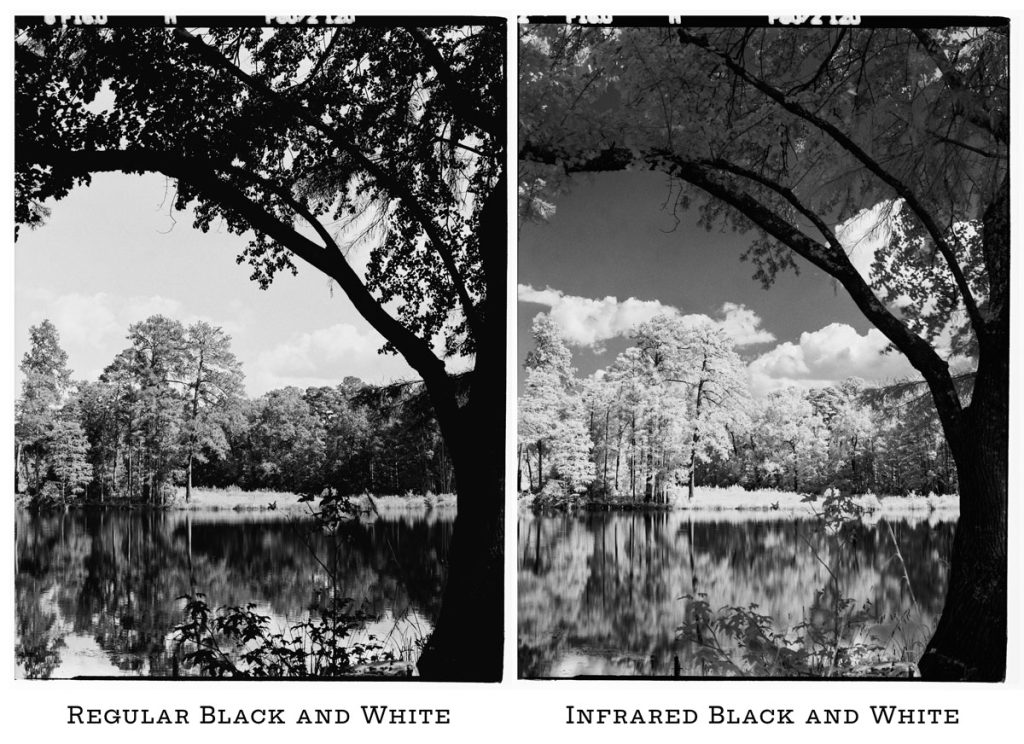
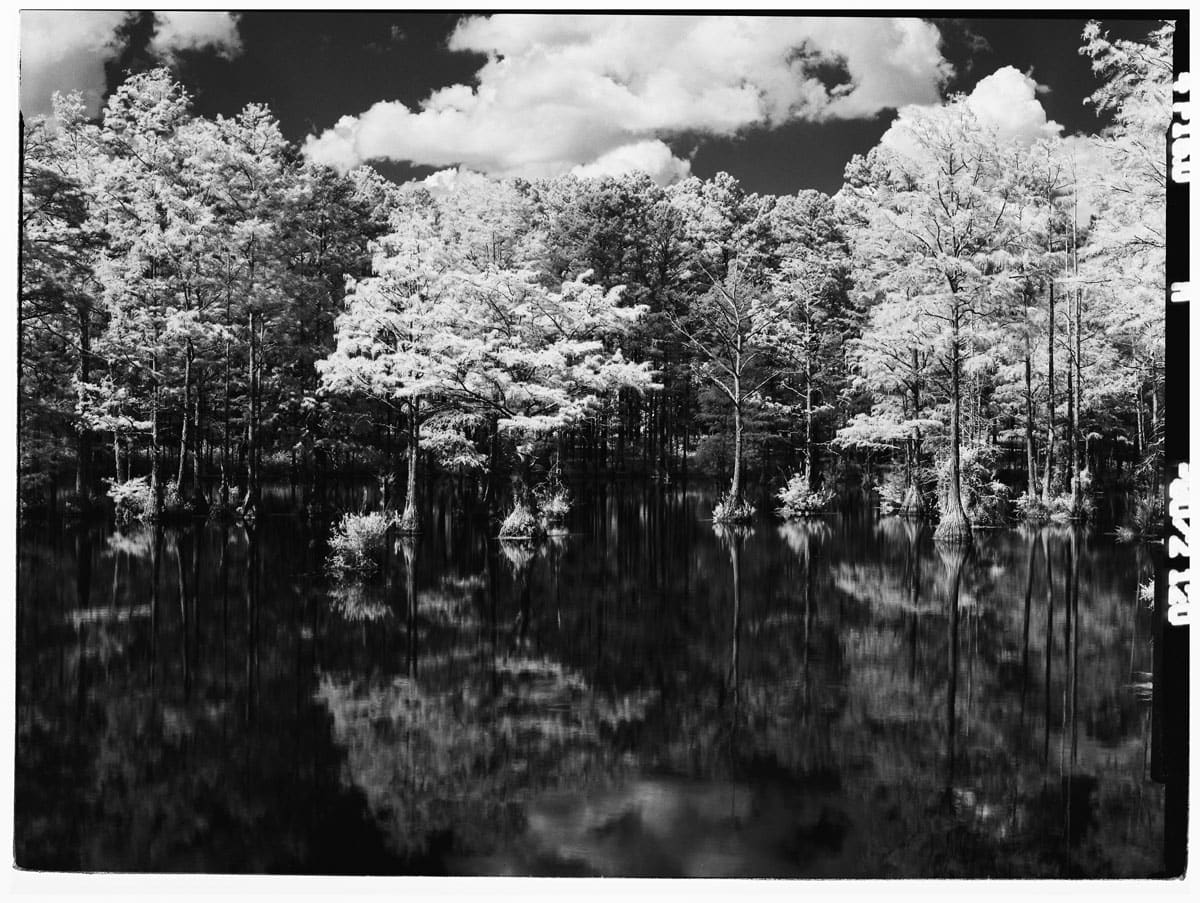
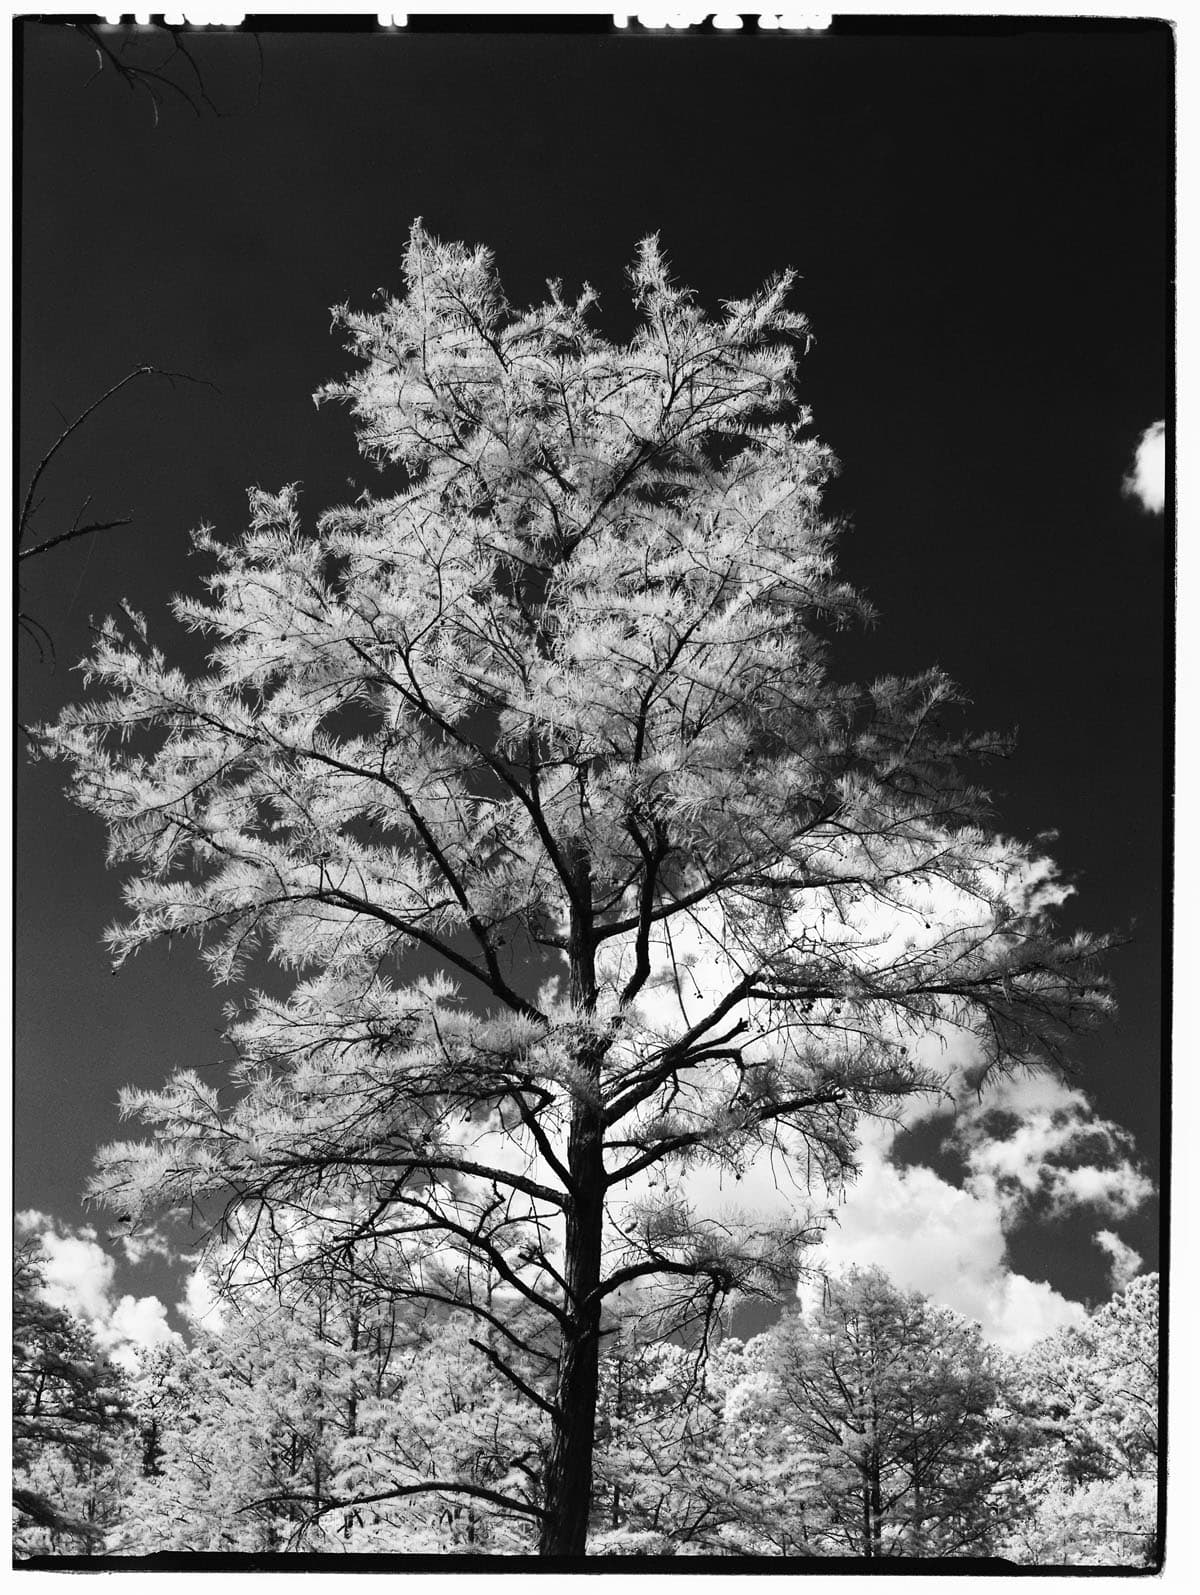
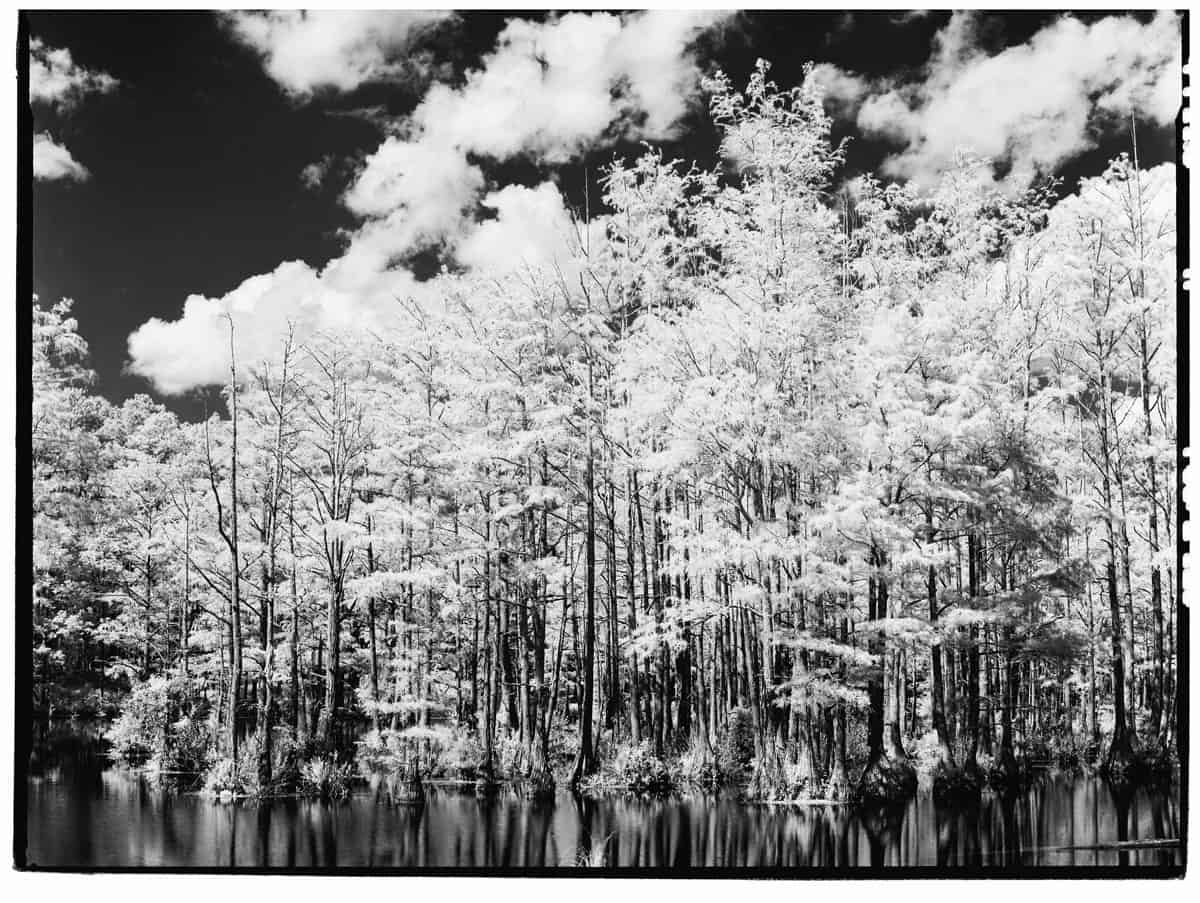
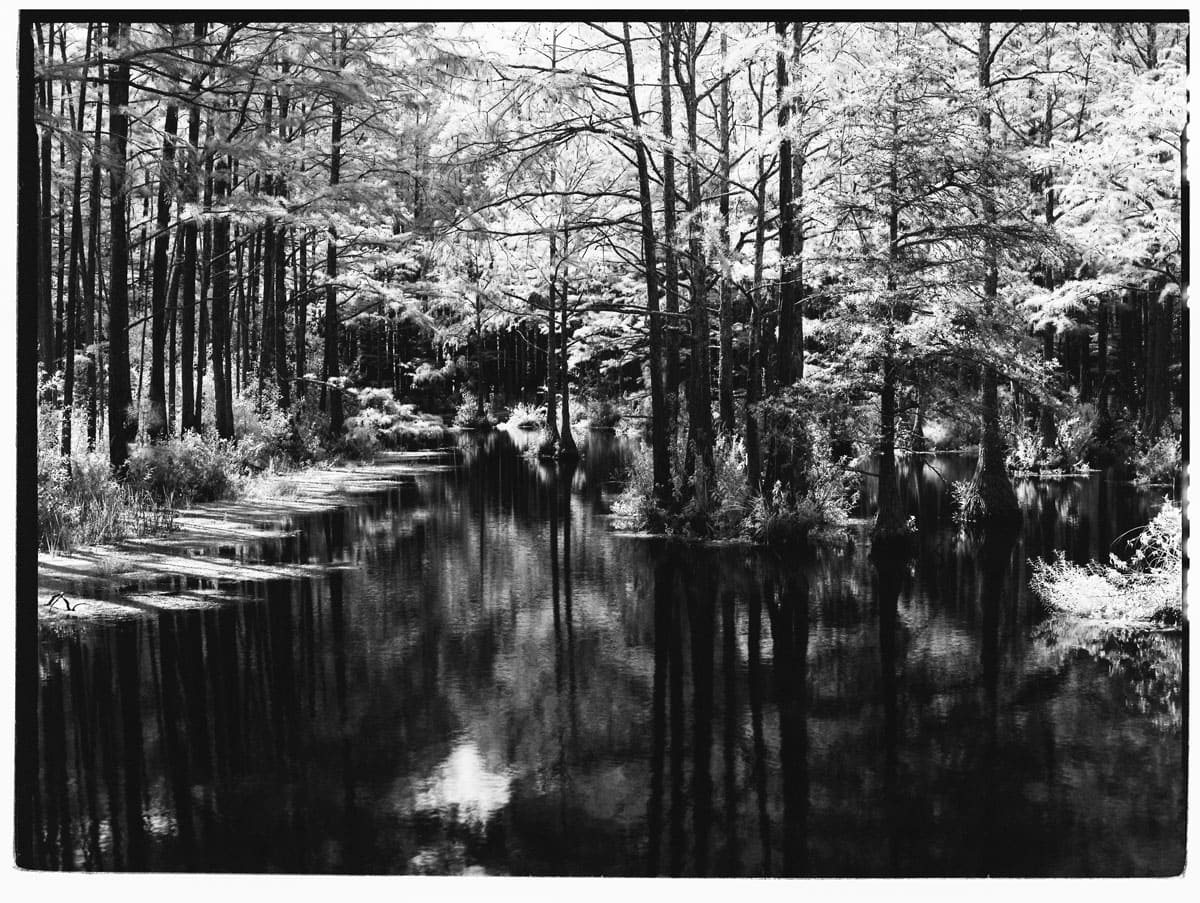
One of the notable aspects achievable with black-and-white infrared photography is the Wood Effect. The Wood Effect refers to the striking visual phenomenon where green foliage, like leaves and grass, appears bright white or light gray in images, while other elements, like skies or water, often appear darker.
Named after Robert W. Wood, who pioneered infrared photography in the early 20th century, this effect occurs because infrared light is strongly reflected by chlorophyll in plants, making them appear luminous in infrared-sensitive film. Compare the regular and infrared sets below:
Click to enlarge image
Click to enlarge image
And this is a quick, comparison shot with my digital medium format camera, which happened to have a wider lens so that a landscape orientation shot was more appropriate:

A Quick Word on Medium Format
So why did I use medium format? Medium format photography refers to a type of photography that uses cameras with a film size larger than 35mm but smaller than 4×5 inches. Typically, medium format film sizes include 120 or 220 film, with common frame dimensions like 6×4.5cm (the format this project is based on), 6x6cm, 6x7cm, or 6x9cm.
The film area captures more light and detail, resulting in higher resolution, sharper images, finer grain, and better dynamic range. This makes medium format ideal for applications requiring exceptional image quality, such as fine art, landscape, portrait, and commercial photography.
This whole project was shot using the Contax 645 (find on eBay) and the Zeiss 80mm f/2 lens, with the exception of the sole digital shot above which was taken using a GFX 50R and a 50mm f/3.5 lens.
The Infrared Film Stock
For this project, I chose to use Rollei Infrared 400, which can also function as a normal black-and-white film if not paired with an infrared filter.
Other film stocks are available, but I chose Rollei because I hadn’t used their film before.
The Method to the Madness & Tips for Infrared Photography
If nothing else, shooting black and white infrared film using a single-lens reflex medium format camera is a test of technical discipline (rangefinders follow a much simpler process).
For one, you will need to use a special filter, such as the Hoya R72 filter, which I used, that prevents composing candidly. A sturdy and reliable tripod is required because this dark filter will make handheld shooting unsuitable, unless motion shots are in order.
Next, focusing for infrared is different from focusing in normal light—the photographs will come out soft if you forget to refocus. An infrared film is obviously required, but that hardly needs to be mentioned. Infrared films are available in 120 (16 exposures) or 35mm (36 exposures) formats.
To overcome these hurdles, I followed this simple process:
- Compose: Compose your photograph as you normally would, short of pressing the shutter. This includes setting up the camera and tripod, deciding on the aperture, focusing, and composing the photo as you pre-visualized it for the final image. Needless to say, your camera must be loaded with infrared film. Some examples of infrared film are Rollei Infrared 400 or Ilford SFX 200. I chose to shoot with Rollei Infrared 120, which means I have 16 exposures per roll.
- Apply Filter: Gently screw on the infrared filter after you have finalized your composition.
- Focus: Turn your focusing ring to move the numerical distance marker to the red marker on your lens. Refer to your manufacturer’s manual if you do not see a red marker, but most vintage lenses have one.
- Meter: Meter to underexpose by 5 or 6 stops. For my Rollei Infrared 400, I metered for ISO 6.
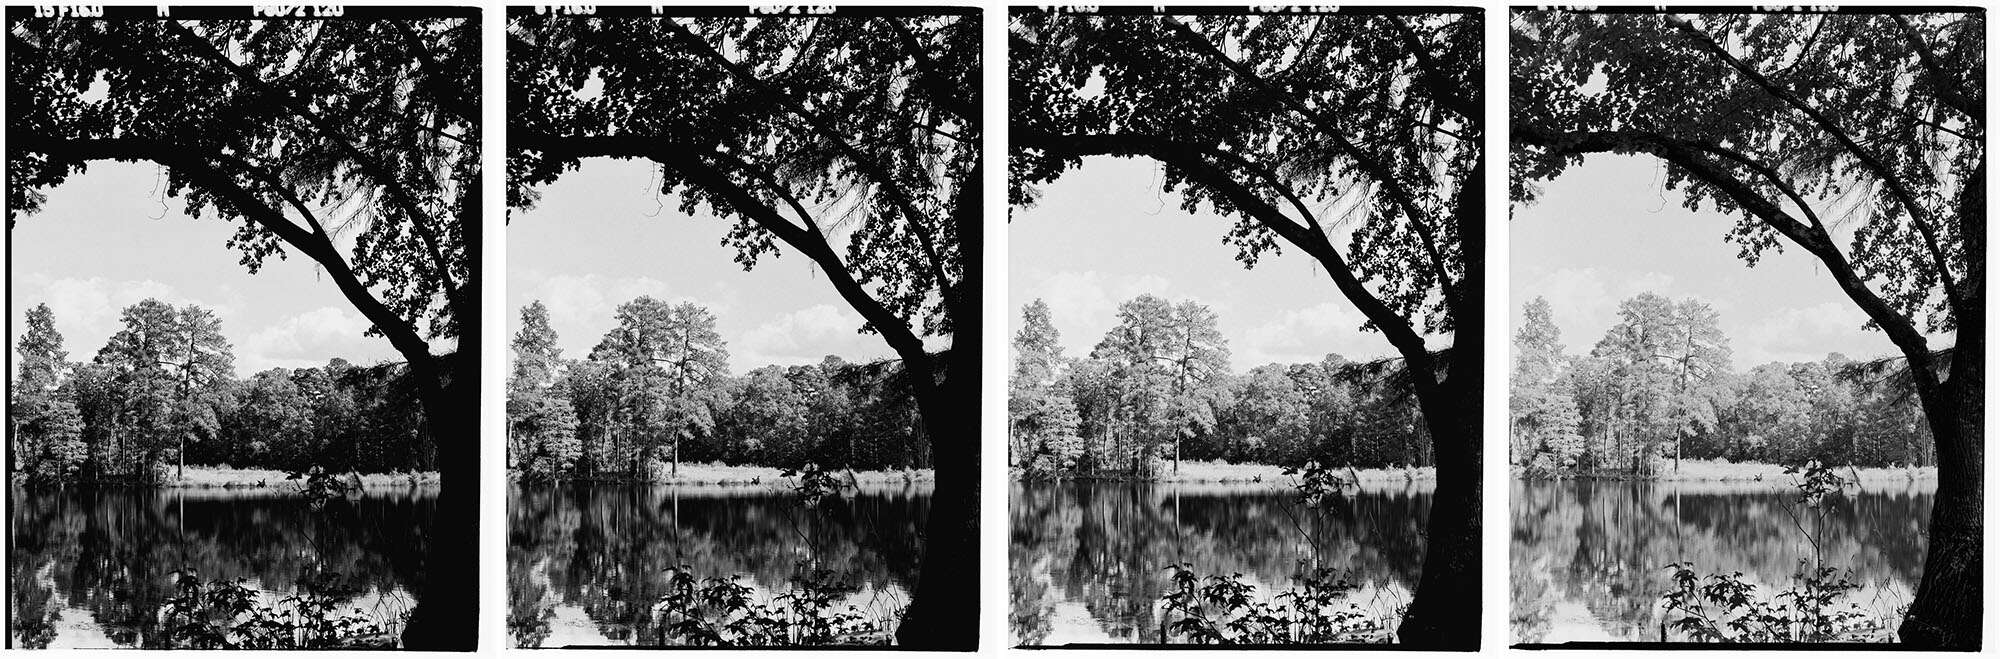
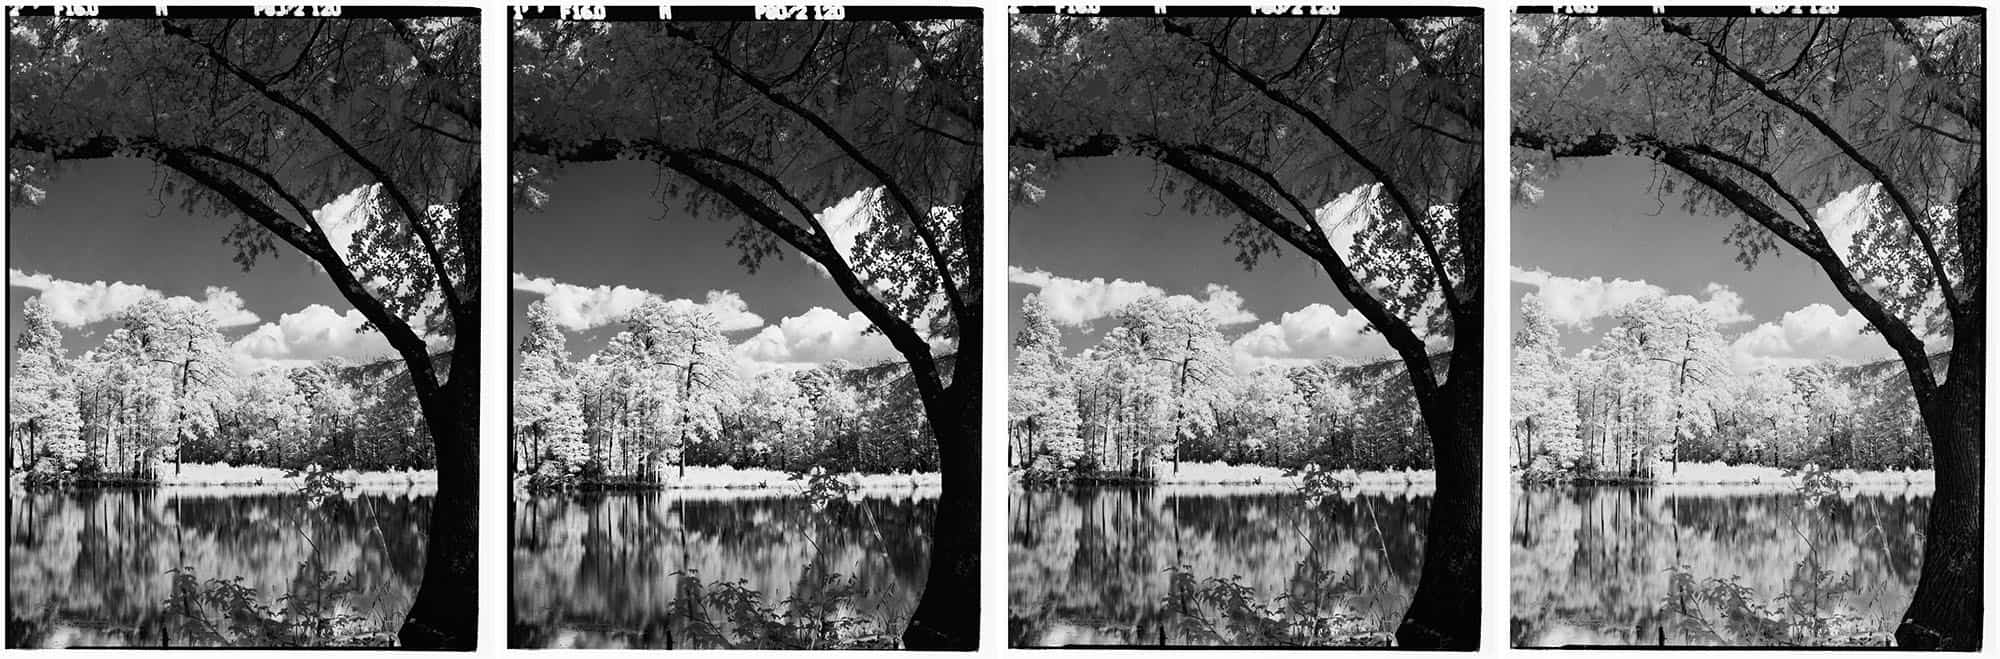
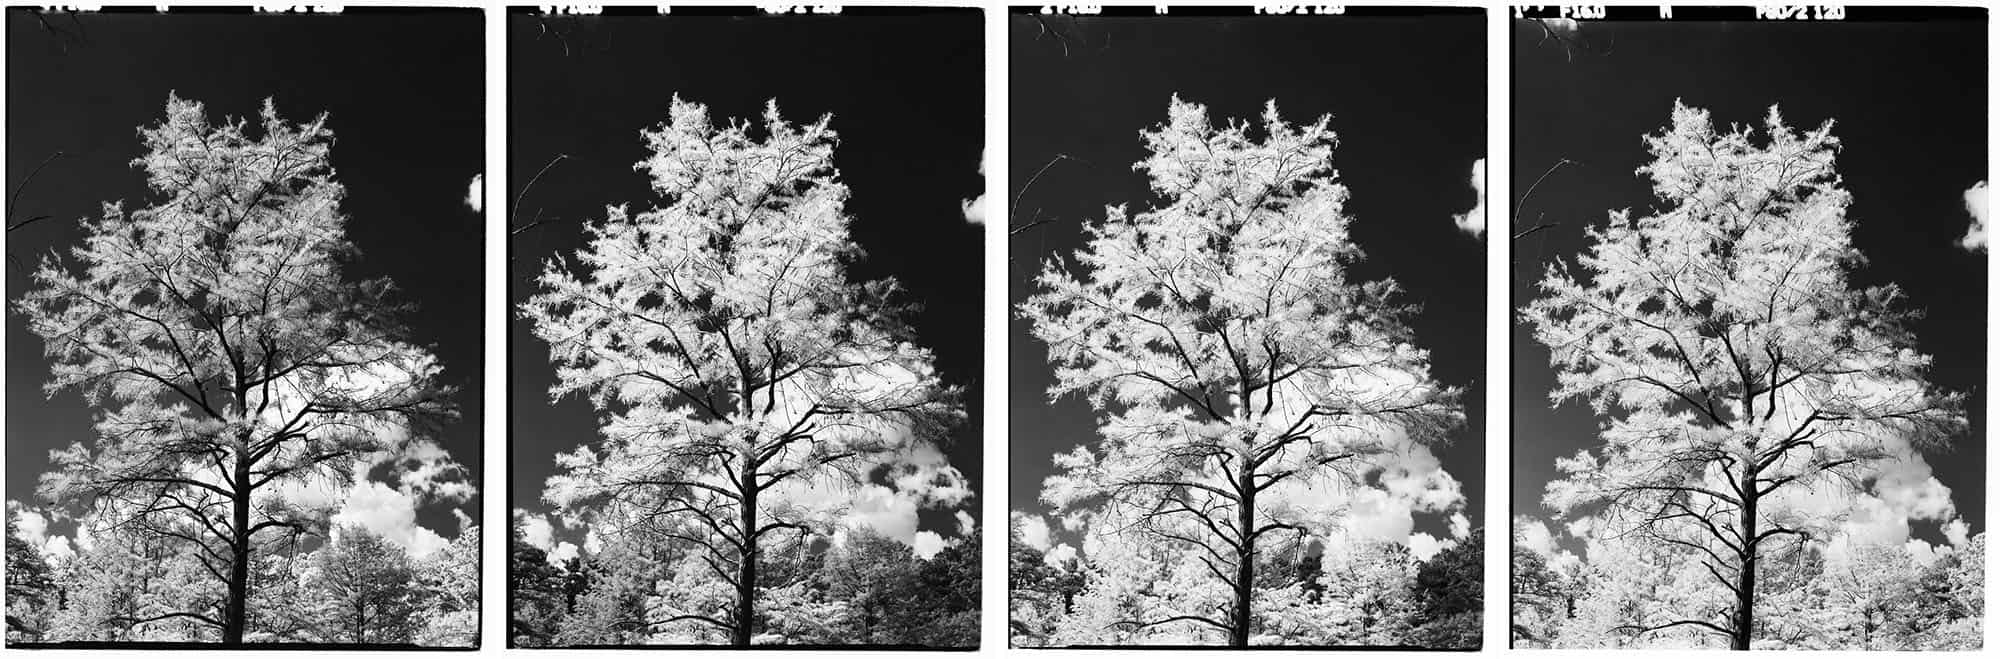
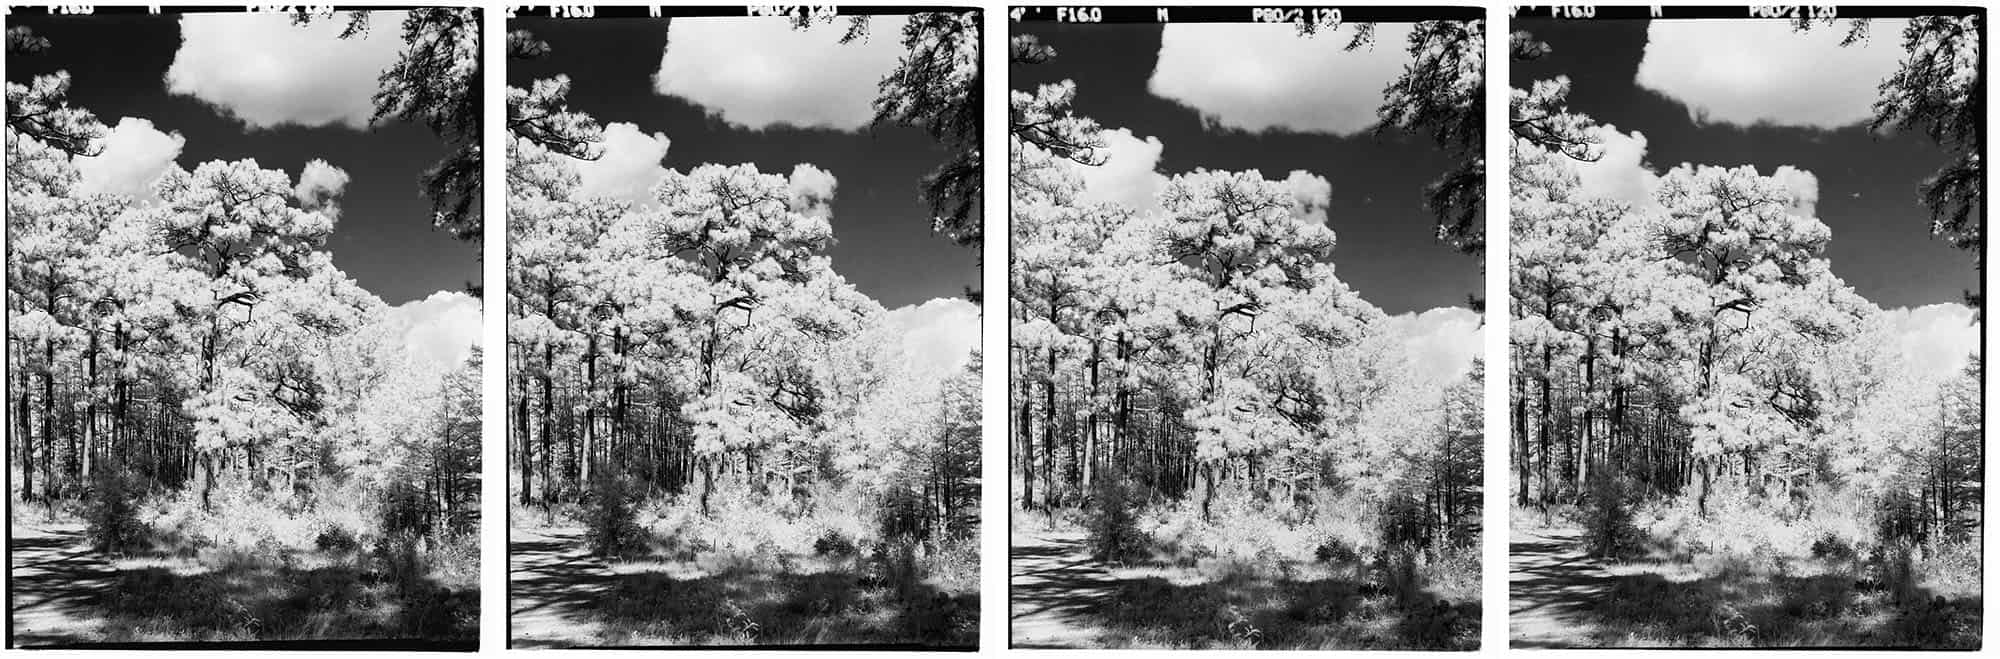
- Bracket Expose: Press the shutter, not one time but multiple times! Take 3 to 5 exposures with varying meter settings; this is called bracket exposing. Bracket exposing increases your chance of having at least one good shot. The metering will vary greatly depending on your situation, comfort, and experience level. For my sets, I chose to have four exposures per composition, adjusting the shutter speed with each press to add in more light.
I followed this process for my first two rolls of Rollei Infrared. Here are some of my results, with my favorite in large view followed by the bracketed set:


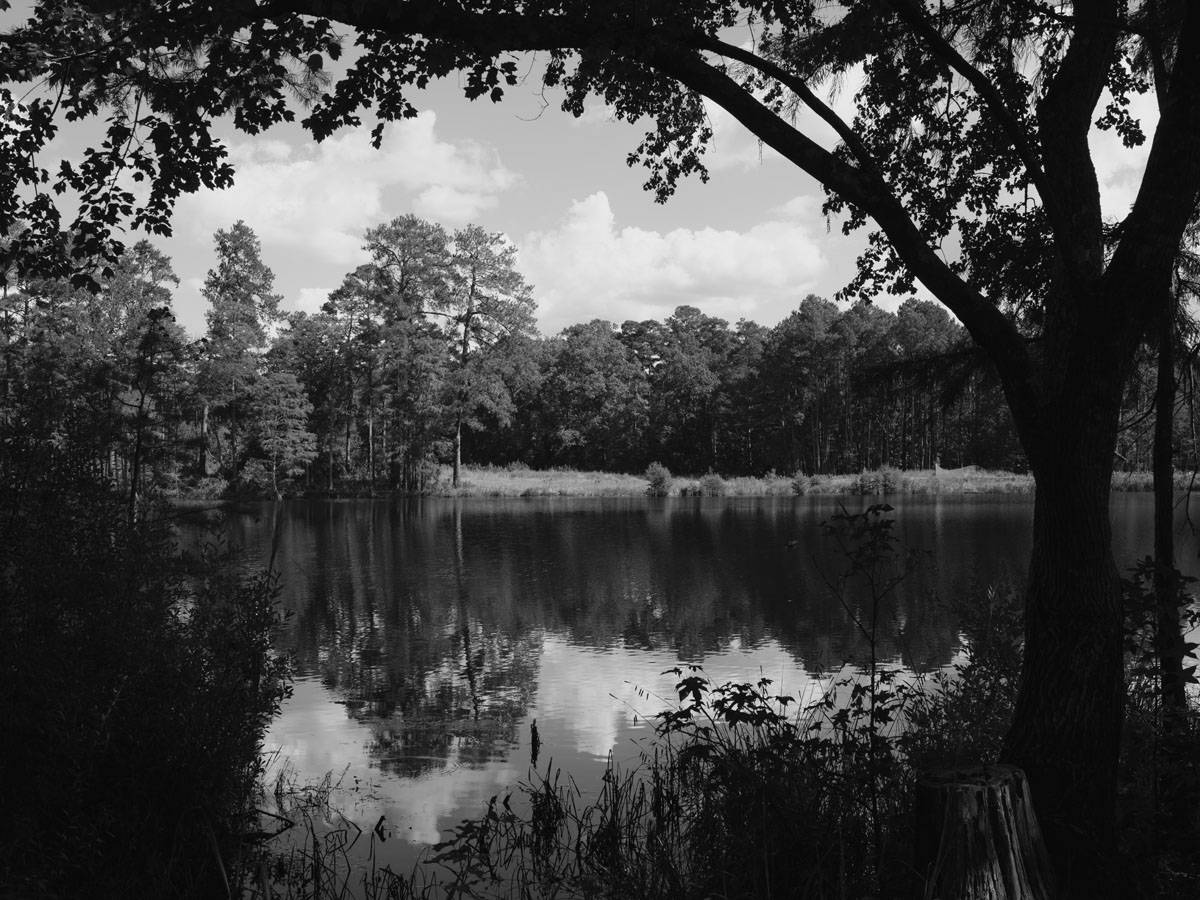
Errors and Mistakes
I hate the composition of the following set, but I’m putting it here, hoping I can encourage anyone who may be too risk averse in trying infrared photography. Mistakes are part of photography–it is ok to make them.

For this set, I overexposed by half or one stop, and I did not feel like I have at least one good shot. Perhaps my overabundance of caution has backfired?
Conclusion
I enjoyed the meticulous process I set up for myself during this shoot. The difficulty level and learning threshold are really not that high. Rather, it is the lack of patience that will jeopardize the final results.
Any sense of immediacy and urgency must be set aside before anyone begins infrared photography. But being methodical has its rewards.
So did I like my results? Certainly. Could I do better? Absolutely. I think infrared has the potential to unleash the unique beauty of black and white photography.
Thank you so much, Hansel! You can find more of Hansel’s work on his website and on Instagram.
Leave your questions about infrared film photography below in the comments, and you can pick up some infrared film on Amazon here.


Leave a Comment
Shoot It With Film on Instagram


Blog Comments
Lucas
October 24, 2025 at 11:13 am
In my experience, for rollei infrared 400 (and rollei retro 400s) with a 720nm filter, the ideal metering should be underexposing by 4 stops.
Hansel
October 27, 2025 at 9:59 am
Hi Lucas! Thanks for your input. This won’t be my last go at doing infrared so I’ll keep your comment in mind.
Bob
October 24, 2025 at 12:27 pm
Some beautiful examples of infrared photos here, thanks for the article/photos.
I like the Rollei-IR as well and use a TLR to avoid the composition-focus-put on the filter-routine. After working through many rolls I have found a 4 or 5 stop increase in exposure works so well I usually don’t have to bracket. As well, I’ve noticed quite consistent lighting after metering (hand-held) for the scene(s). I’ve also had great results with ILFORD SFX.
Hansel
October 27, 2025 at 9:58 am
Hi Bob! Thank you for your input! I hope those who haven’t tried IR film photography would be encouraged to try it, atleast once. I definitely see the advantage of TLRs and rangefinders for this process.
Renato Frolvi/ Rome
October 27, 2025 at 12:44 pm
Hi, thanks for your images…my favourite infrared film is ADOX HR50, from germany, very popular here in Rome, Italy , where I live…Adox is very sharp, no grain at all, and you get much more contrast than rollei IR or ilford sfx…and, last but not least, is very cheap ! (7.5€ for a 36 shot roll)…you have to overexpose 5 stop…try it and let me know!
Renato Frolvi/ Rome
October 27, 2025 at 3:08 pm
…try also FOMAPAN 400 as infrared film, but you need an extreme over-exposure :+8 (eight) stop , and sometimes also +9 stop, after using hoya ir72 filter…Fomapan is also very cheap : 7euro for a 35mm 36 shot film…
Hansel
October 27, 2025 at 3:15 pm
Hi Renato! Thanks for you suggestion! I still have a couple more Rollei and Ilford SFX films that I want to finish before trying out other film stocks, but will definitely give it a go if I find it available in the US. Thanks!