Written by Sara Johansen
One SIWF article I’ve visited before is a DIY hack from Jennifer Stamps for shooting 35mm sprocket images in a Holga 120. The idea of shooting 35mm in my Holga and being able to get the sprockets was SO good, but I had no idea how to do it.
And here’s the thing about me – I’m not a DIY’er. There are those great at DIY (I see you Jen Stamps!) and those who need a kit (hi, it’s me, I’m the problem it’s me).
So, I found the solution that works for me, and I want to share it with you, just in case you’re like me and need a kit with a 35mm adapter for the Holga. There are a couple of things I purchased to get me started, but have no fear, these items aren’t going to break the bank.
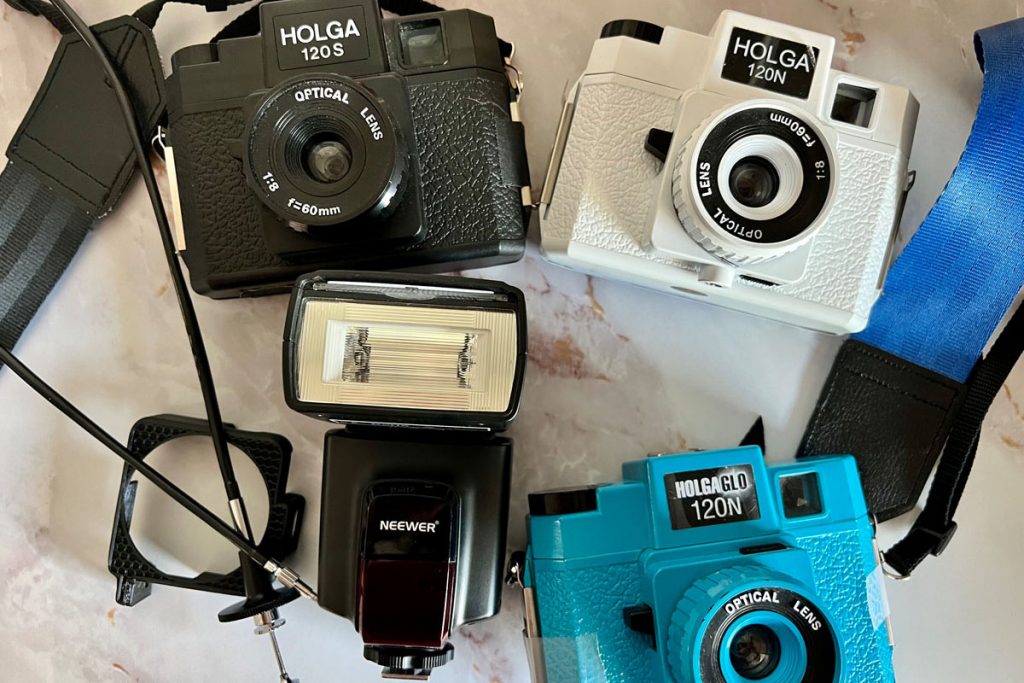
Find the Holga 120N on Amazon.


Supplies for Shooting 35mm Film in a Holga 120 Camera
1. A 35mm to 120 Film Adapter
Since a roll of 120 film is a different size from 35mm, you need an adapter to help you securely load your 35mm roll in your 120 Holga.
The top and bottom cap keep the canister snug, while the take up spool is there to lead the film.
I bought mine on Etsy and I really love it, but you can find them elsewhere as well, including Amazon.
Find the 35mm to 120 film adapter on Amazon.

On the left: Take up spool
On the right: Adapters that fit over the ends of the 35mm film canister

2. Windowless Camera Back for the Holga
On the Holga, there is a window in the back of the camera to show the frame counting when using 120 film. 120 film has paper backing, so major light leaks with this window are not an issue.
But with 35mm, there is no paper backing, so that window needs to be covered up. You can use tape, but sometimes, it’s not enough. Using a windowless camera back ensures that if there is a light leak, it’s not from that.
Find the Holga windowless camera back on Amazon.

3. Frame Counter Sticker
When shooting 35mm in a 120 camera, due to not having the paper backing/window as mentioned above, there’s no way to know how much to wind your film in between shots. It’s really all a guess.
I do love the overlapping frames at times, but sometimes I want just a straight up image (or as straight up an image as a Holga will allow).
This frame counter sticker is not an end all be all, but it does help quite a bit when trying to get your winding just right to maximize the number of frames on a roll without risking major overlapping. I love having this sticker as a guide to help me navigate!
Find the Holga 35mm frame counter sticker on Amazon.

4. Darkroom Changing Bag
When using the 35mm film adapter in the Holga, there is no way to wind your film back into the 35mm canister when you are done shooting it.
You’ll have to do this step in a darkroom changing bag, which is essential so you do not lose frames due to light exposure.
Find darkroom changing bags on Amazon.

At the bottom: darkroom changing bag
A Note About Using a Frame Mask
For both my windowless camera back and frame counter sticker, I purchased a kit on Amazon that included both. This kit does also include a frame mask.
Please note that if you use the frame mask, you will NOT be exposing sprockets in your shot.


How to Shoot 35mm Film in a Holga 120N
Once you’ve got the gear, it’s time to make the magic happen.
1. Put the Frame Counter Sticker on the Holga
Place your frame counter sticker on the winding wheel on the top of the camera.

2. Add Frame Mask (Optional)
If you do NOT want sprockets, this would be the time to add the frame mask, so that the sprockets are not exposed when shooting.
I like sprockets, so I skip this step when I shoot with 35mm in my Holga 120.
3. Load 35mm Film onto the Adapter
Use the film adapter to load a roll of 35mm. Place the top cap and bottom cap of the film adapter on your roll of 35mm film.
Then, with the back cover off of the Holga, insert the 35mm film roll (with the adapter caps on it) into the left-hand opening on the back of the Holga, and insert the take-up spool into the right-hand opening.


4. Secure Film to the Take-Up Spool
To help the film catch in the take-up spool, add a small piece of tape to secure the film. If you don’t have tape handy, you can also try bending the film to help it catch and stay in place.
I have successfully done rolls of 35mm without the tape holding it, so it’s not a necessity, but it does help.


Related: How to Shoot Holgaramas
5. Add Windowless Camera Back
Place the windowless camera back on the Holga.
Remember, Holga’s are prone to light leak, so even with the windowless camera back, you may still get some light leaks.
A great way to help prevent this is to use gaffers tape or something similar to help keep the side seals tight when using.
I prefer to let the dice roll and let the additional light leaks land where they may – it’s character!


6. Wind the Film Advance Knob
Wind your film advance wheel one full time, and then wind until the arrow to the side of the wheel is lined up with number one.
Now, you’re set to wind with the numbers on the sticker to help prevent overlapping frames. You can always fudge a wind up a bit if you do want overlapping frames.

7. Shoot Your Film!
Shoot your roll of 35mm!
Remember, if you’re like me and never shoot a straight horizon, this is the time to think about getting it right! With sprockets, straightening a shot in post takes some masterful photoshop, and I don’t have time for that.
I like to put a note on the back of my camera that says HORIZON to help remind me.

8. Lining Images Up in the Viewfinder
Another tip when shooting 35mm, it’s good to note that what you are seeing in your viewfinder is not exactly what you’re getting on your frame.
Since 35mm is more narrow, you’re really only getting that middle sliver of the frame, not the whole thing.
Adjust accordingly so you don’t cut off an important part of your image unintentionally with the sprockets or beyond.


9. Rewind Film in the Darkroom Changing Bag
When you get to the end of the roll, DO NOT OPEN THE BACK OF THE HOLGA TO TAKE OUT YOUR YOUR FILM!
Yes, this may seem like a no-brainer, but I’ve done it and I know plenty of others who have.
Get your darkroom bag, put your Holga in it. Once fully secure in the bag, you can then take the back off of the camera and wind the film back into the canister. Turn the knob on the top of the film canister to rewind the film.
Once fully wound, it’s good to go!


10. Scanning Your Film for Sprockets
If you develop your own film, you’ll want to scan a bit differently than regular 35mm to capture the sprockets. I’m going to refer you this article about scanning film borders for that as I am not a home developer. Remember, DIY and I do not get along.
So I send off my film to my lab and talk with them to scan with the sprockets. If this isn’t an option when ordering, call or email and check with your lab to make sure they are capable of scanning the sprockets. This is often an extra charge.


Using a 35mm film adapter in a Holga 120 is such a fun way to add in some creativity to your work, whether it’s personal or client work.
I’ve done it for both, and I have to say when I’ve done it for clients, they love it. Something about those sprockets get people every time.
Have you used 35mm in your Holga? I would love to hear any extra tips you have!


Thank you so much, Sara! Sara is a regular contributor here at Shoot It With Film, and you can check out her other articles here, such as Five Tips for Shooting Film at Night and LomoChrome Turquoise Review.
You can also find more of Sara’s work on her website, Instagram, and print store.
Leave your questions about editing film soup images below in the comments!


Blog Comments
Richard Ries
July 14, 2023 at 5:11 pm
Interesting article! ????
I don’t know how easy it is to rewind the 35mm film with the adapter, but maybe a cheap 35mm “toy” camera could be used for rewinding the film into the cartridge?
I read an article about using 35mm film in a 127 camera. The basic idea was to trim the 35mm film and tape it to the 127’s backing paper, effectively replacing the 127 film with the 35mm film. This gives the advantage of the light-blocking paper and the exposure marks. I imagine the same could be done with 120 film?
Thanks again,
–Rich
Richard Ries
July 14, 2023 at 5:13 pm
Oops! ???? Don’t know how the “???” snuck in there!
–Rich
Sara Johansen
July 29, 2023 at 5:33 am
Hi Rich! Putting the roll into a toy camera to rewind is a great idea! The one hiccup might be the adapter part that the roll is spooled onto while in the Holga. You may still need to unwind it off of that to get it to work into the toy camera? Hmmmm, now I want to try. It will still all need to be done in a dark room changing bag (or dark room), but it might make the winding part a bit easier.
The backing is also a great idea! You would have to trim the 35mm down to just 16 shots instead of 36, but in theory it should work in order to get super accurate frames.
Thanks for sharing! Your comment really got me thinking!!
Best-Sara
eddy
March 30, 2024 at 12:56 pm
I never understood why when you shoot 35mm in a 120 camera you do not use a blank take up 35mm cannister instead of using the 120 take up spool. They sell blank ones at camera stores like B&H. It would eliminate using a changing bag part .
Huss
November 5, 2024 at 4:09 pm
Hey Eddy
You would still need a changing bag because the 35mm film is captured/very firmly attached to the spool in its cassette. It’s not like 120 film where it just releases from the spool.