
Written by Tyler Mattas
“Can you fix my ________ (insert any film camera from plastic point-and-shoot to 1930s Contax to Fuji GSW)?” – the inevitable question coming from anyone that finds out I repair film cameras. Everyone seems to have at least one broken camera they wish they could get working.
My equally inevitable answer tends to be a nicer version of something along the lines of… yes, but I don’t want to. I typically cite the unfortunate reality that the amount of time and effort that goes into even moderate repair work on film era cameras and lenses greatly exceeds the amount that can realistically be charged for the work (except those Leica people, they’ll pay anything).
Do you really think I’m going to spend four hours servicing the leaf shutter on your $25 Agfa? Of course not. And yet… I’ll still do it on my own $25 Agfa.
So I thought maybe I’d try to enable more people to repair their own cameras. I’ll write an article about some lessons learned from years of camera repair. Or maybe something about tips and tricks you only figure out after you’ve messed up a few cameras beyond fixing. Or maybe helpful tools I wish I had bought sooner – what you can and cannot get away with not having.
After pondering these ideas for awhile though, I decided there’s something much more important to address before any of these things: the mentality required to be successful in camera repair.

The Mentality Need to Repair Cameras
If you’re of a very utilitarian, practical mindset and you’re looking at your broken $25 Agfa and trying to decide… is it worth 4-5 hours of my time to fix this thing or is it worth paying for 4-5 hours of someone else’s time to fix this thing, you can stop reading right now and just go buy a working one. $25 very well spent for the time saved and certainly cheaper than paying someone else $150 to fix your $25 camera.
If you’re one of the people that recognizes that these film cameras we all love are a finite commodity that’s never coming back, so the big picture value of that $25 Agfa actually greatly exceeds its superficial, current monetary value on the markets of the Eeee-Bays (and/or you just don’t like throw-away consumerist culture) – then hang tight because we’re going to test your commitment to that belief.


Repairing My First Camera
My first experience with putting this mentality into practice actually came with my second film camera purchase, only a couple months after getting back into film: the comically unreliable Canonet QL17 GIII, which I picked up working well at a local antique story for only $45. And work well it did, for 24 whole hours.
While out on a hike, just a few shots into the roll, I wound, pressed the shutter, and…. Several seconds later the leaf blades opened in slow motion, and then didn’t quite manage to close again. So I was faced with a dilemma. Chalk up the $45 as a loss and buy a nice working one on eBay for about $250, or try to fix the one I had with zero camera repair experience.
For me, the choice was obvious. Importantly, it wasn’t about the money, nor was it a carefully calculated financial decision. This QL17 was mine, and I wanted it to work.
What ensued was a repair nightmare fueled by inexperience, improper tools, lack of online tutorials for the GIII version of the camera, and Canon’s always terrible design and materials decisions made to save a buck wherever possible (friends don’t let friends buy Canon).
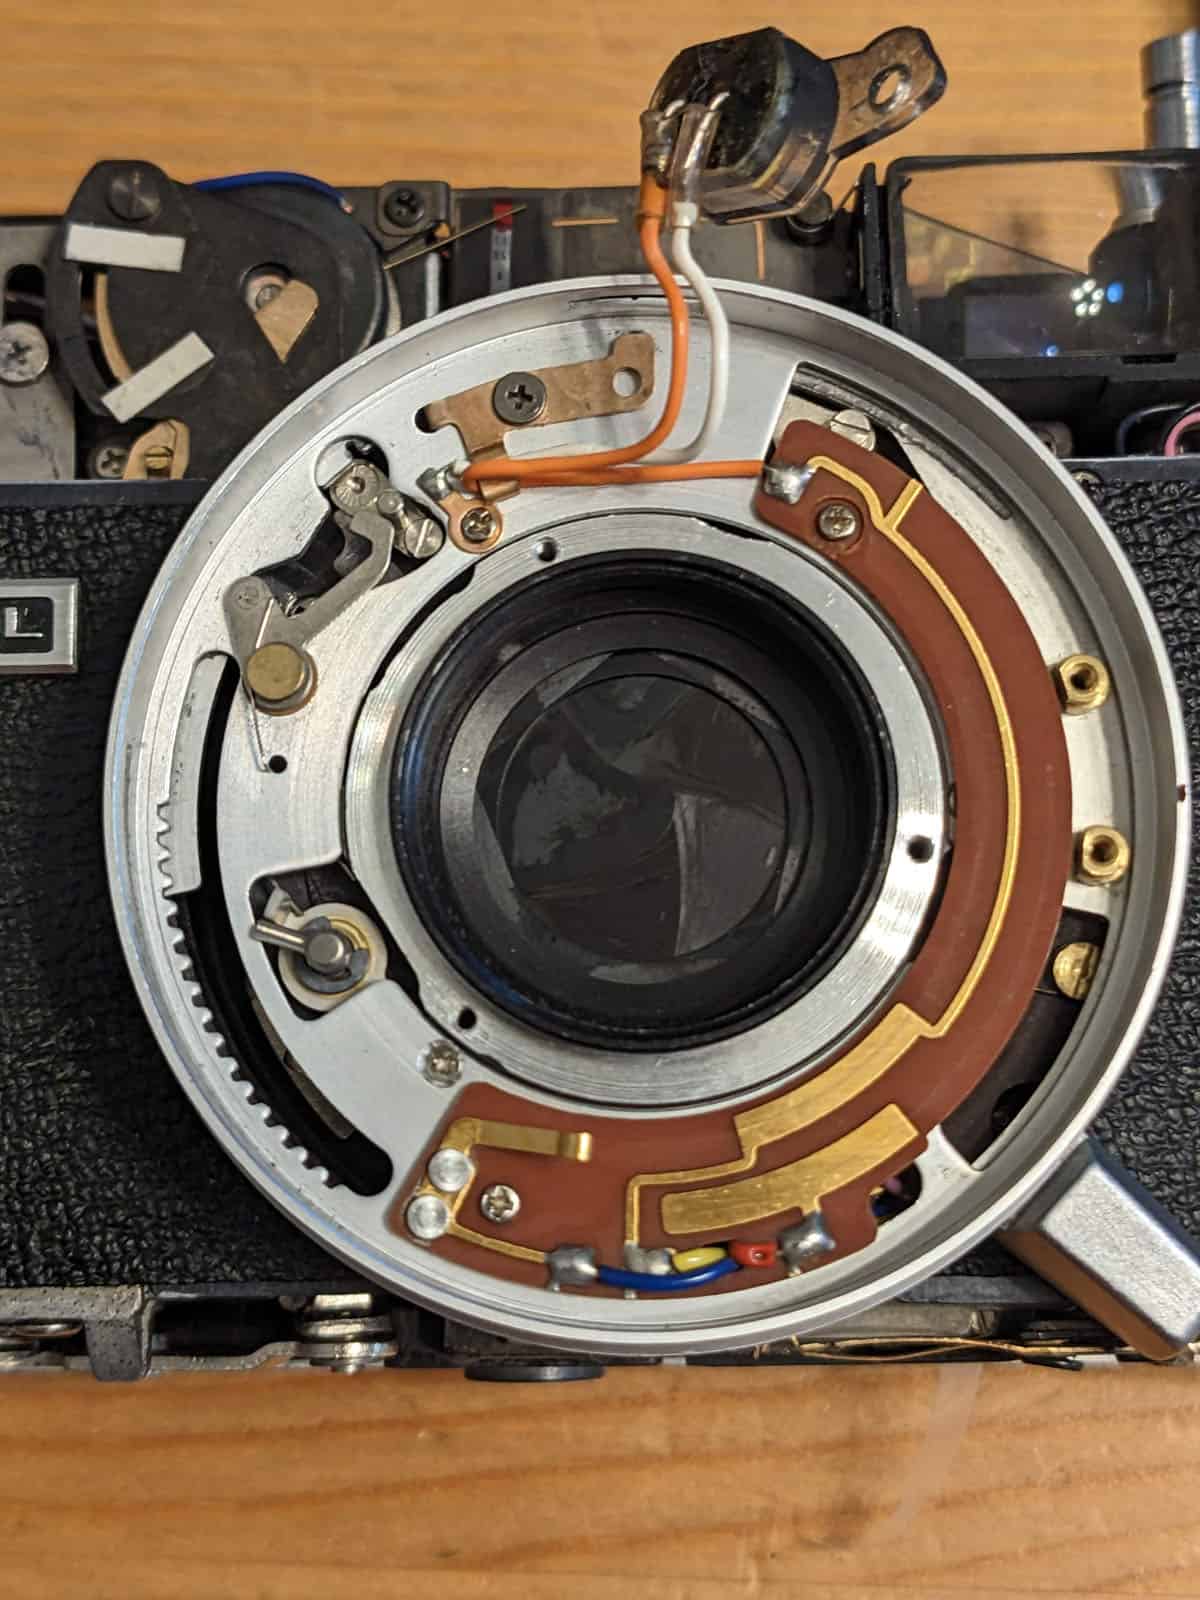
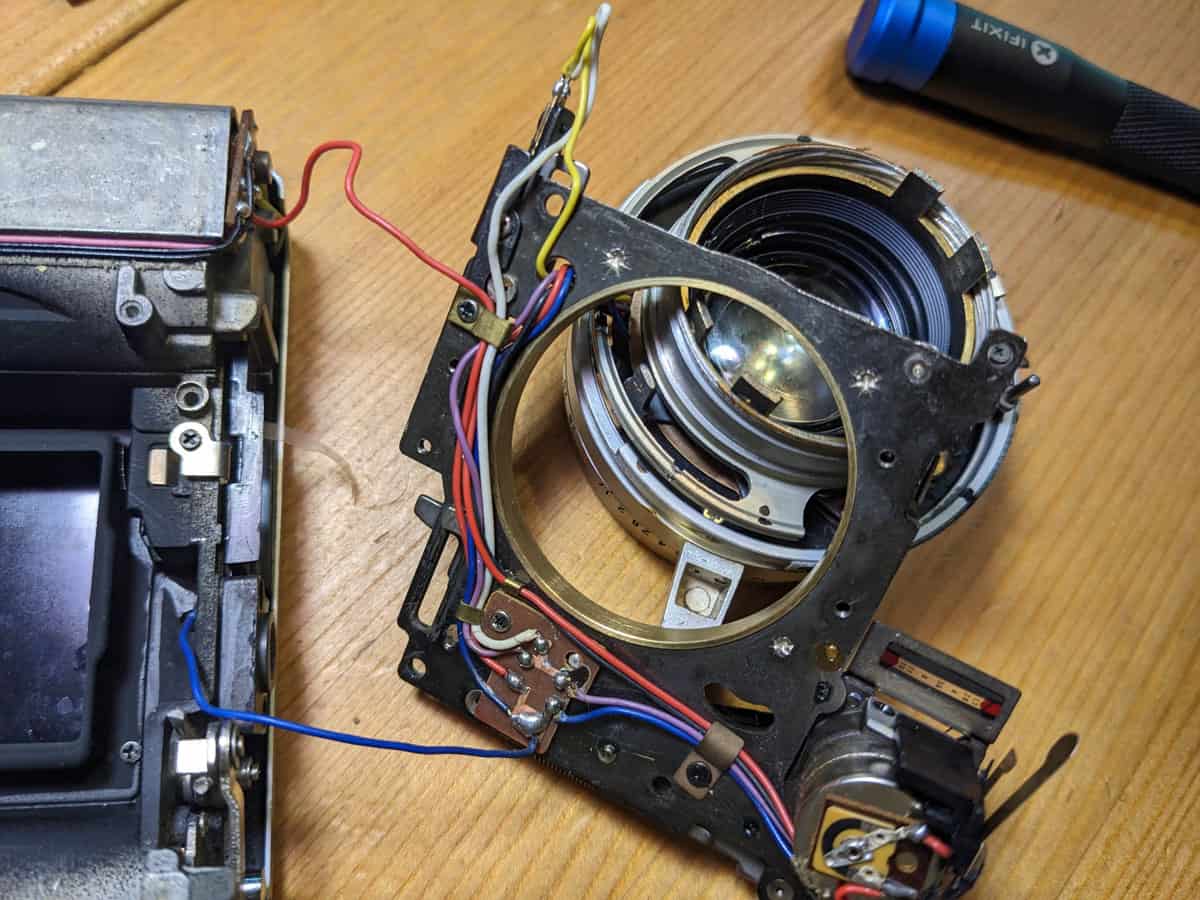
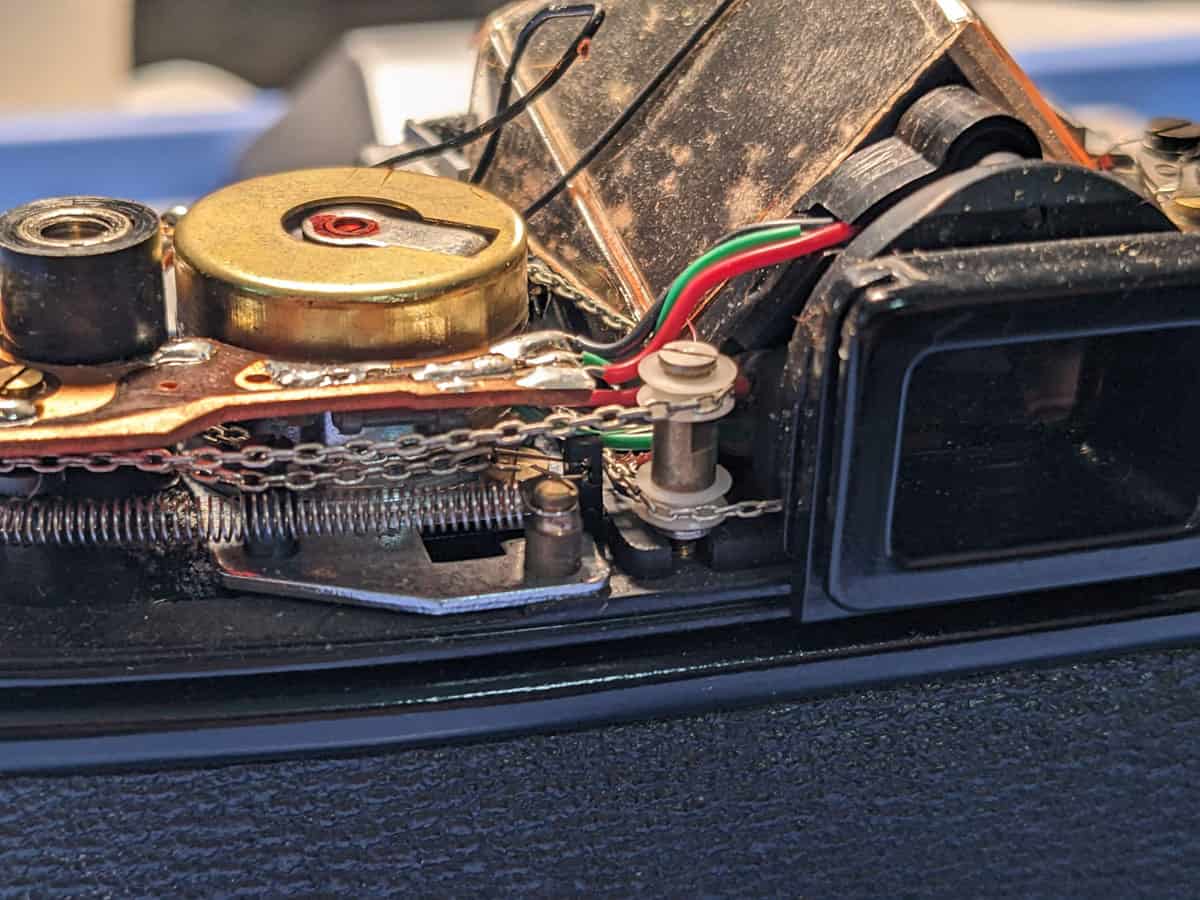
I tried the least invasive method recommended first: removing the front lens elements and wiping the shutter leaf blades clean. Didn’t come even close to working. I eventually had to go all in and peel the leatherette, pull the entire lens board off (which on this camera involves unsoldering and pulling out a bunch of wires), and disassembling the shutter and aperture assembles to clean and re-lube everything by hand.
Peeling 50+ year old leatherette is like chipping away the skin of a very unripe orange that’s been further secured with epoxy, more so than actually peeling anything. The rear lens element was jammed. I slipped, gouged and scratched things, including myself.
I often thought I documented disassembly well with photos, but then found myself having to reverse engineer how things worked or where wires attached because I didn’t have sufficient photo documentation.
All told, mostly due to lack of experience and tools, plus some stuck parts, I put over 50 hours into that camera. Not even close to worth the money savings of not buying a replacement. But my camera was now fixed, and that repair experience and all those hours of my life were now a part of that camera.
It was more special to me because of the effort and the misery. Plus, I’m the kind of person that really, really doesn’t want to be defeated by projects and undertakings. There were plenty of times the camera nearly got drop kicked into the woods, but ultimately I managed to hold myself together and always come back another day to try again.
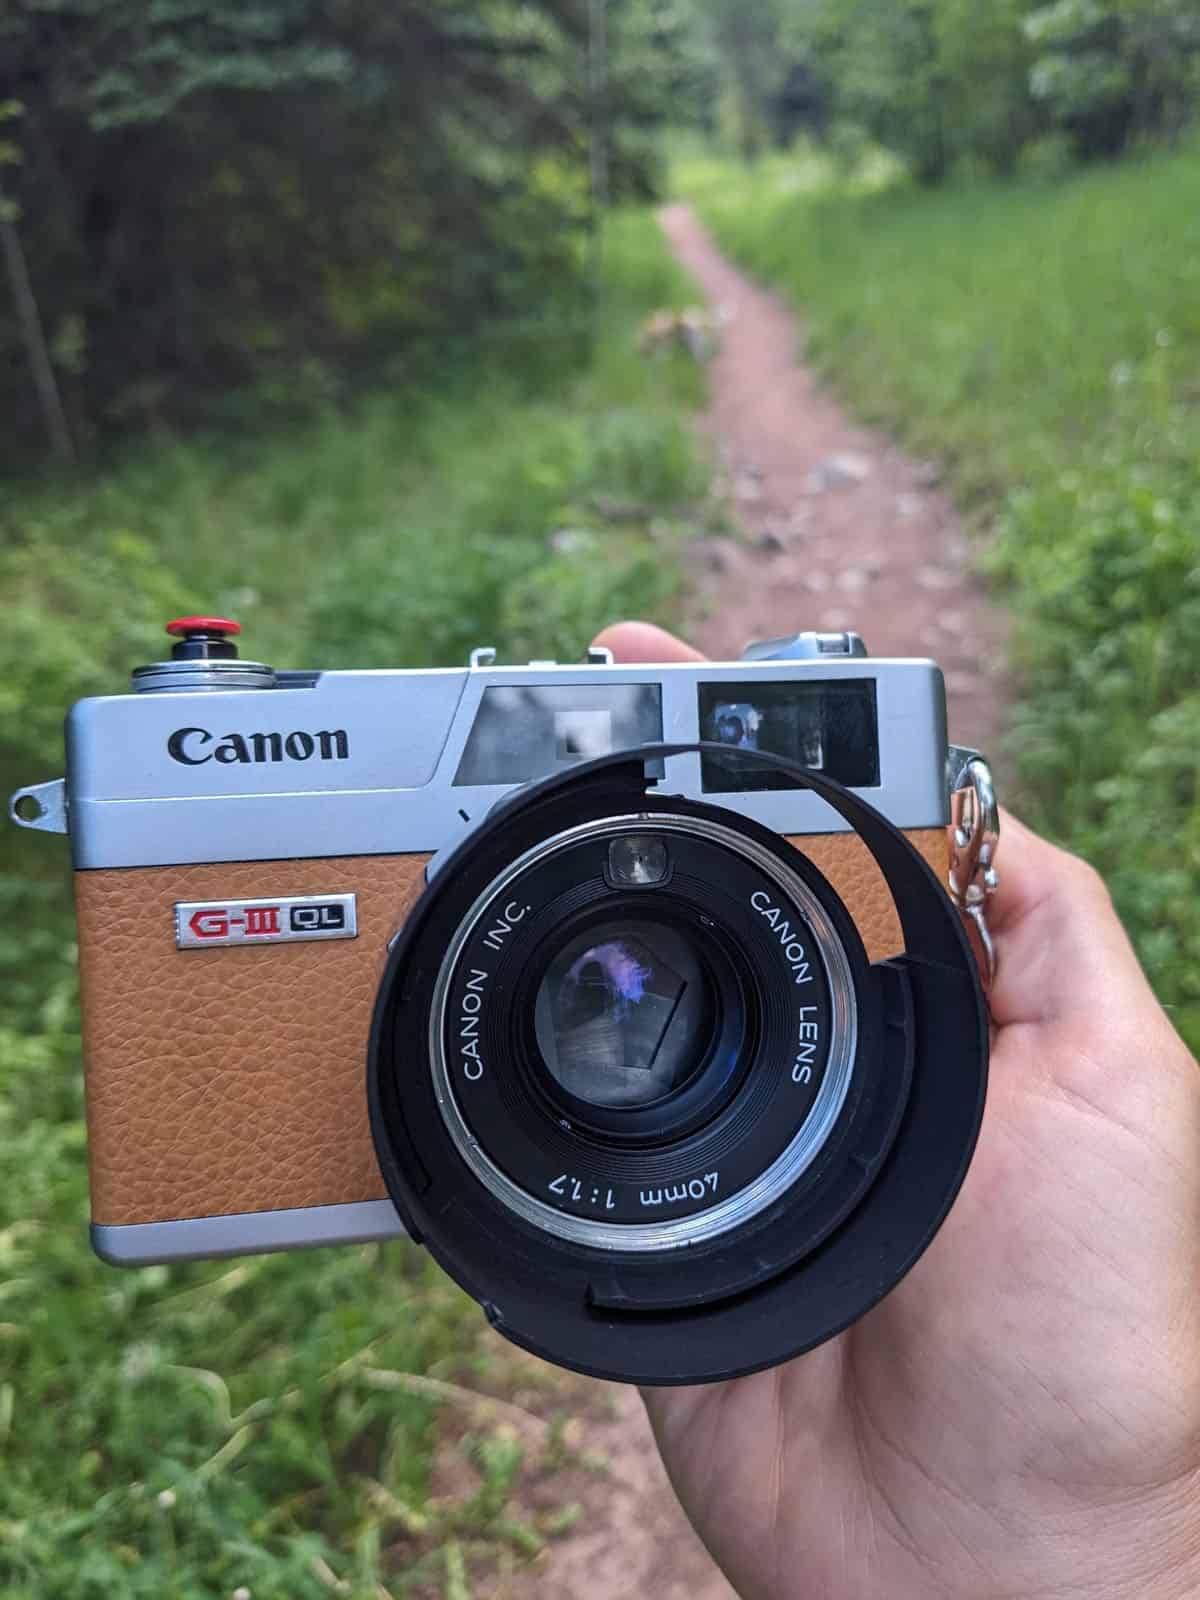
The Canonet has gone all over the place with me since then:


My Biggest Takeaway From Repairing that First Camera
That repair experience set the tone for the rest of my camera repair work.
I almost never asked myself whether the effort made financial sense – because it never did. I never took the value of the camera into account or called it quits after a certain number of hours. I simply stepped up to the unique challenges each camera brought and enjoyed the rewarding feeling of successfully overcoming them, particularly when they were something I didn’t think I’d be able to do (which was most of the time, for a long time).
It’s important to understand that as the true baseline ability and mentality required to start repairing (or more importantly, actually finish repairing) your own cameras or anyone else’s.
Even as I gained experience and got proper tools, things didn’t really get easier, I just took on more challenging repairs – like that famous Greg Lemond quote about bike racing, “It never gets easier, you just go faster.”
The Petri 7S Repair
I was grabbing film at a local camera store a couple years after the Canonet experience and a woman walked in with a bag of older film cameras, looking to sell them to the store. Unsurprisingly, this modern, digital camera focused shop had no interest in buying a bag of low value film cameras.
I caught the lady on her way out and recommend she go across the street to the film camera shop and give them a try – where I happened to be going next also. A few minutes later, over at the other shop… they also had zero interest in what was mostly plastic point-and-shoots and unpopular brands.
The women was quite exasperated that these cameras were going to go to waste and started explaining to the store manager that they belonged to her late mother and she’d hate to see them go to waste, which he… didn’t care about. At that point, I decided to leave tact aside, get out of my spot in line, and step into the middle of this transaction that didn’t appear to be materializing and offer to take a look at what she had myself and buy any that interested me – much to the annoyance of the guy from the store, even in spite of him not wanting any of them anyway.
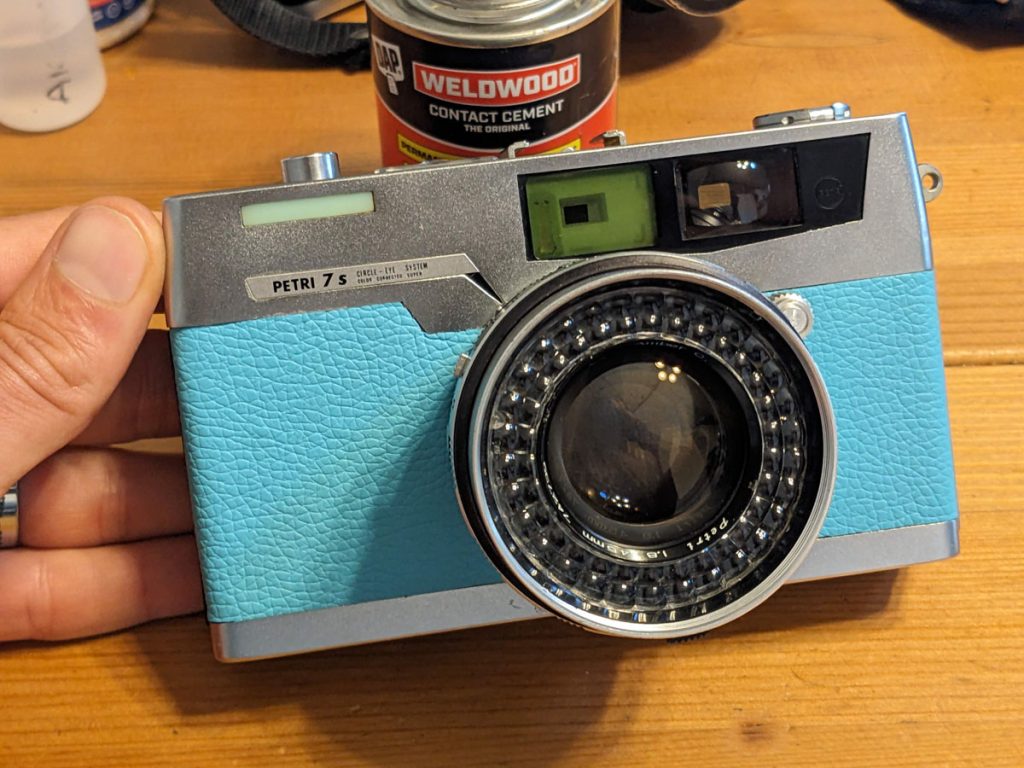
Long story slightly less long, we both gave up on the camera store and went out to her car where I looked through what she had. What caught my eye was a Petri 7S – a 1960s fixed lens rangefinder (not unlike the Canonet) that can be had for a whopping $20 all over eBay. I’ve actually never looked up how to pronounce Petri, nor do I care enough to now. I grew up with Land Before Time, so it’s always going to be Petrie for me.

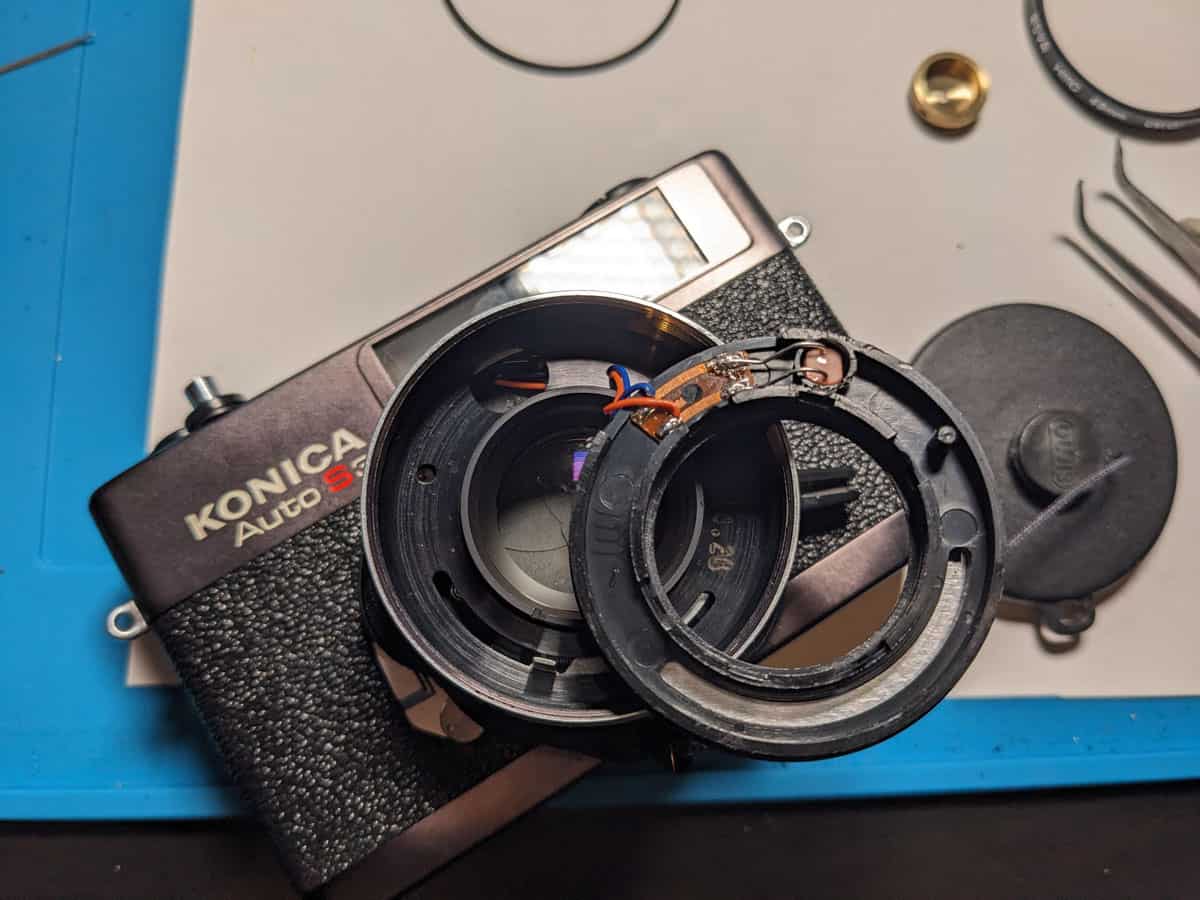
The camera appeared to be in excellent condition and came in the original box. The focus was frozen solid, but the camera worked flawlessly otherwise, and I offered to buy it. She gave it to me for free, saying she just wanted her mom’s camera to go to someone that would appreciate it and use it. And with that my fate was sealed.
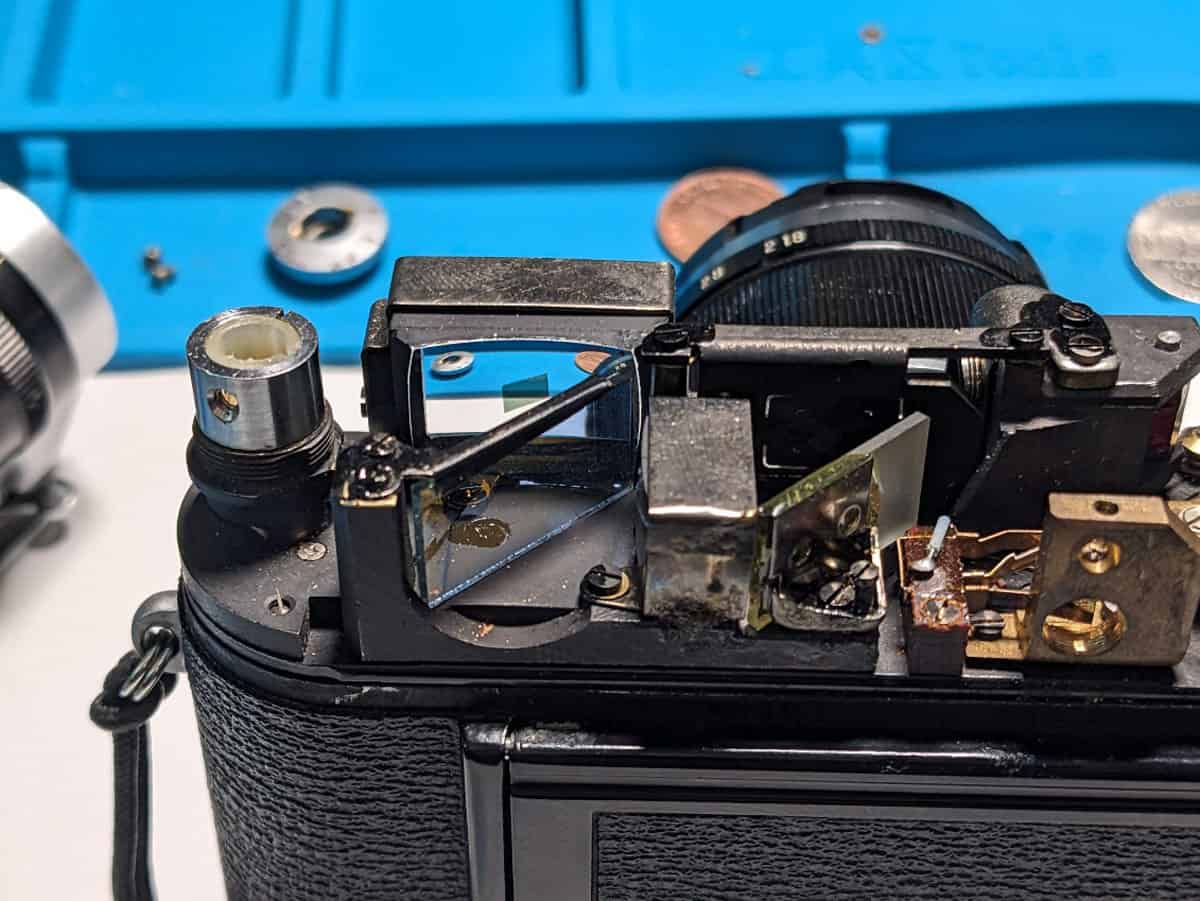
Repairing the Focus Mechanism
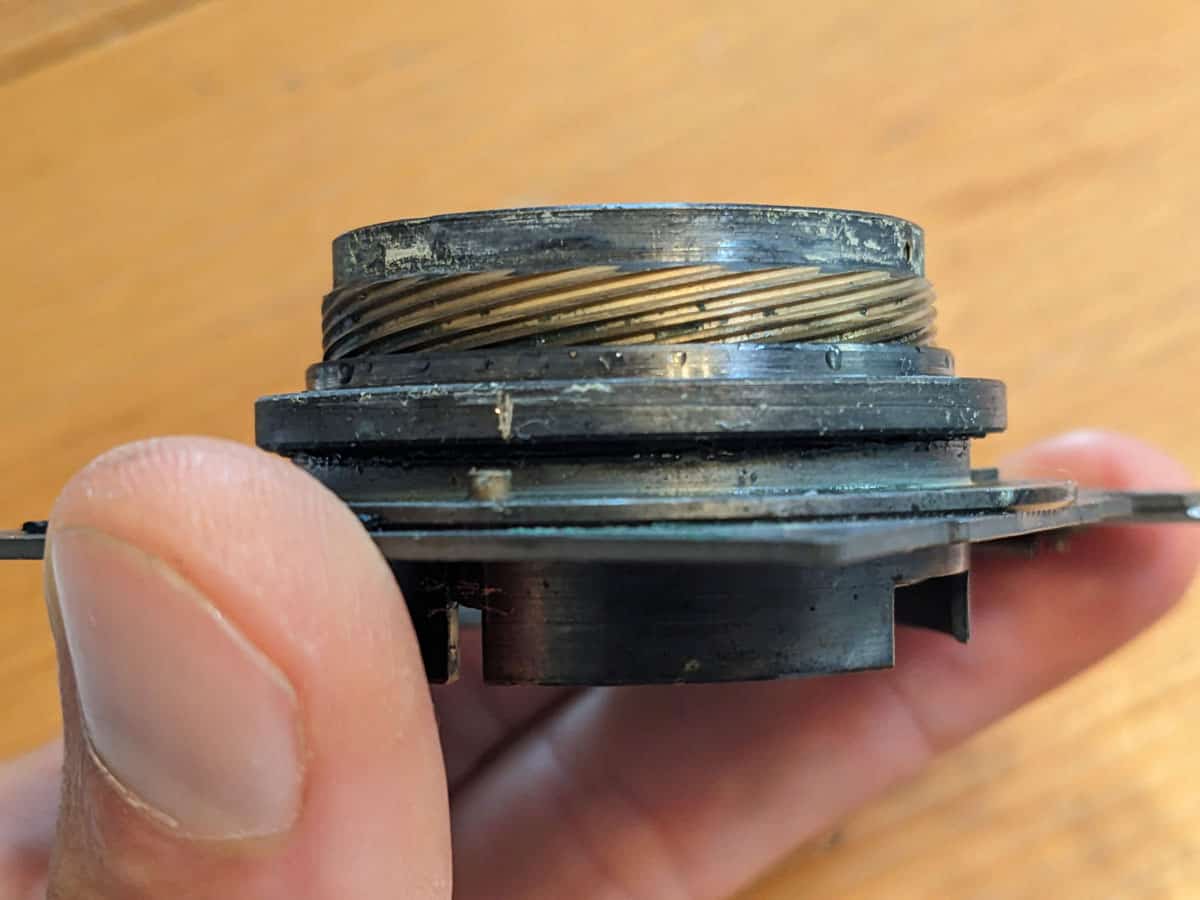
Having a bit more experience with repairs now, including having dealt with several cameras with stuck focus rings due to solidified grease, I knew what lay ahead.
These old style greases basically turn into plastic when the solvents in them evaporate over many years, gluing the threads of the focusing helicoid together. I knew I needed to pull the lens board (more leatherette peeling, yay), remove the shutter mechanism and all glass elements, and let the focus helicoid soak in some alcohol for somewhere in the neighborhood of a couple hours to overnight to turn the grease back into grease from the cement it had become.
In the morning it was… still stuck.
No worries, I’ll just add some fresh alcohol and leave it overnight again. This did – absolutely nothing. I moved from alcohol to naphtha, which did nothing. I tried lidding the container to slow evaporation and let the helicoid soak for days at a time rather than hours – nothing.
I tried regular intervals of agitation to keep fresh solvent in contact with the grease in the threads – nothing. I eventually moved to applying heat with a torch, trying to squirt naphtha into the coil threads under pressure, various other solvents – all to no avail.
I got out the lens spanner and a vise and tried using extreme amounts of force to move the helicoid even a little bit, thinking that if I could at least budge it the solvent could get further into the threads – still nothing.
But every day the perfectly functioning remainder of the camera body (now turned into a hundred small parts inside many, poorly labeled containers) looked at me, wanting to work, and the woman’s parting words kept haunting me. I wasn’t going to let her mother’s beloved $20 camera end up in the dust bin.
So back the helicoid went into the naphtha bath, lid on. Every few days I topped up the naphtha and gave things a swirl for… three months. I moved it into the sun during the day for some extra heat, brought it inside at night.
At some point, several months later, I decided today was the day. I put on my gloves, got out the lens spanner, locked it into the focus ring as best I could and turned with all the force I could summon until the lens board started cutting into my hand – and all of a sudden, it released.
Slowly at first, but then all at once it unscrewed completely with minimal effort.
So there I sat, in disbelief, partly because I didn’t actually think that thing was ever going to unscrew and partly because I now realized I lost proper focus set on the helicoid and had no repair manual to know how to get it back in the ballpark, and the camera was laying in many pieces I took apart so many months ago (and documented insufficiently, per usual) that I had no idea where many of those parts went or in what orientation.
But I also wasn’t going to be defeated on re-assembly after all those months of persevering with the stuck focus. Back to the practice of reverse engineering I went, and, a dozen or more hours later, I managed to half educated guess, half blind luck the helicoid back into the right ballpark of focus and had a perfectly functioning camera reassembled. I was able to use some ground glass taped to the film gate and a magnifying glass to get infinity focus dialed in again and properly coupled with the rangefinder.
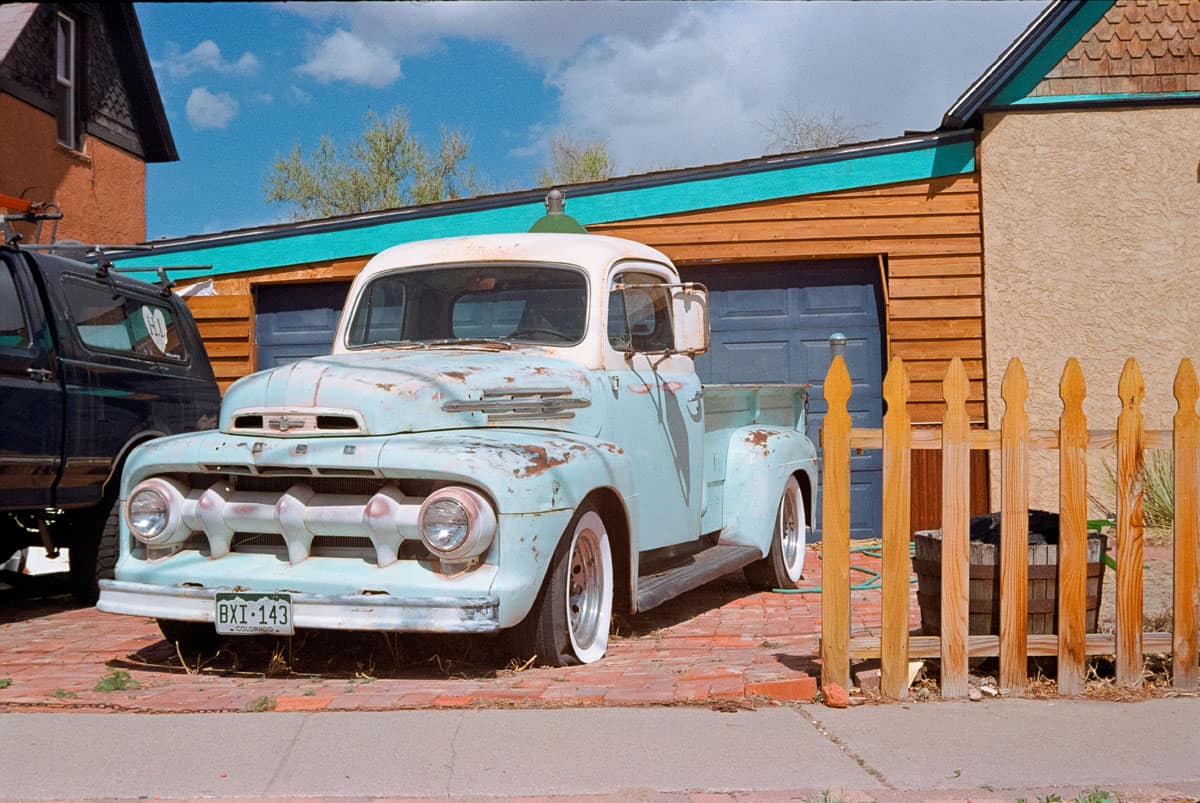
Putting a roll through that camera was probably the most satisfying roll I had shot since the original Canonet repair. The experience of being able to actually use that camera and knowing what I had gone through to get it there completely superseded the amazingly mediocre user experience and poor tactile feel of the cheaply built camera.
It also felt great to know how happy the lady who gave it me would have been, and I wished I had gotten her contact info so I could have sent her some photos from that first roll.
Final Thoughts
So there you have it – if you really want to start repairing cameras, step one is actually being able to find some amount of enjoyment in the suffering and frustrations that come with it.
Maybe this is where film photography meets philosophy. Anything worth doing is going to take some amount of effort and the feeling of reward and enjoyment afterward is often directly correlated with the amount of suffering and difficulty endured in the process.
If you’re looking to repair cameras for financial gain or you’re looking to take the most financially logical path to getting a working camera, repairing probably isn’t for you. If you enjoy a mental and often physical challenge, and you enjoy the process of persevering through frustrations and seemingly constant impending failure – go buy something at a local antique store that’s likely to break soon and let your journey begin.


Thank you so much, Tyler! Tyler is a regular contributor here at Shoot It With Film, and be sure to check out his other articles, like The Only One of Its Kind: Voigtlander Bessa R4M Review.
You can also find more of his work on Instagram here, and find his eBay store here.
Leave your questions about repairing film cameras below in the comments!


Leave a Comment
Shoot It With Film on Instagram


Blog Comments
Adam
March 20, 2026 at 11:35 am
This is a great well written article, and I likes the photographs.
There are myriad photo courses out there, a week away in the Croatian mists, bucolic idylls, dawn deserts with frisky photons, all led by Thorson Angulon or Anna Morphic who guide you in accents of scandi moire, urging you to use the light Luke . So I pay the not inconsiderable sum, for travel accommodation coaching, and carrots for mistletoe. These can be enjoyable sojourns if the group gels, but you just need one with a mis-inserted telephoto and its a long week. What I want is week learning how to repair a camera, to acquire this mentality, punctuated by exquisite nosh , and whiskey sagas of Contax Shutters . Just set one up and I will be there………..Thanks for the article .
John
March 20, 2026 at 11:42 am
I found this article very well timed. As I sit and ponder if I want to to undertake figuring out why the shutter button on my 20$ antique shop Canon ql17 is worth it. I frustrate easily with these kinds of things, but, it’s a challenge, and how cool will I look to my kids when I say “see, it works perfectly now!”
Dennis
March 20, 2026 at 11:49 am
Tyler, thank you for the camera repair article. Very well done. I am a Hasselblad V user. I love my Hasselblad. Twice it had broken down and I have had to send it to Portland for repairs. The repairs are not horribly expensive, but they keep it up to 4 months. I would like to be able to do repairs for my self. But it seems daunting. Any thoughts?
Tyler
March 28, 2026 at 10:33 am
Thanks Dennis. It’s a tough call because it all depends on what the repair involves. The V system bodies are pretty easy to work on because they were clearly designed with servicing in mind and they’re physically large, so the parts/screws are all pretty large and easy to handle. If you’re at least moderately mechanically inclined and have the fine motor skills necessary, I think there’s two main things to consider before diving into any repair or service:
1. Do you have/can you get a factory service manual so you can do disassembly/reassembly in the correct order – or, barring this, do you have the mechanical aptitude to reverse engineer how parts are supposed to work/fit together in case you unknowingly get things out of sequence. Sometimes getting the parts back into place is only half the battle. They often need to all be correctly oriented to each other and this can be a pain to figure out without a manual telling you exact reassembly order or issues to watch out for.
2. Is the repair going to involve replacing broken or worn parts. This is actually the primary reason I don’t work on other peoples’ cameras – I just don’t have enough spares laying around. If some small part is broken or worn out, the repair shop can probably pull it from the 20 spare parts bodies they’ve accumulated over the years and sell it to you for a few bucks. If you have to replace that same part, you might have to buy an entire parts camera to pull it off of – which could end up costing as much as paying someone else to do the repair. Granted, you now have a spare body in case other parts break, but this is worth running some numbers on first if you think something is actually broken vs just needing a clean and lube.
Brett Rogers
July 4, 2026 at 2:24 am
Hasselblads are a design that use a lot of custom fitted parts. Before you even consider taking the mechanism out of the body shell, you must have a strategy for correctly setting the alignment of the lens mount to the film plane correctly. Otherwise your reassembled camera will not produce images with maximum sharpness. The factory produced an alignment tool. There are other methods which will work, but you must have a plan before *commencing* disassembly.
Christopher Welch
March 23, 2026 at 10:12 am
Thanks for writing this article on camera DIY repairs. It’s interesting you fixed a Petri 7s and I’m glad it was successful. I bought one on eBay for $10 and it worked a whopping 2 hours. One of the leaf shutter blades got off track. I attempted to fix it after failing to find anyone that worked on them. I took the lens apart and got halfway and stopped when I got down to a lot of little parts I couldn’t figure out how to remove. I also couldn’t get it back together the way it’s supposed to go, despite documenting each layer with pictures. And somehow the film advance isn’t connected to anything now. I have a FED 3 that needs a new shutter curtain and I’m considering taking it apart just to see if I can replace it since I only paid $35 for it, and it’s at least $200 to fix at the only shop in North America I found that will work on them.
Tyler
March 28, 2026 at 10:43 am
Just a couple tips for future repair efforts…
Leaf shutter assemblies aren’t always the nightmare they seem like once you realize the blades typically come out from the rear and not the front. Fire the shutter to make sure it’s not cocked, then always first try to remove the entire assembly from the camera body via the back, usually held in place with a large retainer ring around the rear lens elements. Do your best to identify what screws/plate hold the aperture blades in and don’t mess with them unless you need to. The front typically only needs to be taken down as far as the speed ring coming off. All the mechanics on most leaf shutter assemblies stay attached to the main plate and only need to be removed for heavy cleaning or replacement. You will often have to help a spring get back into the correct position on reassembly though.
If you’ve gotten stuff out of sequence, it can be quite a task to get it back into sequence without a repair manual. Just have to start by trying to reverse engineer how all the gears and levelers interact with each other. Lots of trial and error involved, unfortunately.
Artem
March 23, 2026 at 12:52 pm
Thanks for the article. All you write makes sense. I own 3 film cameras and all 3 required repair:
the first one was Rolleiflex 1950. Even though I didn’t see anything unusual in the lens I noticed that the pictures I take are not so sharp. When I examined it at an angle, I found traces of fungus between the lenses. So, I made a tool to remove one lens, cleaned the surfaces and got a different camera.
The second one was Contax I, 1930 with a broken shutter ribbon – this was on the edge of my skills because the ribbons have to be wound onto a spring-loaded barrel and placed in a tight space. This camera kind of works after repair – at least one shutter speed band is available.
The third one is Voigtlander Bessa 1930 – this one was easy, it was rusty and scratched the film, but it became operable after a good cleaning, polishing and painting.
Long story short – if you are not afraid to ruin the camera, repair it, but document each step and put the screws/parts on a signed sticky surface or something like that. Use magnifying glass and a good source of light. Use the right tools. Cover the lenses if you can scratch them by working near them/on them. Watch the videos – most probably, someone has already done it and fallen into the common traps. Good luck!
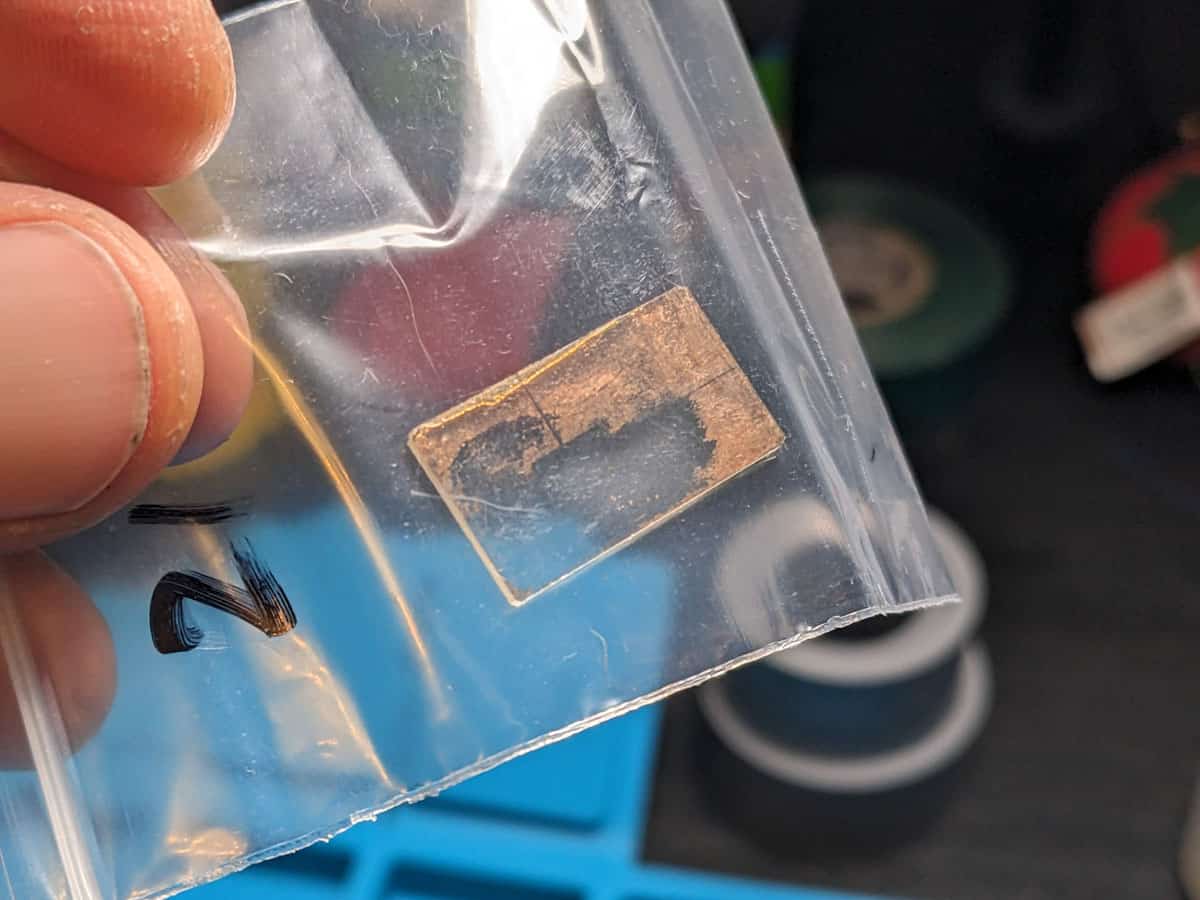
Brian Schafer
May 24, 2026 at 5:40 am
I am curious where you found CdS sensors for sale to find a replacement for that Konica Auto S3! From what I can tell, newly made CdS sensors are pretty much impossible to find. Can you share your source?
Tyler
May 28, 2026 at 9:13 am
I found them on eBay. Try searching “cds photoresistor”