
Written by Ryan Jones
It is April, 2021. The world is irreparably changed by global events far beyond your control. You’ve been stuck at home with your parents for an indeterminate number of days, and, having run out of anything else to do, you venture into the attic to dig through dusty boxes of god knows what.
What’s this?
An object resembling a camera is peaking out from the corner of a box, caked with a thick layer of dust. It is a camera!
But there’s no screen on the back? There’s a lever on top that makes a deeply satisfying ratchet followed by a clunk of engagement when it is pushed to its zenith.
It says “NIKKORMAT” on the front of it… what is a NIKKORMAT? I’ve heard of Nikon…

This may resemble many young folk’s first interaction with a film camera. Others may have ceremoniously received a grandfather’s Rolleiflex, purchased while stationed in Germany. Still others may have stumbled upon a camera in an antique store.
Whatever it may be, let’s face it, film is hot right now.
To listen to me speculate as to why that may be, and my philosophy on repair and preservation, check out my previous article in 35MMC.
I’m writing here to offer some tips if you have recently acquired a film camera that may need repair. These tips will include steps you can take at home to make simple diagnostics and what to expect from the repair process.
For the seasoned career film buffs, recently initiated, or bright green and uninitiated, gather ‘round as I welcome you to what is a beautiful and gratifying, if expensive, hobby.

Isolating the Problem with Your Film Camera
When you really think about it, the repair process truly begins at home, the moment the owner decides they are willing to invest in the wellbeing and longevity of their camera.
Knowing what you are getting into ahead of time and doing some simple at home diagnostics can be extremely helpful in getting an idea of what a repair may cost and can accelerate the diagnosis for the repair tech.
The most helpful way that I have found to look at camera repair is as follows:
All cameras exist to fulfil one simple purpose: to expose a light sensitive material to an organized amount of light, for a predetermined period of time.
All other details are ancillary.


Diagnosing Fungus and Haze on Your Camera Lens
By looking at the camera in this way, we can isolate the fundamental variables that must be assessed. No matter what kind of camera it is, it must have something to organize the rays of light into an image. This is usually a lens, with the exception of pinhole cameras.
Lenses are a series of spherical segments of glass arranged in such a way that they project an image onto a flat plane.
When lenses sit in environments without temperature control for long periods of time, the air around and within them expands and contracts and moisture can condense on their internal and external surfaces. This moist surface can become host to mold and fungus.
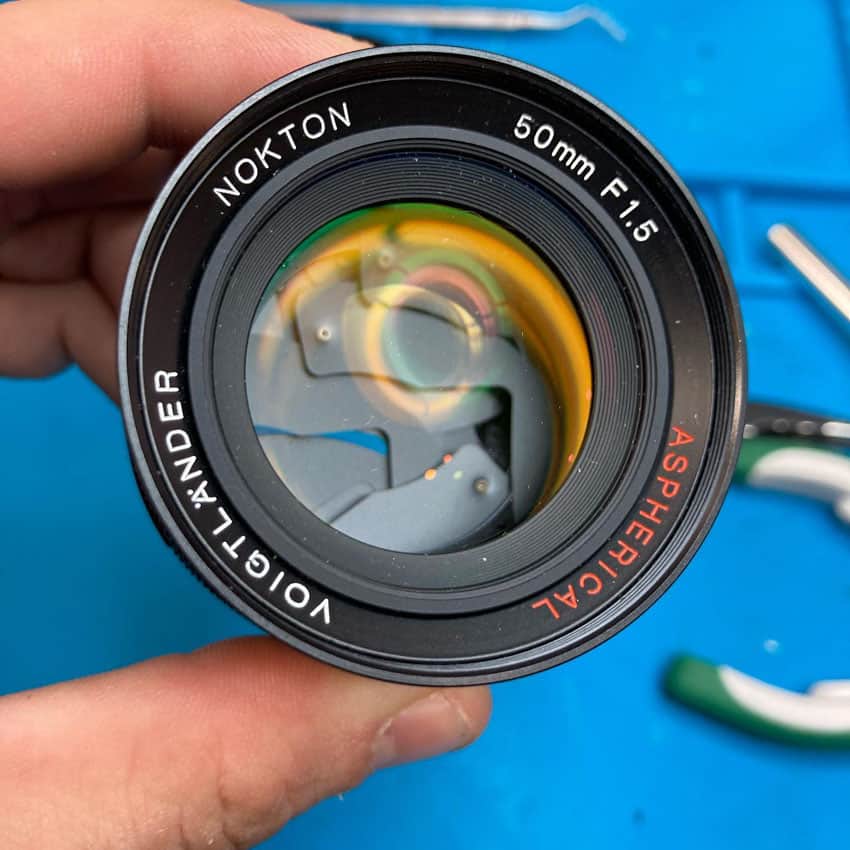
If this process of condensation and evaporation occurs repeatedly, say, with the seasons over 20 or 30 years, haze from microscopic particulate and minerals can accumulate on the surface of the glass.
I tell all my clients there are two basic kinds of fungus/haze: the kind that wipes right out, and the kind that does not. The only way to know is to open the lens up and find out.
The kind that does not wipe away is usually the kind that has interacted with the optical coating of the glass and eaten away at that coating and left a physical signature in the glass. Sadly if it has gotten this far, not much can be done.
It is important to know, however, that while haze and fungus are yucky and very irritating to look at, there are many lenses with minor fungus and haze that, when used with a lens hood and a keen eye towards the location of the sun, can still make perfectly stunning images without issue.

Should You Use a Flashlight to Diagnose Lens Fungus?
I’d like to take a moment to address a pet peeve of mine. I hear and see many folks who hold a flashlight to the rear of a lens and look through it, bemoaning all of the dust and debris the light picks up.
Let’s break this down. Dust happens. Dust does not impact the optical rendering of the lens.
Is it annoying? Absolutely.
Does it look 1,000 times worse when you back light it with an LED flashlight brighter than the sun? Absolutely.
Putting a flashlight behind a lens is useful in the sense that if there is a detrimental amount of haze or fungus, it will scream bloody murder at you, and you will not be able to miss it.
Putting a flashlight behind a lens will also pick up hundreds of particles of dust that you didn’t know were there until that moment, and that you are now fixated on eradicating.
This is all to say, if your lens has a bunch of haze or fungus, I can and will get it out for you. I do not and cannot however remove all specs of dust from a lens, and a flashlight does not accurately simulate any optical situation beyond taking a photo of the sun.
*Gets off soap box.

Checking Your Lens for Aperture Issues
Next, most lenses have apertures to control the amount of light and, for compositional reasons, the depth-of-field, or the amount of physical space that is in focus.
Some very simple lenses have physical slots with circles that go into them called Waterhouse stops. Most apertures you will encounter are diaphragm style composed of a number of “blades,” or very thin flat pieces of metal that are arranged in a concentric and can open and close to vary the diameter of the hole.
To pick up on the example from above, say you found an old Nikkormat with a 50mm f/1.4 lens on it. This lens has an automatic diaphragm that closes down when the camera is fired.
By first removing the lens from the camera and then turning the aperture ring, you should be able to physically observe the aperture moving inside the lens.
If you adjust it to its smallest setting, f/16 or f/22, look at the back of the lens. On Nikkor lenses and many others, you will see one or more small tabs protruding from the rear of the lens mount.
Gently nudge this tab in any direction until you observe a movement resulting in the aperture. If the tab is springy and lively, forcing the blades to open and snap closed with speed, the diaphragm of the lens is healthy!
If you observe oil on the blades of the diaphragm, if the blades move sluggishly or not at all, or no matter what f/stop you select, you do not see any blades, then it is likely your aperture will need to be cleaned and or repaired.

Diagnosing Shutter Issues
The “predetermined amount of time” in the fundamental function of a camera is carried out by a shutter. This timing mechanism can be as simple as the photographer removing a lens cap, counting to ten, and putting the lens cap back on.
These days you will most likely encounter focal plane shutters and leaf style shutters.
Focal plane shutters dominate 35mm and medium format, while leaf shutters are found in many early 35mm as well as most all large format and some lens mounted medium format shutters from the likes of Mamiya or Hasselblad.
When approaching your camera’s shutter to test its health, the timing mechanism is the first thing to check. Let’s look back at the Nikkormat.
This camera has a blade style focal plane shutter where the blades travel up and down. It uses an escapement mechanism to delay the timing for the slow speeds.

For this and any other camera, set it to the longest shutter speed available, without setting it to “B” or Bulb. This is usually 1 second, sometimes ½ second.
Execute the shutter.
If the shutter is healthy, you will hear a clunk of the shutter opening, a distinct buzzing or whirring of the escapement timing out, and a clunk of the shutter closing.
In many cases you will hear the opening clunk, but no buzzing. This means the shutter is opening but the escapement is dry and needs lubricating.
Sometimes you will hear the first clunk, a bit of a buzz, but the buzz dies out feebly and no second clunk occurs. Same condition, needs lubrication.
The above descriptions also apply to leaf shutters.

Now, let’s test the high speeds, set your shutter to the fastest possible speed. Usually 1/500th, 1/1000th.
Execute the shutter.
You should hear what is perceivable as a single sound. These are the blades dropping in sequence, one very quickly after the other.
A common issue with old focal plane shutters is shutter capping, or when both curtains of the shutter travel at the same time across the focal plane, resulting in partial or zero exposure.
In many cases, you can see this with the naked eye. While you have the camera on the fastest speed, with the lens off, open the back of the camera and cycle the shutter while holding it between your face at arms length and a light bulb or the sky.
If you see no light at all, the shutter is capping quite badly. If you see a section of the frame but not a whole frame, it is partially capping.
From here, step your shutter speed downward until you see a full frame and take note as to when it occurs.
If it occurs when you go from 1/1000th of a second to 1/500th of a second, it is not severe. If it stays dark below 1/250th, fairly major curtain or timing calibration needs to occur.
This is also a good time for cloth focal plane shutter owners to look for tiny pin holes of light in their shutter curtains. This means the rubberized coating of the shutter is dry rotting and will need to be patched or the curtains replaced.
Leaf shutters thankfully cannot cap like this, but they suffer from a host of other issues, the foremost just being dirty blades and escapements that make them hang open.
PSA: lighter fluid applied directly to the blades of a leaf shutter is not good.

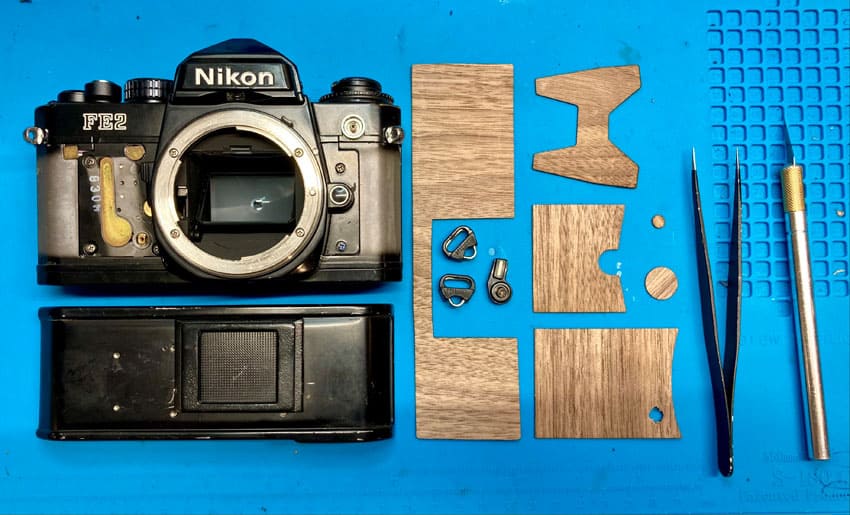
Issues with Transport and Advancing the Film
By transport, I refer to the job of moving the film from one frame to the next. In later, more complex cameras, wise-guy engineers figured out how to make the advance stroke achieve a bunch of important tasks all at once.
When you advance the Nikkormat, the lever:
- Moves the film
- Resets the potential energy of the mirror and diaphragm drive spring
- Raises the shutter curtains back to their top position
- Resets the potential energy of the shutter drive spring
It is pretty incredible all the tasks that are completed in such a simple movement.
Back in the day, most cameras required you to tick off every item in that list individually. You had to charge the shutter, move the film with a winder, reset the aperture position, etc.
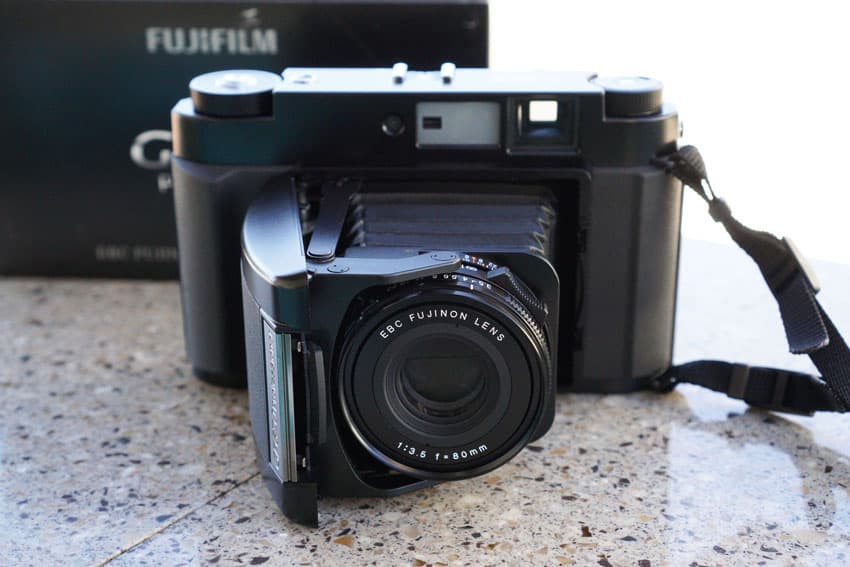
In some medium format cameras, there is a little window in the rear of the camera that you read the frame numbers on, indicating when to stop advancing. I’m a fan of these because they don’t need fixing.
In many later medium format and 35mm cameras, there is a frame counter mechanism that automatically arrests the movement of the advance lever when you have gotten to the next frame.

Because these systems are complex enough that diagnosis at home is fairly challenging, I offer these guidelines that can be applied to all cameras to assess the advance mechanisms.
First, hit the shutter. Many folks have totaled cameras thinking they were jammed because they were actually just cocked and needed to be shot to allow the lever to move.
Second, firmly, but gently push the advance lever as far as it will let you, and release.
If there is ANY “squishy” quality to the advance stroke where you feel an increase in resistance, stop immediately.
Above all else, NEVER force the advance lever.
All cameras require a bit of force to add the potential energy back into the system to make another picture. Think of the force it would take to turn a well operating door knob, squeeze a binder clip, or turn the key of a car’s ignition.
Any more than that will bring harm to the camera and it likely has a jam in the transport mechanism that needs to be cleared.

Impact Damage to Your Camera
If you have made it this far, you are beginning to understand just how complex cameras are. They are doing an innumerable number of tasks all at one time. It is a miracle humans figured out how to make them at all!
Now, you can also likely imagine how messy all these variables become when you add impact damage into the mix. Impact damage is so sinister because it is an assault to the structural integrity of the camera itself.
Many cameras can take a fall and appear 100% unscathed, and, for some reason, they just won’t work. This is because the geometry of the camera itself has been compromised.
All of the individual systems of a camera live in different parts of their architecture. The mirror and the bits that are responsible for the movement of the mirror usually live in and on what is called the “mirror box.” While the shutter of most cameras are usually affixed to the “chassis” or frame of the camera.

These two parts are often independent of one another in their construction, meaning the mirror box is usually mated to the camera chassis and the two systems interact. If the geometric relationship of these to systems is changed by even a millimeter, the entire camera can cease operation.
This millimeter can be caused by a healthy fall but many not be physically perceptible to the human eye. This is the worst kind of impact damage because it makes diagnosis extremely challenging.
The other kind of impact damage is the kind where the camera most certainly DOES look like it fell off a ladder and there are clear signs like dents, broken plastic, or glass.
The usual remedy for impact damage is full replacement of entire systems.
What you should know going into an impact damage repair is that it is not going to be cheap, and it is not going to be quick. Which brings me to the final section.

Setting Your Expectations with Camera Repairs
The closer a camera is to working, the faster it can be repaired, the fewer (if any) parts it will need to be repaired, and the less you will have to pay to get it working again.
There is a spectrum of use and abuse, and where your camera falls on that spectrum usually determines how much it will cost to get it working again.
If your camera has been dropped in the ocean, run over by a car, dropped off a ladder or from a height greater than 5 feet, stored incorrectly for more than 30 years, it is probably time to consider it as a display piece rather than a working camera, or be prepared to spend far more than the market value of the camera itself on the repair.
If your camera is in the opposite boat and is clean as can be and you’d like it serviced to ensure its longevity and health, you will fall into the “base rate” category of pricing where you are mostly paying for the expertise and time it takes to lubricate and calibrate the machine back into specification.
If your camera falls somewhere between these two conditions, meaning one or more systems needs significant work, but overall it has good bones and is very worth repairing, you will pay in the middle.

I am always honest with my clients when a camera will cost more than it is worth to repair. In these cases I inform the client of this reality and allow them to make the call because I have had countless clients in the past authorize a $300 repair on a $125 camera because it has sentimental value.
You can go buy a Nikon F2 in unknown condition on eBay for $150. Or you can pay me $225 to get the one your father bought in Vietnam working again because it means a lot to you.
I respect and honor your decision either way because I recognize that these objects are imbued with meaning far beyond their material value.
By most standards they slipped into obsolescence before I was born, but not to their owners, and that is why I’m here to keep them working.

Thanks so much for reading and please check out my business on Instagram @rj__repairs. I have recently announced my plans to build a repair facility and team, and you can stay up to date on my progress there.
I also do frequent camera giveaways and generally share my repair work as it is happening!
Thank you so much, Ryan! You can connect with Ryan through his website or Instagram.
If you have questions about the camera repair process, leave them below in the comments, and if you’re looking to have a film camera serviced, be sure to check out Ryan’s repair shop!


Leave a Comment
Shoot It With Film on Instagram


Blog Comments
AstroBot
June 10, 2022 at 11:02 am
All I can say is THANK YOU for doing this valuable work! There are too few people like you these days with these skills, Thank you again!
Jason
June 10, 2022 at 11:23 am
What a timely article! I was given a Minolta XD-11 with power winder that belonged to my grandfather. I believe it is in decent condition, but could use an overall, I’m sure. Now I know a place I can send it.
William
June 10, 2022 at 11:26 am
Hi. I really enjoyed reading this post. Most of the knowledge I have already absorbed in my 10 years collecting and using film cameras, but still appreciated the writing style and experience. Well done.
William
P.s was hoping you were based in the UK when I checked your site
Luna Moth
June 10, 2022 at 1:36 pm
Such a great article!! Witty and informative 🙂 how talented can you get?? 💖💖