Written by Ryan Seabrook
Some disappointing film slides arrived in the post this week, an ugly jumble of well exposed and limp, underexposed frames.
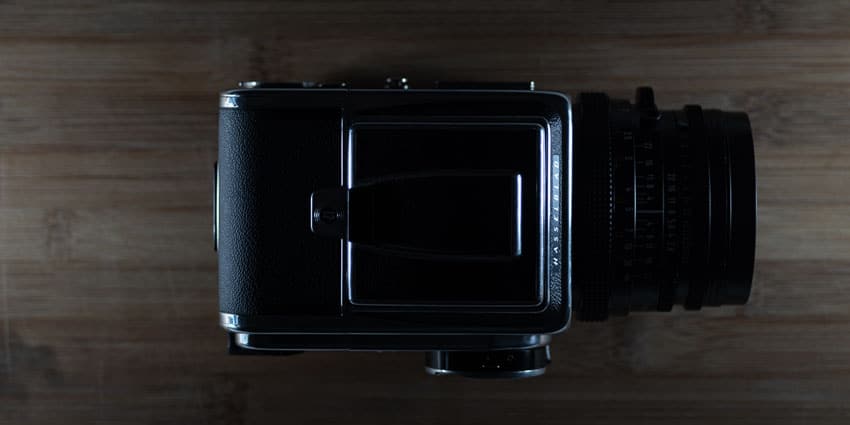
Until recently, I’ve been shooting monochrome negative film with wide exposure latitudes, masking a suspected problem with my camera – a medium format classic, the Hasselblad 500CM and Carl Zeiss 80mm lens.
Presuming all was well, I shot a roll of color slide film, which does not take kindly to incorrect exposure.
Fortunately, I keep a basic journal detailing the shutter speed and aperture for every shot taken, which highlighted a potential timing issue with the shutter speed of 1/8 second (125 milliseconds), leading to the underexposed frames.
Before paying to have the lens serviced, I wanted to assess the scale of the issue – if only a small subset of shutter speeds were affected, I could then take note and adjust my future exposures or ignore those speeds entirely.
If you’re not sure if you’re dealing with a shutter speed issue, check out this article on assessing your film camera for what repair issues it may need.


Using Audio Waves to Test Shutter Speeds
Having spent all my money on a Hasselblad, I didn’t feel like shelling out for a professional shutter speed testing device. So, armed with the equipment I had on hand, I decided to devise a rudimentary measuring technique to highlight any substantially erroneous speeds.
For this method, I used an audio recording to measure the shutter actuation. Then, I used a visual analysis of defined peaks along the waveform as the shutter snaps open then closes to measure the shutter speed.
The beauty of this method is its simplicity, requiring only two items; the camera and means of recording audio (Audacity in my case).
I also decided to use a tripod and shutter release cable to better position the lens over my laptop.


Equipment Setup
I took the offending Hasselblad 500CM and Carl Zeiss 80mm f2.8 CF T* lens, removed the A12 back, and mounted the camera onto a tripod above the built-in microphone in my laptop.
With Audacity open, and a shutter cable release attached, I was ready to begin testing the lens.

Shutter Speed Testing Method
- Set up the camera with the shutter close to the microphone.
- If present, the mirror lock-up feature reduces noise enabling better isolation of the shutter.
- Begin recording, release the shutter, stop recording.
- Expand the waveform and identify the time between the open and close peak.
- Repeat the exercise for each shutter speed.

Results
After calculating the deviation* between expected and recorded shutter speeds and plotting the results it is clear that, while my lens is not functioning correctly at speeds under a 30th of a second, it is acceptably consistent at most faster speeds.
This is exceptionally useful information, as the lens in question employs a different mechanism for shutter speeds between a 15th and 1 second – implying that the issue lies in this mechanism.

Notes
- Deviation within 1/3 of a stop (33%) is typically considered acceptable
- To reduce the effect of outliers & observe shutter consistency I recorded 7 iterations of each shutter speed – yes, 70 individual recordings…
- For cameras lacking mirror lock up, the waveform will contain extra peaks as the mirror moves
- Measurement becomes more challenging as speed increases, as the waveform is compressed
- *(Expected Speed – Measured Speed) ÷ ((Expected Speed + Measured Speed) ÷ 2)
Summary
I found this method of recording shutter speed audio allows for ballpark analysis of speed deviation and consistency for shutter speeds up to 500th of a second.
I’m not suggesting that it offers the precision or accuracy of a dedicated professional tool, but as shown here, can aid in detecting issues with a shutter mechanism before sending it off for service or repair.
I sent the lens to Aperture in London for a full CLA and just received the camera back and it is now functioning properly.

Thank you so much, Ryan! You can find Ryan’s work on his website and Instagram.
Leave any questions about testing and troubleshooting shutter speed issues below in the comments!
Check out more tutorials for how to shoot film here!


Blog Comments
Marcus
March 12, 2021 at 1:37 pm
Outstanding post! I have never thought or read about that technique. Very smart and quite handy. I have a couple of old large format lenses with copal shutters. I was always doubting their accuracy. Finally a cheap and easy way to check them for peace of mind. Kudos!!!
Ryan Seabrook
March 15, 2021 at 8:22 am
Thanks for the great feedback Marcus, it’s lovely to know that someone has benefitted from my ramblings!
Bruce Heyne
March 12, 2021 at 4:15 pm
A few weeks ago, I had similar experiences concerning a couple lenses/shutters. I found a smartphone app that works similarly. It took a bit of effort to understand it and practice to get consistent results but now works pretty well.
Ryan Seabrook
March 15, 2021 at 8:26 am
Hi Bruce, the use of an app sure does sound handy. It’s been great to see a number of outstanding smartphone apps built specifically with film photography in mind as of late.
Heikki Annala
March 30, 2021 at 1:44 am
Excellent and usefull article, thank you!
A few months ago I needed to test shutter speeds of an old Zeiss Ikon Nettar and after hard thinking only home made option I figured out wast to take a 100fps video with a DSLR camera. That was quite good but somewhat clumsy and works only with speeds up to 1/200s.
shootitwithfilm
March 30, 2021 at 3:07 pm
Such a great workaround! Thank you for sharing!
Paul B
June 17, 2022 at 3:13 pm
Thanks for posting your methods and results. I’m doing the same thing with an old Rolleiflex K4A and wasn’t sure whether to count from the shutter open/close peaks or the beginning and end of the open/close cycle. (Every speed is off, but at least I now know by how much.)
Ray Goulter
January 13, 2023 at 5:09 pm
The techniques described above all assume there’s no problem with the aperture mechanism. I had a problem years ago when getting inconsistent transparency results with my 55 Micro-Nikkor. The shutter speeds of the Nikon FE seemed ok, then after a second failed trainee film using my Nikon F2AS I knew it wasn’t a problem with camera shutters, but with the lens. I manually checked the aperture diaphragm only to find the aperture iris wasn’t closing instantly when the shutter was triggered. A service to the lens fixed the problem that happened to be some lubricating oil finding its way into the iris blades, slowing them down at the time the photos were taken. If you find a problem with unexpected under/over exposures it’s worthwhile checking both the shutter and aperture mechanisms.
Ray Goulter
January 13, 2023 at 5:12 pm
That should read ‘trannie’ (transparency) film, not ‘trainee’. (Damn auto-correct!)
shootitwithfilm
January 14, 2023 at 8:11 pm
Thank you so much, Ray! This is great info about checking the aperture mechanism!