
Written by Alec Pain (Alastair Place)
Written by Alec Pain (AKA Alastair Place).
I’ve been running The Daily Holga Instagram feed now for three years now, and one of the many highlights is the diversity and brilliance of content produced by our followers.
I like to create challenges for my followers most months to see what they can come up with or if they can find something from their archives. So, I thought I would give you (and as it turns out me) a very tricky challenge and share 18 photography prompts for you to try. These are with the Holga and Kentmere film, but you are more than welcome to join if you own a Diana, or, in fact, using any camera and film to replicate these prompts.

The Holga Challenge
Now, you might be one of those very good (but sometimes a little annoying to those of us who can’t keep up) people who do the excellent 12 Months on Film – with twelve different cameras! Or you post a picture every day, every year as part of the 365 Instagram (you know who you are reading this, and I am very jealous!).
You might also be a little like me. You probably do take too many pictures, but you never quite get round to posting, crippled by a desire to make your feed line up, to have some sort of consistency to your posts and images.
And lastly, before I start, I’m not happy with quite a few of these images, but that is not the point. We are all guilty of showing only our best photos, never the fails, never showing our human side. And let’s face it the Holga can be an expensive way of messing up. Light leaks, leaving the cap on, leaving the Bulb mode on, etc, can sometimes ruin a whole or part of the film.
So, whilst I intended to put up 30 prompts for thirty days on The Daily Holga and here, I actually ended up with 18 images/prompts on two rolls of film. Before you go rushing out to do what I did and take them all at once (or in 18 days), my advice would be to take your time. Wait for the right moment for the shot to appear, and then take the picture. If you are planning ahead, then still wait for the right moment!

What You Will Need for this Challenge:
- A Holga (or Diana)
- A Holga lens cap or a Holga splitzer
- A tripod
- A shutter release cable
- A shutter release cable holder
- A roll of Kentmere 100
- A roll of Kentmere 400
- Optional: A light meter or the Lumi Light Meter App
As these are experiments, I started with the idea of taking shots with the cheapest black and white film I could find. I wanted to shoot Kentmere 100, 200, and 400. I managed 100 and 400, the 200s have now joined the rest of the unused film in my fridge.
The general rule for the ISO of the film inside your Holga when shooting is:
- ISO 100/125 A bright sunny day (in the UK a very bright day!)
- ISO 200 Some sun and some cloud.
- ISO 400 Cloudy day
But I’ve found that in general the Holga will shine on a bright sunny day and be perfect with ISO 400 or 800 (Maybe this is just UK sunshine!).
The below shots are intended to use one roll of Kentmere 100. I shot two for the purposes of this article.
Roll 1: Kentmere 100
Here’s the list of what to take:
- Self-portrait with mirror (Shot 1)
- Micro turns (Shots 2-4)
- Holgarama (Shots 5-6)
- Intentional camera movement (Shot 7)
- Selfie indoors (white wall) (Shot 8)
- Selfie indoors (white wall movement) (Shot 9)
- Selfie indoors (white wall multiple exposures) (Shot 10)
- Selfie (outside) (Shot 11)
- Silhouette double exposure (Shot 12)

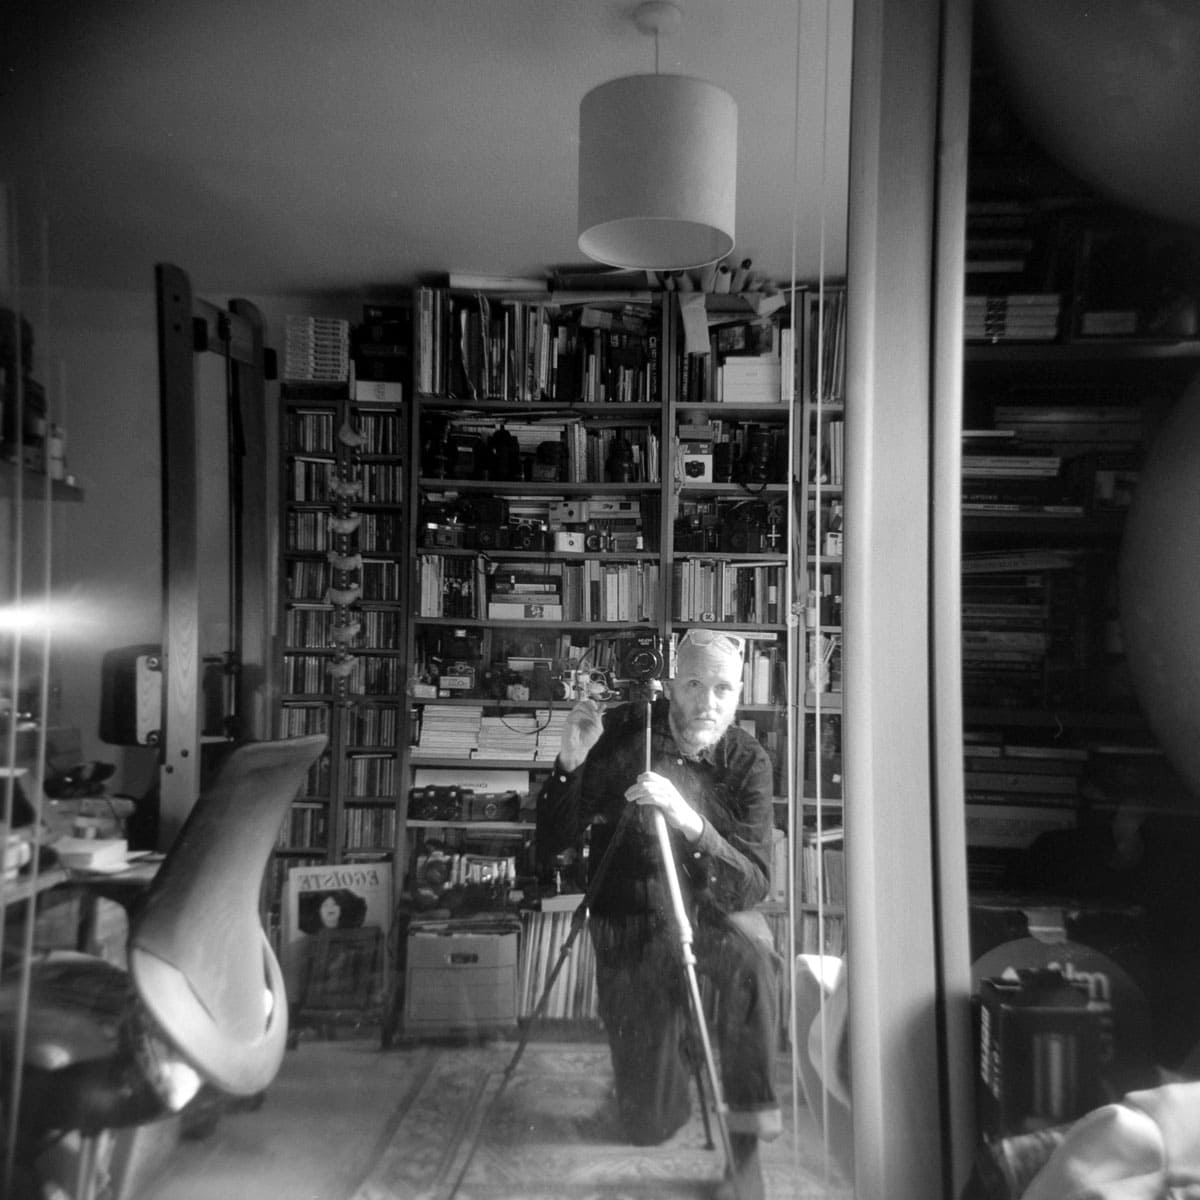
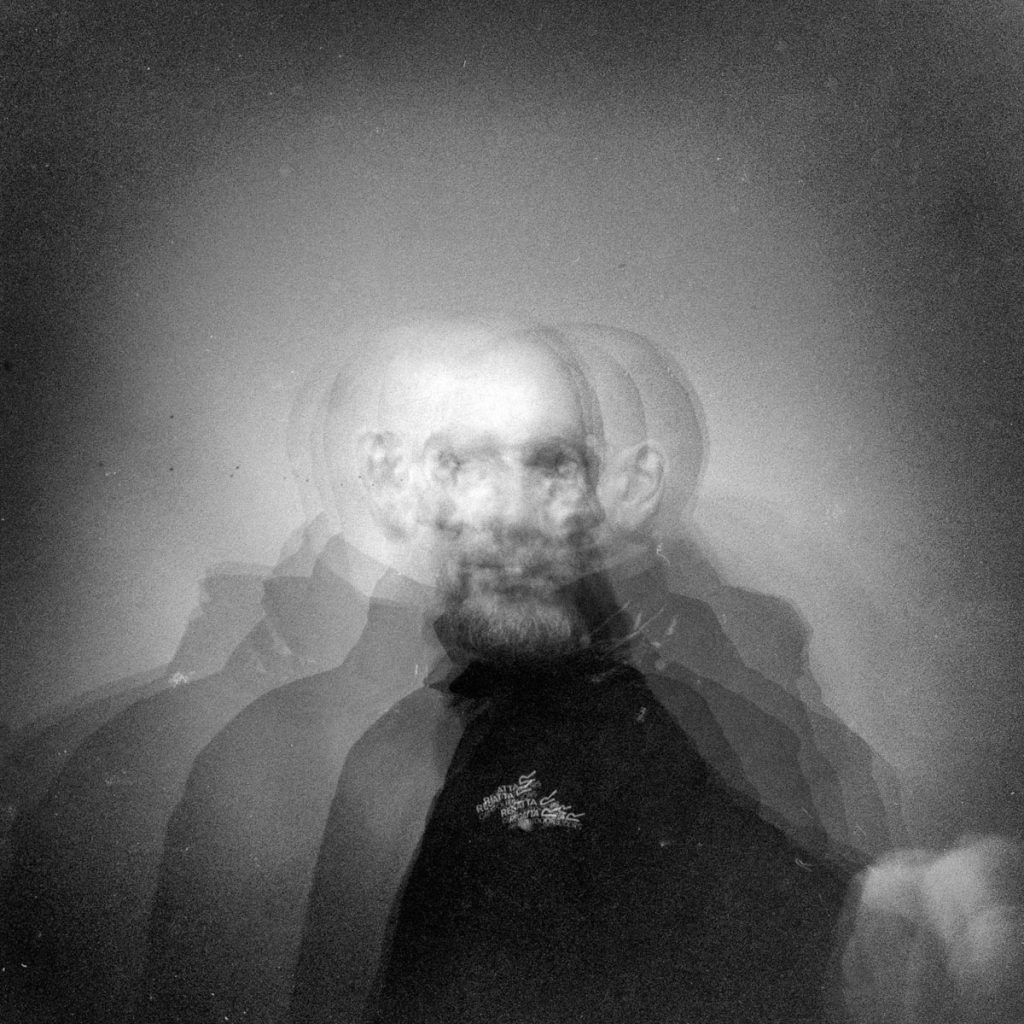
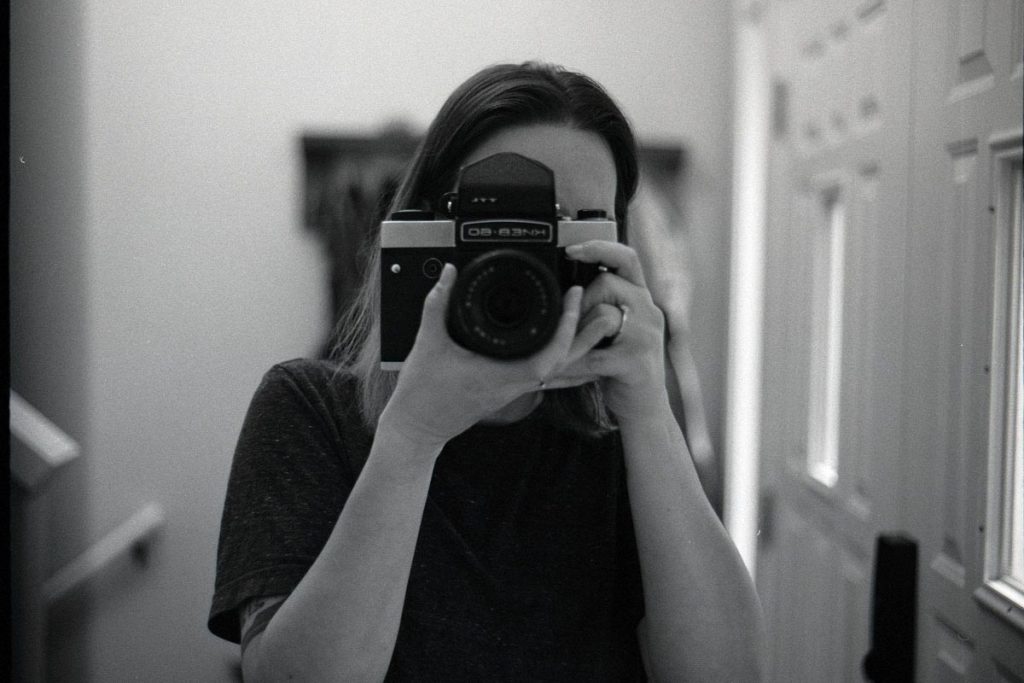
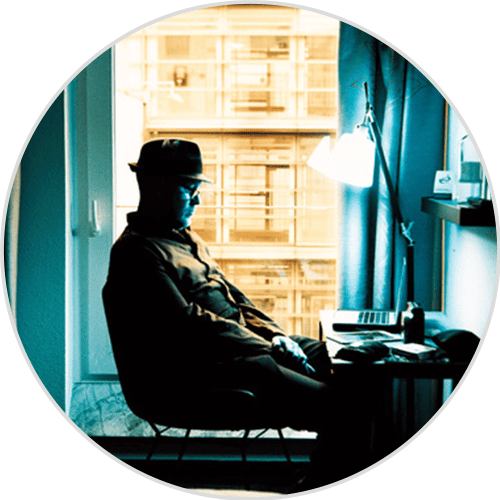
1. Self Portrait with Mirror (Shot 1)
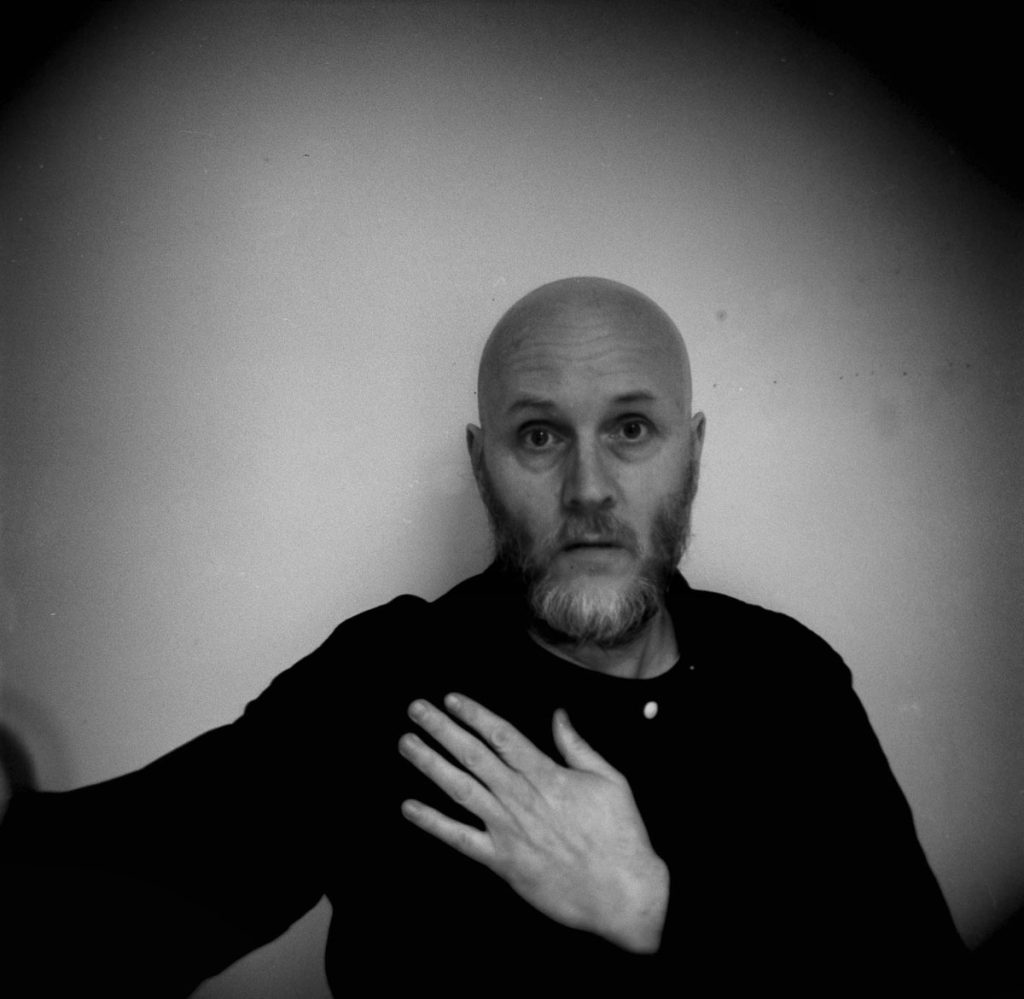
Make sure your Holga is set to B or Bulb mode. Find a mirror around the house and put your Holga onto a tripod. If there’s some sunlight streaming through the windows or you are in a fairly light intensive place, then you may not need the tripod. If you don’t have a light meter to measure the light, you can use the Lumi Light Meter App from the Apple store.
I rated the Holga (set to the cloudy setting) at f8 and held the shutter down for 3 seconds without moving. Here’s me and my study to prove it!
I think I could have got closer, but it’s a nice, easy start – and one which you can do around the house fairly quickly!
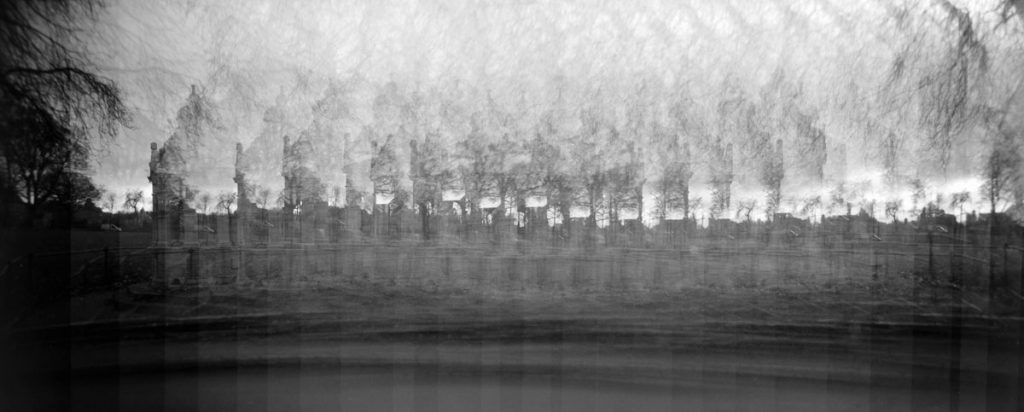
2. Micro Turns (Shots 2-4)
Make sure your Holga is set to N. A micro-click is exactly that. Take a shot, turn the dial a very minimal amount, take another shot, continue until you think you have captured the object or building you have chosen.
I went too far here. Trying to widen a very short fountain.
It will take up 2 or 3 shots of your roll. Make sure you wind until you reach the next number, or if you reach the next number on the back of the camera, wind on to the next one.
This is what is looks like normally!

Here’s one I’m happier with – of the Blavatnik School of Government in Oxford. Taken with Portra 800 (and made B&W for comparison). Note the lines of the micro-click.
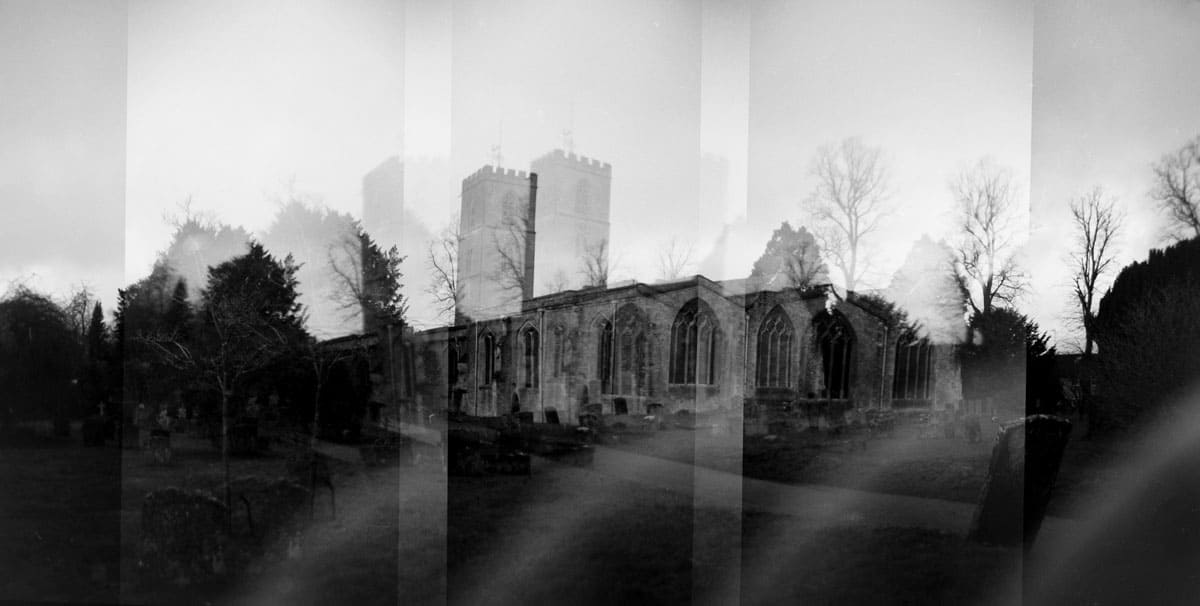
3. Holgarama (Shots 5-6)
Make sure your Holga is set to N. For your third shot, try a Holgarama. If you want to know more about Holgaramas, here’s my article on them.
Essentially, it’s turning the dial to wind the film on two to three times in order to get a wide angled shot.
This one, of my local church in Charlbury, turned out OK, but there are a lot more successful versions in my article!

4. Intentional Camera Movement (Shot 7)
Make sure your Holga is set to N. Intentional camera movement is a little easier to do than a Holgarama or a micro-click, and is probably what I should have used to take the shot of the fountain!
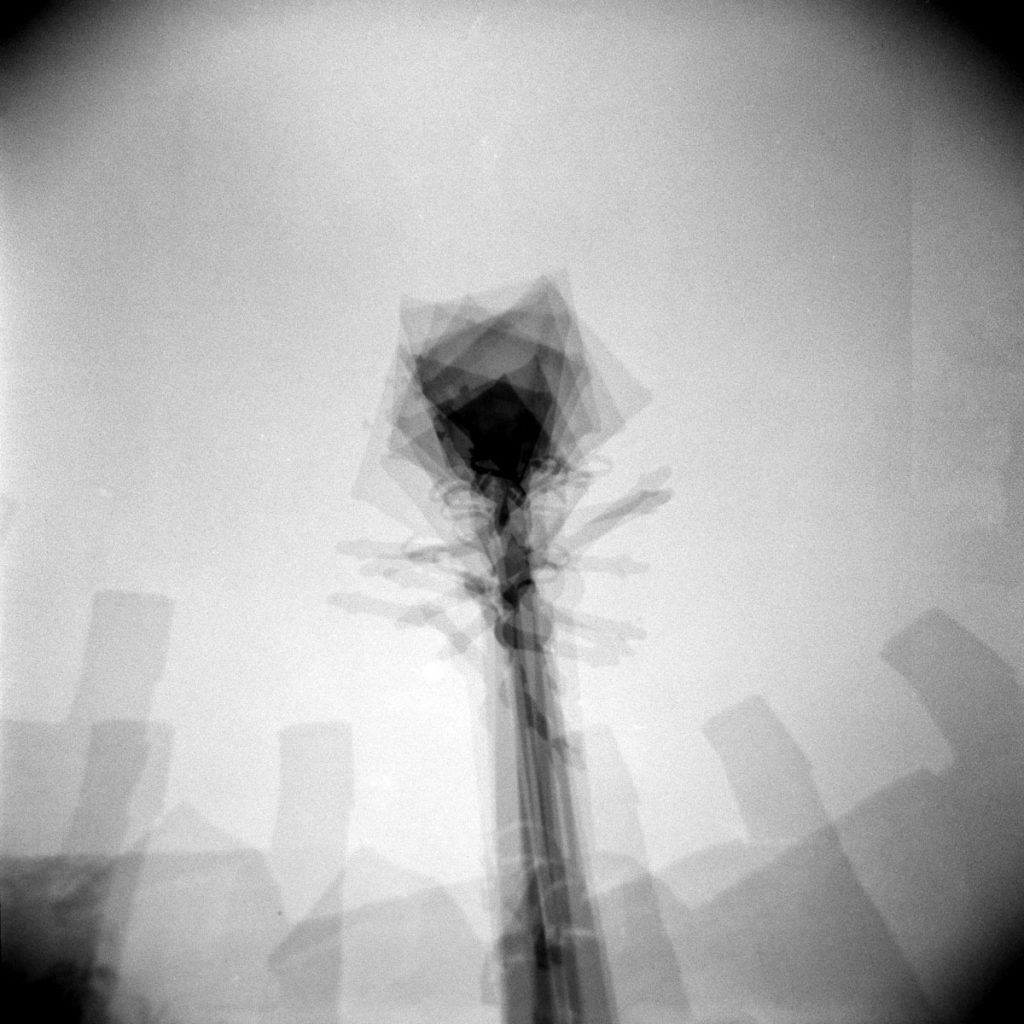
This is a lamp post. Something stationary. You could even try stationery! Click the shutter seven or eight times whilst moving slightly or choosing a slightly different angle. Try and make sure the object is central each time. Using a low ISO (100 or lower) also means that you won’t get blown out highlights.
5. Selfie Indoors (White Wall) (Shot 9)
Make sure your Holga is set to B or Bulb mode. This one isn’t that difficult to do, but it’s probably better with a prop or trying to look a lot cooler than I am here.
Again, I needed a tripod to take this one – just a couple of seconds. You’ll get plenty of Black Cornering with a white background on a Holga. Using a strobe, can also help you get a less lo-fi look. You can measure the light in the room if you have a light meter.
This one was a couple of seconds. You could probably take an educated guess dependent on how much light is in the room. 2-3 seconds should probably sufficient.
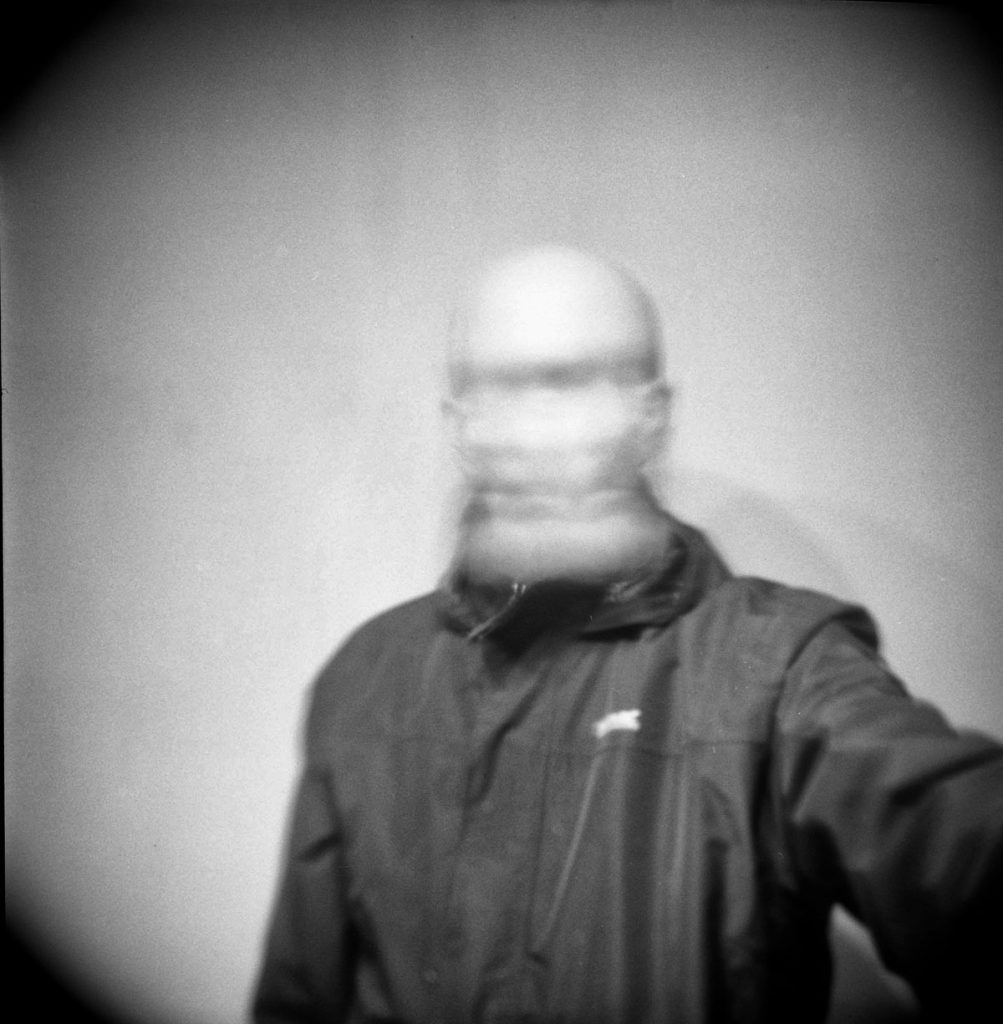
6. Selfie Indoors (White Wall Movement) (Shot 9)
As we have the camera on B, we may as well try some movement.
Depress the shutter with the release cable (if you can find a long cable even better!). Perhaps shaking your head like this might work?
Again this is a 2-3 seconds exposure.
7. Selfie Indoors (White Wall Multiple Exposures) (Shot 10)
As you are using 100 ISO film, you might want to try switching the camera back to N and taking say 5 shots (or as many as you like).
This is almost an ICM of yourself!
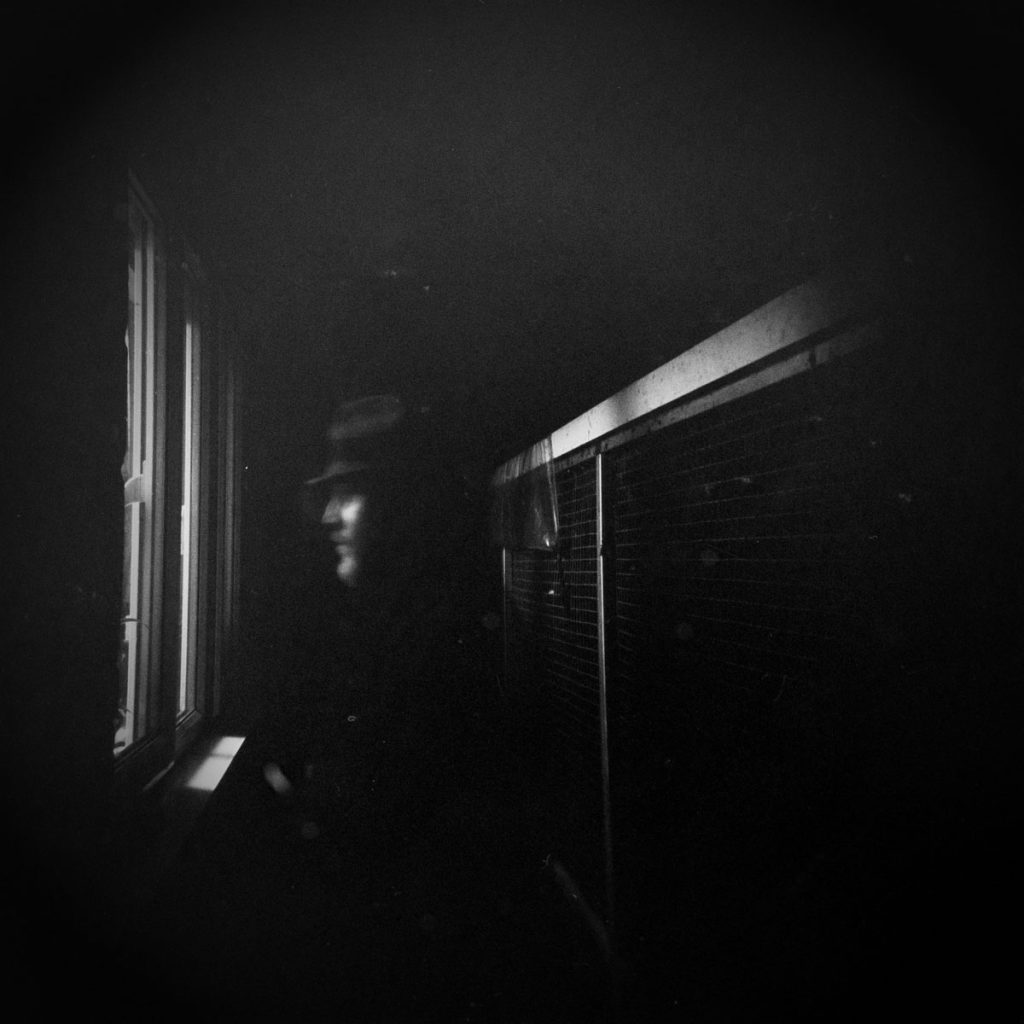
8. Selfie (Outside) (Shot 11)
I love creating a “ghost” image by taking a self-portrait outside. Make sure there is a light coming from in front or behind your head but stand in the darkness. Set up your tripod and practice where you are going to stand.
REMEMBER to switch on B!
Depress the shutter release and go and stand for three, four, or maybe five seconds outside the window or at the frame source. Move away, and return to the camera leaving it a good two seconds before repressing the shutter cable to stop the exposure.
You should end up with a ghost of yourself, looking hauntingly into your own house.
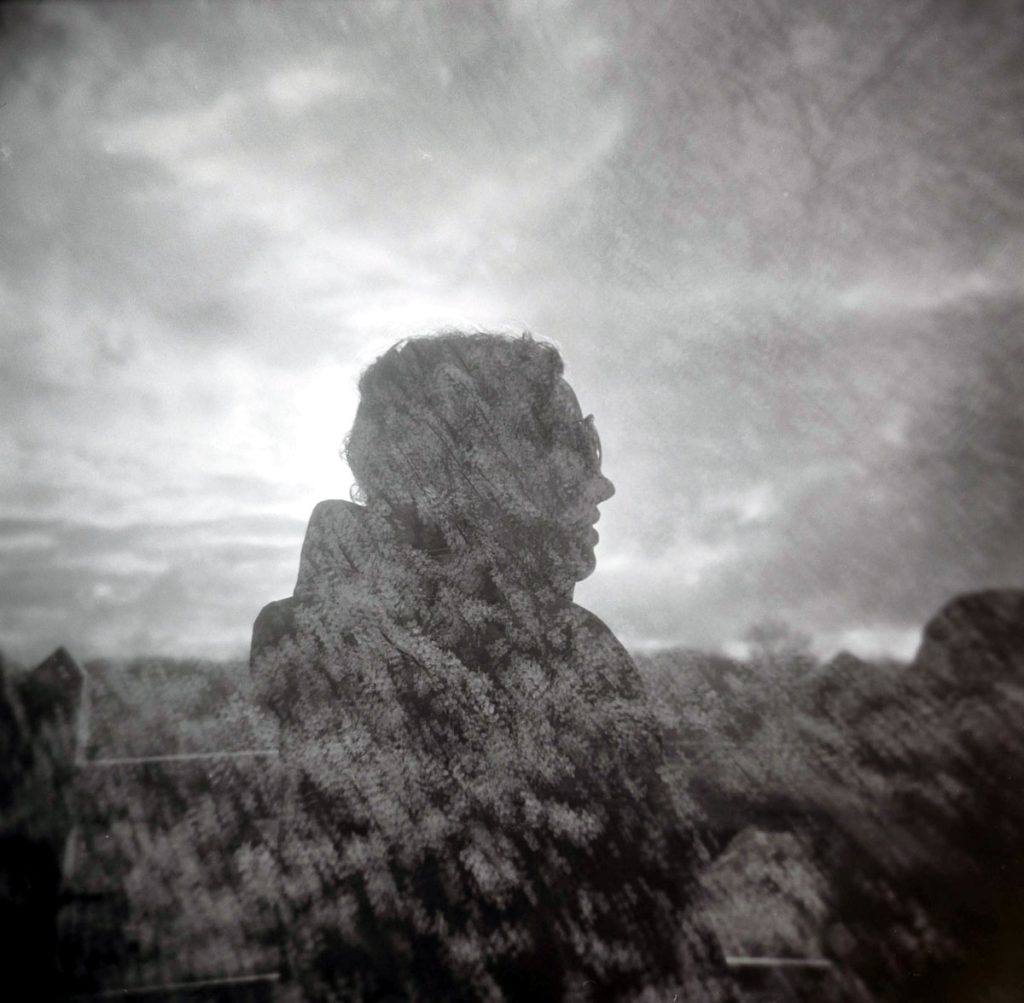
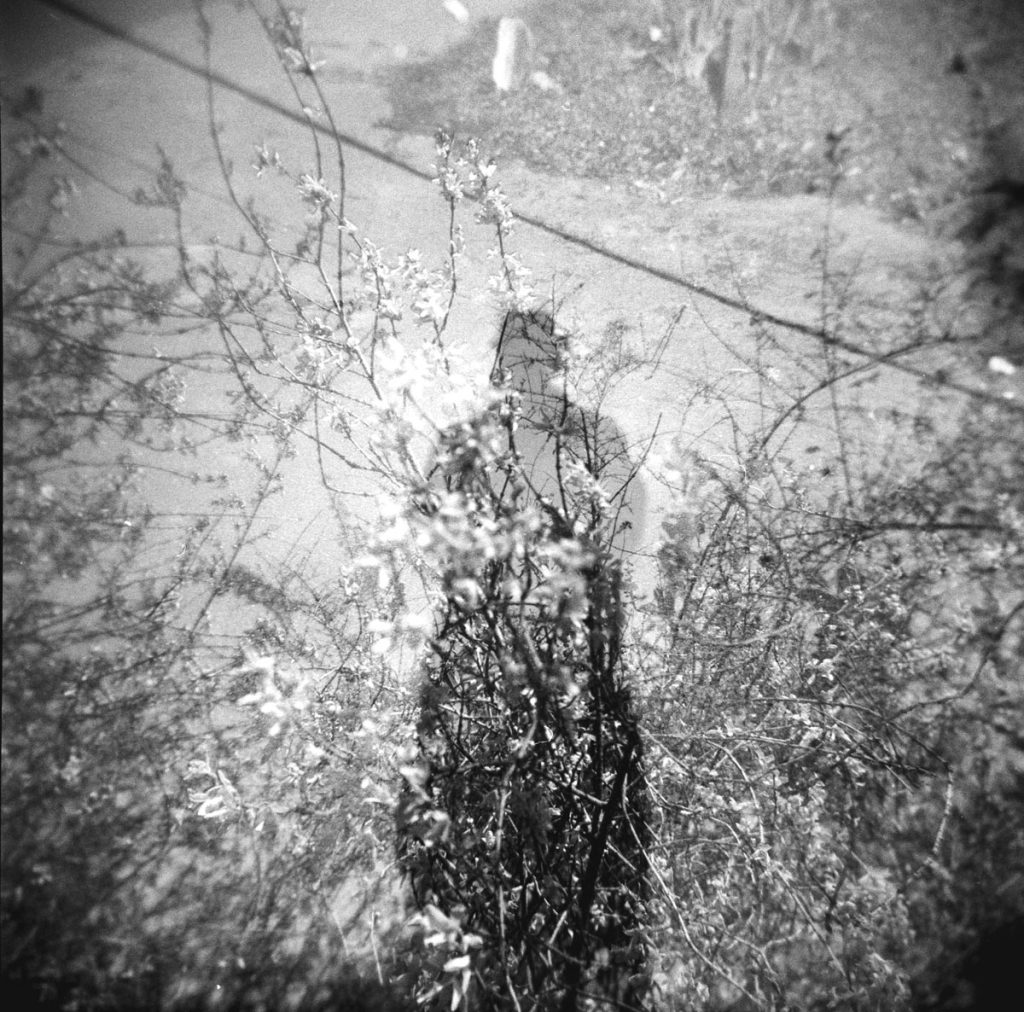
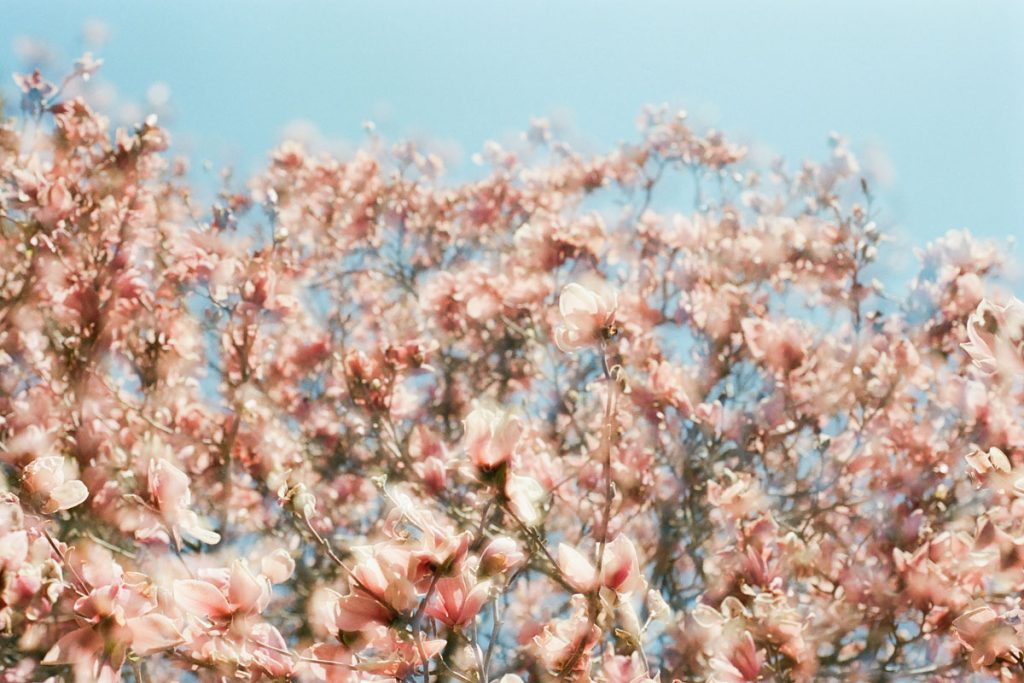
9. Silhouette Double Exposure (Shot 12)
For this, you do need the sun to come out, or a bright light behind you, and you probably need someone to be your model, but you could try setting up the first shot on a tripod with the sun behind you so that you can take a silhouette of yourself.
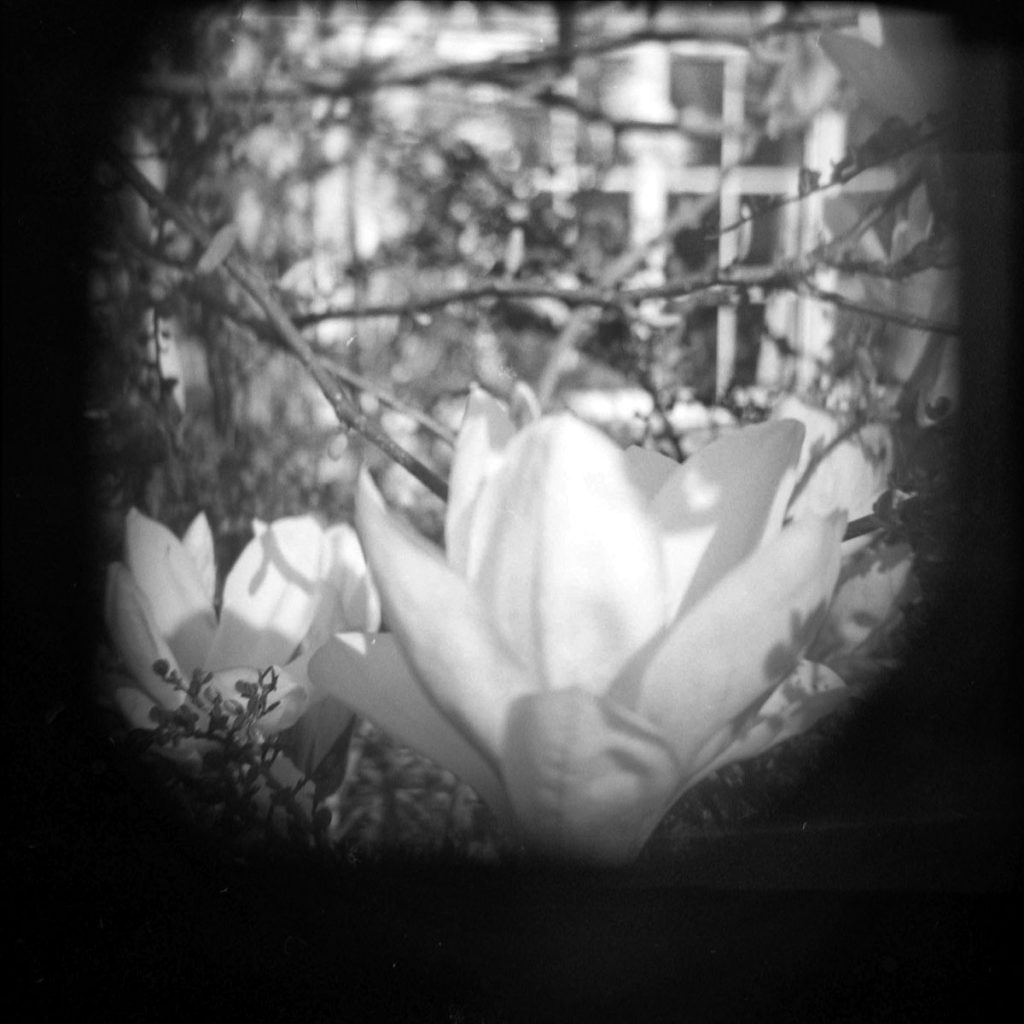
Here is my wife taken with the sun directly behind her, and a then a picture (taken a couple of days later of some blossom).
Here’s one I took from looking down at my silhouette (using Kentmere 400), and then taking some more flowers.
There’s a lot more light in picture two and you can definitely see the difference of having more sunlight and more light from the 400 iso film.
Roll 2: Kentmere 400
Here’s the list of what to take:
- Outside sky (Shot 1)
- Splitzer (one fifth) (Shot 2)
- Splitzer (one quarter) (Shot 3)
- Splitzer (half horizontal) (Shot 4)
- Splitzer (half vertical) (Shot 5)
- Non-splitzer (both ways up) (Shot 6)
- Four corners (no splitzer) (Shot 7)
- Free lens (Shot 8)
- Collage (Shots 9-12)
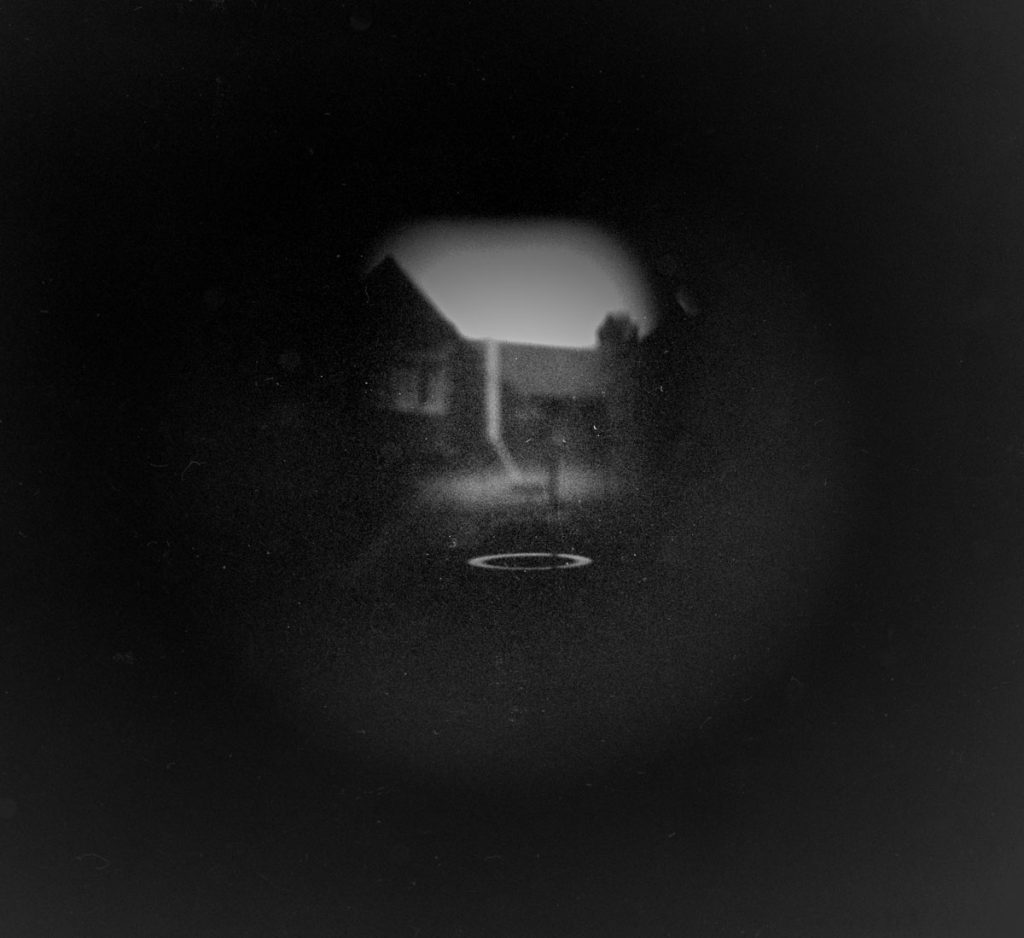
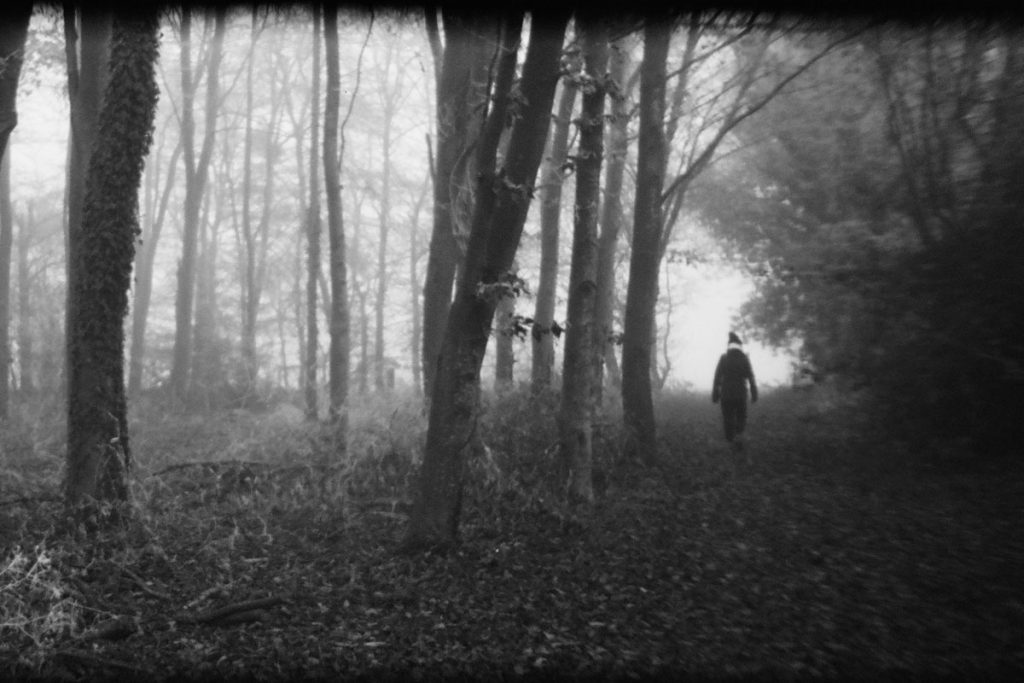
1. Outside Sky (Shot 1)
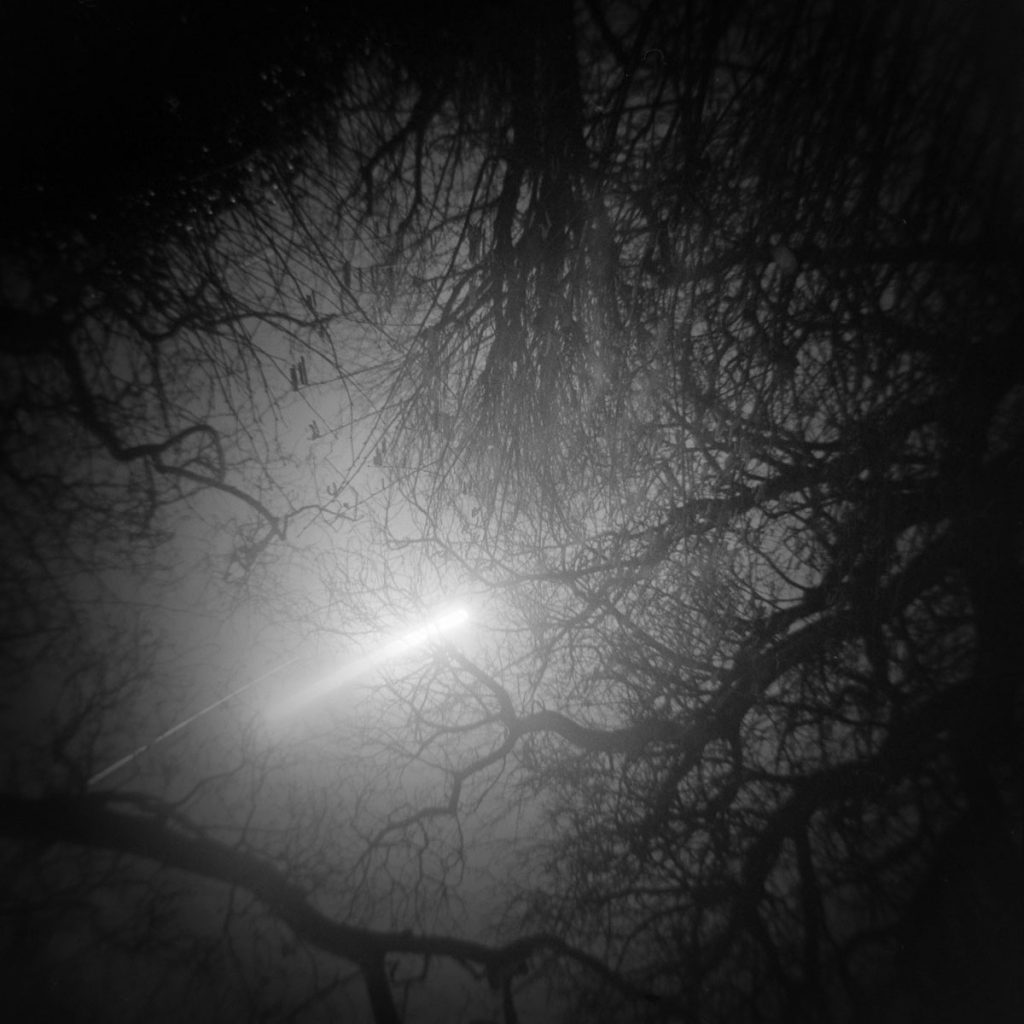
It’s always fun taking shots at night. The only problem is having a clear sky so that you can see the stars and the moon, and of course the thirty minute wait in the cold whilst you take the picture.
This one was taken in my back garden so I could be in the warmth of the house whilst taking it, setting my phone alarm for 30 minutes.
I love the way the moon moves so much in 30 minutes! I would love to be able to do this in clearer skies.
2. Splitzer (One Fifth) (Shot 2)
If you still have your lens cap from your Holga, you can easily make a splitzer. If you have more than one cap, there’s fun to be had in cutting them up into different sized splitzers.
Here’s three splitzers that I either created with my lens cap, or have bought (try here at MIA pinhole cameras website).
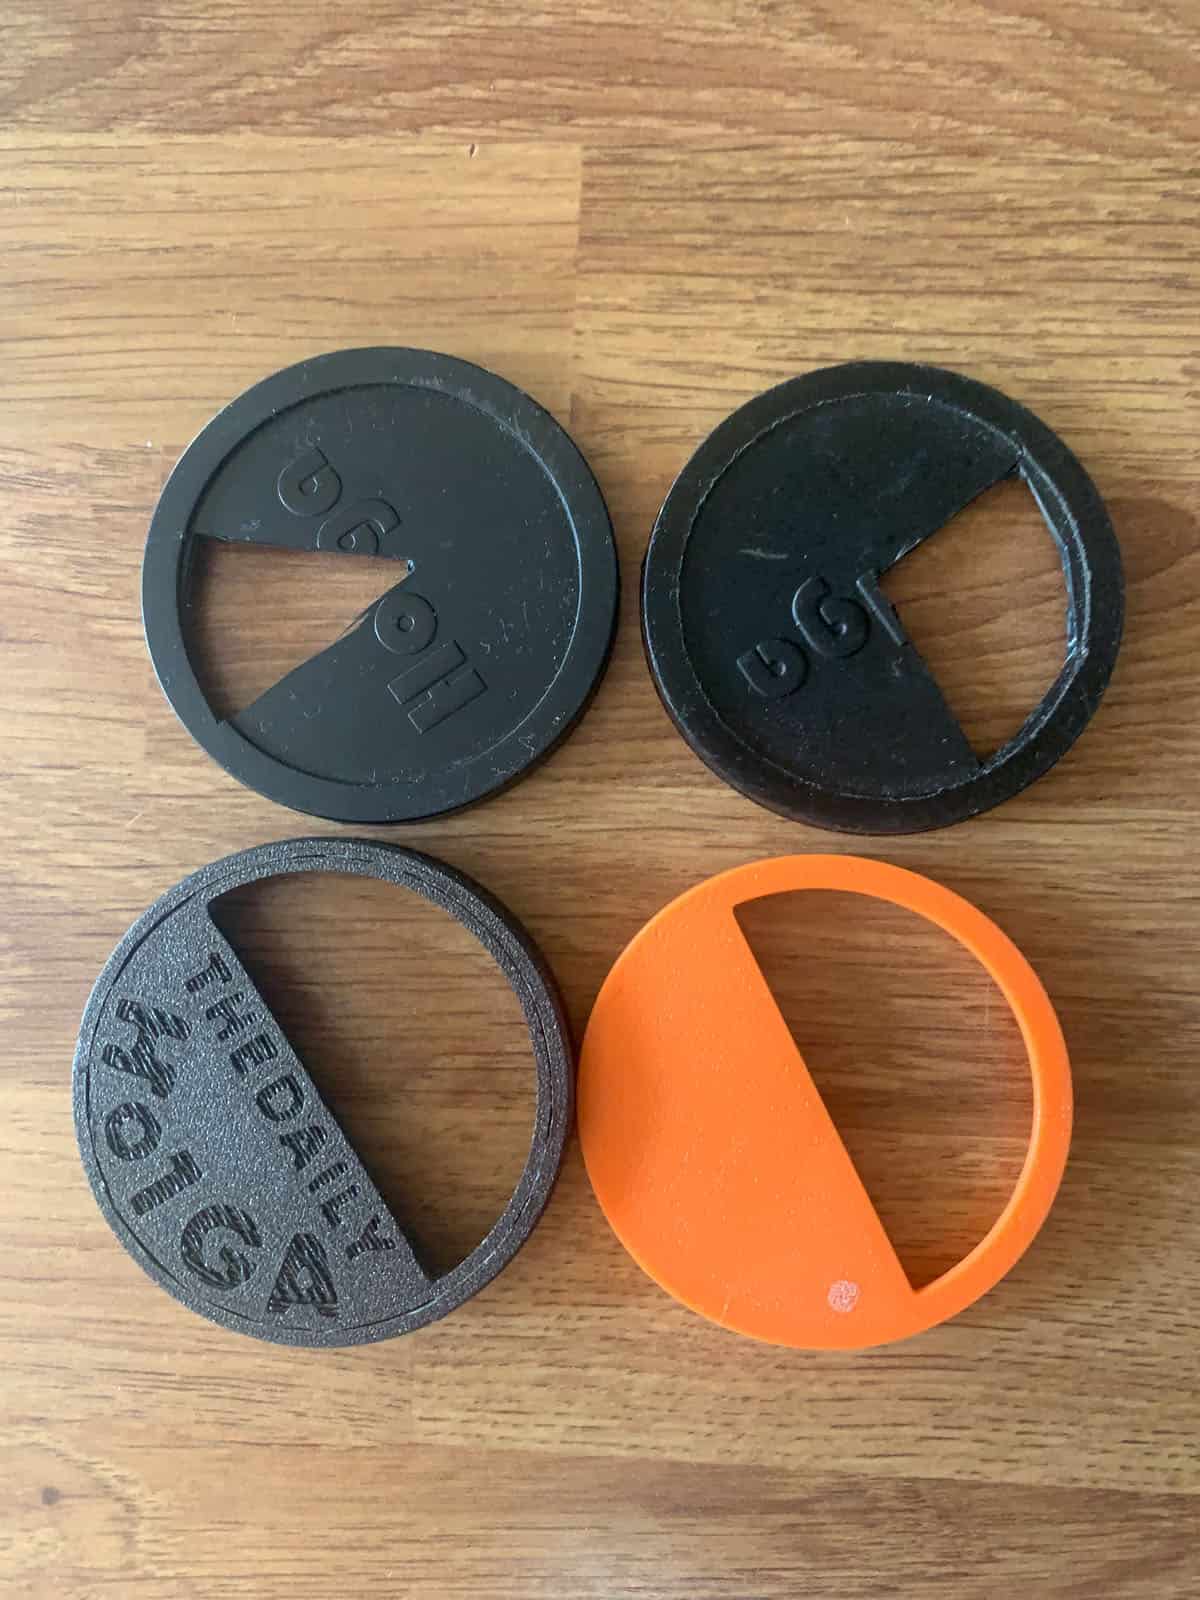
You just need something (a pair of scissors is simplest but I used a scalpel and a ruler) to cut the lens cap with. If you have time, you could try out the fifth, then cut it down to the quarter, before finally cutting it down to a half splitzer.
The one fifth splitzer is the trickiest one to do, especially remembering what bit you have taken as you turn the camera and the splitzer around, and also trying to get enough of your subject in. Here’s my attempt in Oxford. I’m definitely going to experiment with this more.
3. Splitzer (One Quarter) (Shot 3)
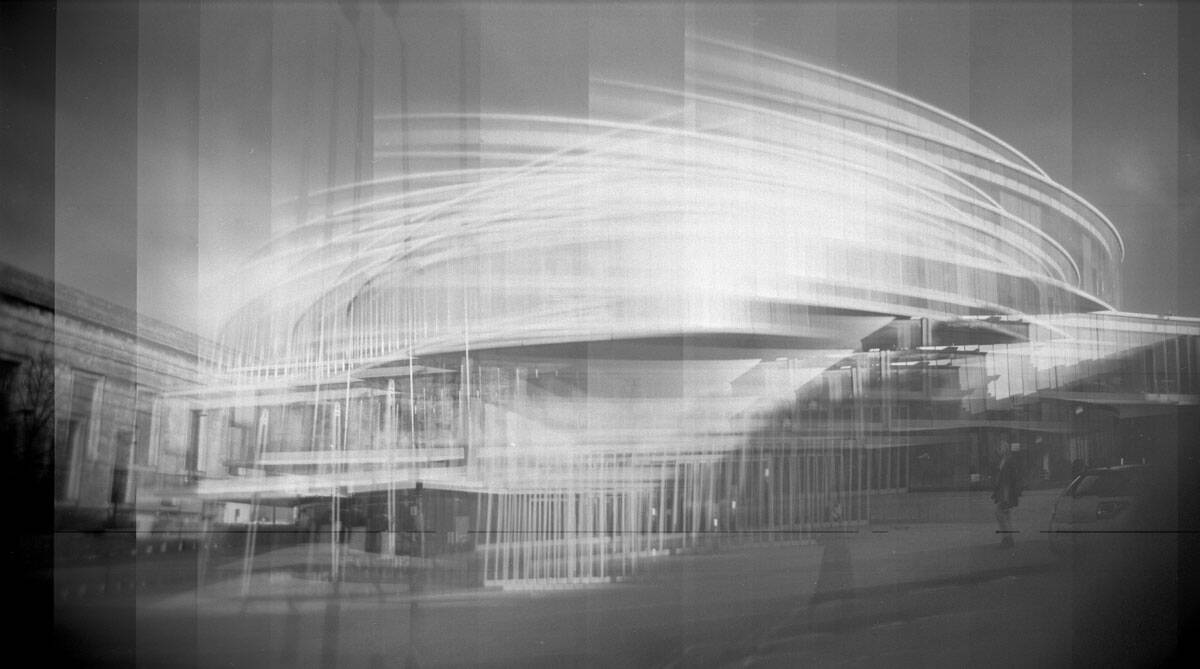
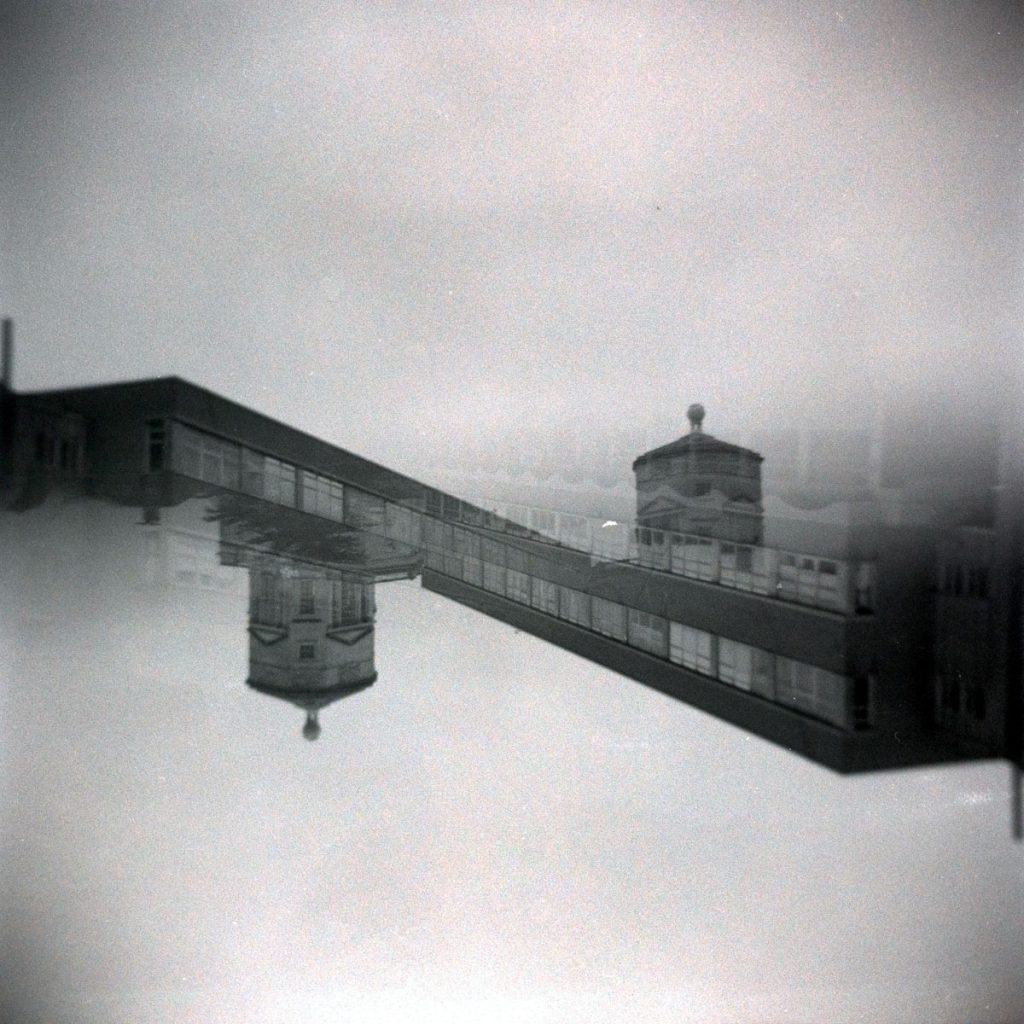
The quarter splitzer is a quite tricky, too. Here’s the Blavtanik building again taken with the splitzer in the top right, then bottom right, bottom left, and top left, rotating the camera clockwise each time.
You can make some nice shapes and get some weird effects with this (see the color Portra 400 shot below the Kentmere 400 shot.

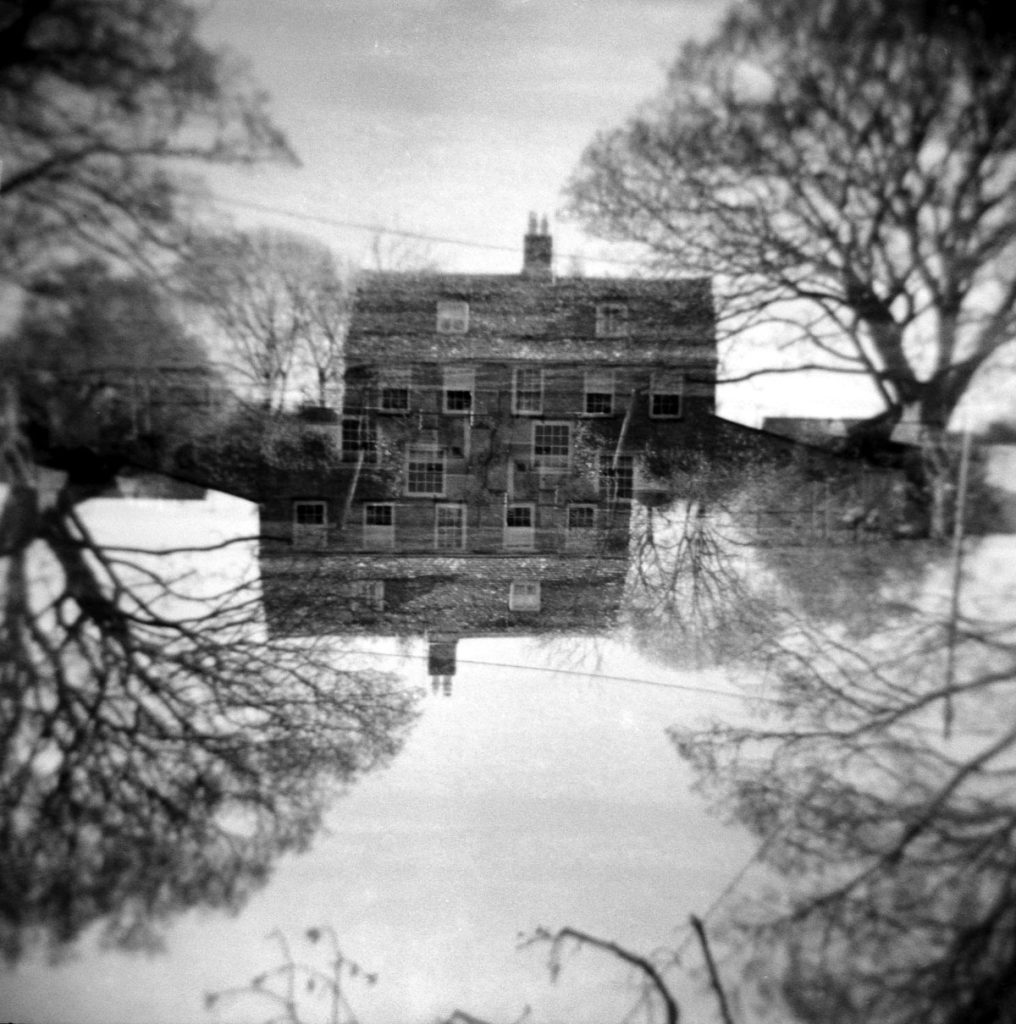
4. Horizontal Splitzer (Shot 4)
The half splitzer can be used in a number of ways, but the usual way is to cover the bottom of your lens and take the first shot. Then, turn your camera around and cover the top of the picture. That way you will get an upside down shot.
Here’s one of the Oxford University buildings on a very grey day, plus a half splitzer in London with Portra 400:
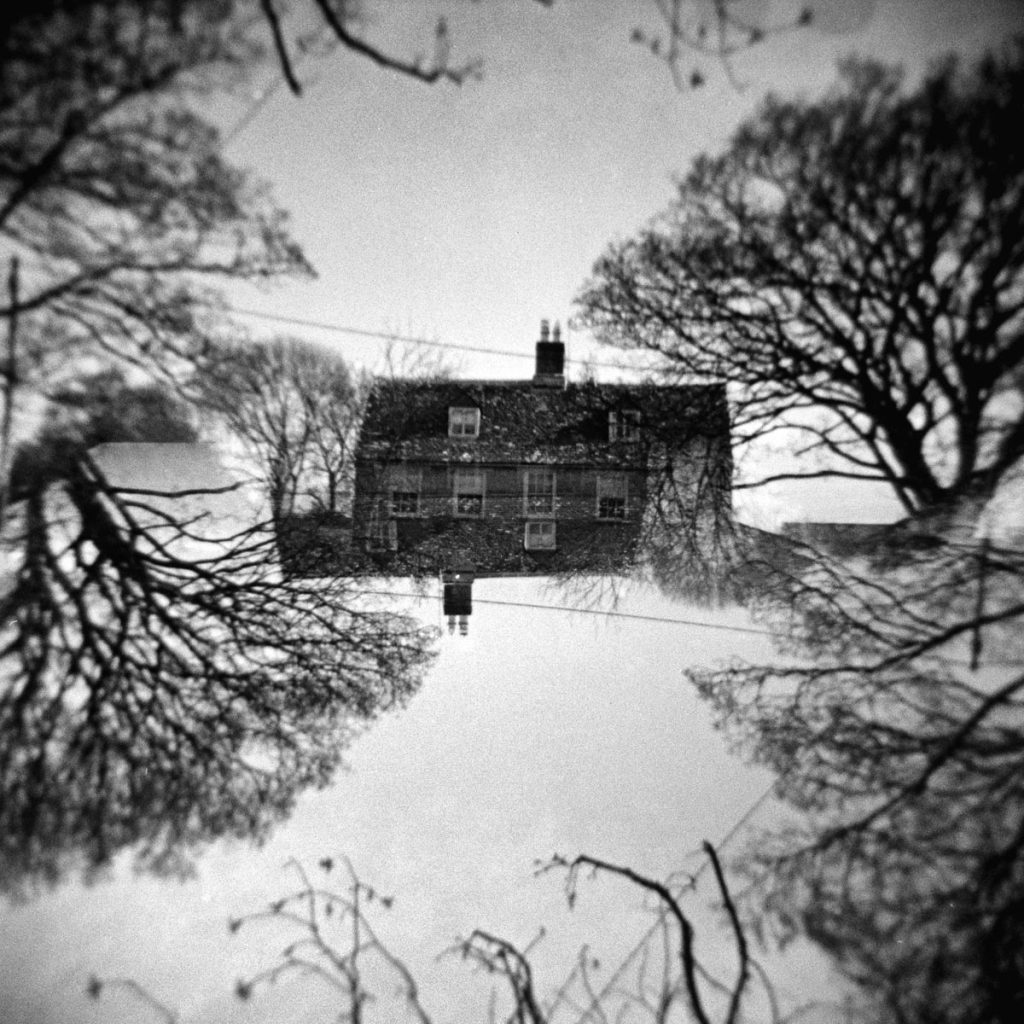
5. Non-Splitzer (Both Ways Up) (Shot 5)
Of course, you don’t have to use a splitzer to get an “upside down” picture. You can take a double exposure and just turn the camera upside down for the second shot.
Here’s a comparison of two shots – the top one is without the splitzer and the bottom one with a splitzer.
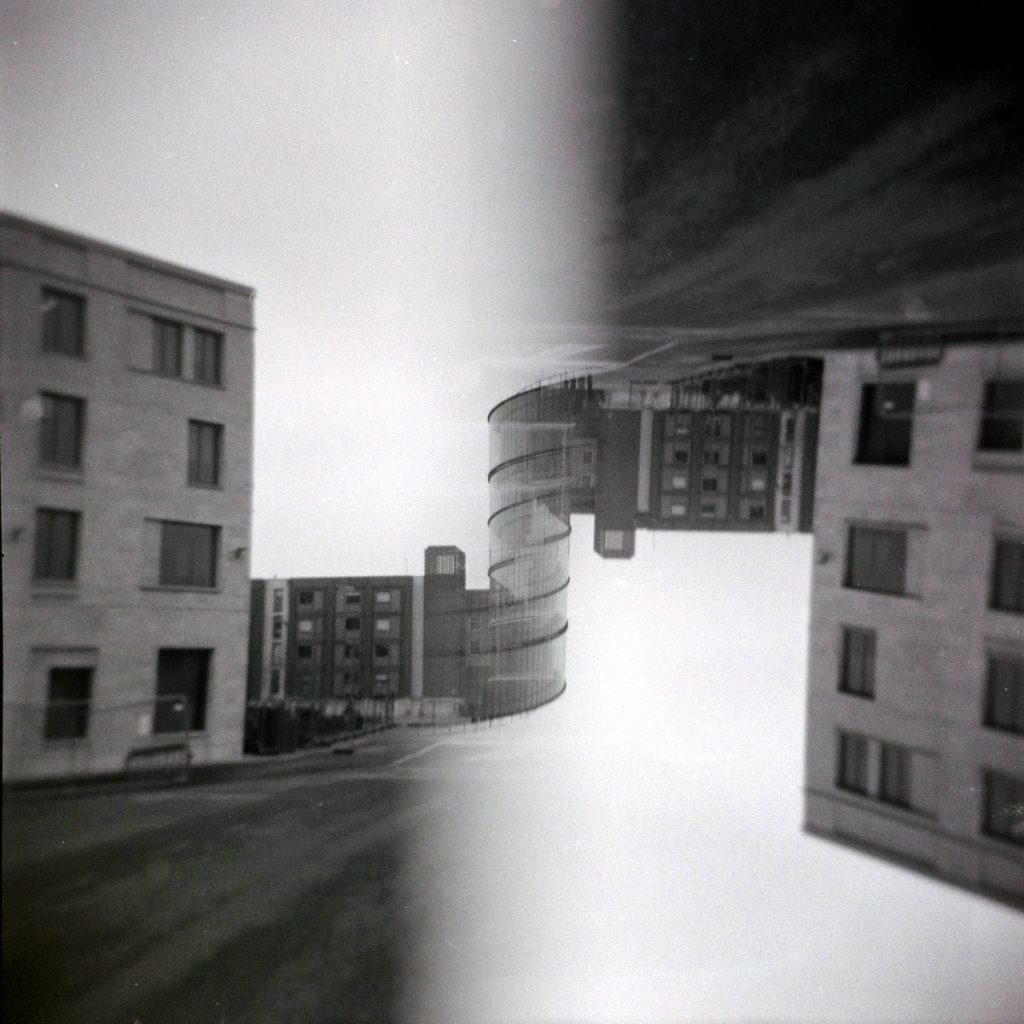
6. Splitzer (Half Vertical) (Shot 6)
Here’s another splitzer shot vertically this time, ie covering the left-hand side of the lens and taking the shot and then turning the camera upside down and taking the second shot with the right-hand side of the lens covered.
I got a little lucky – the top of the Blavtanik building now looks like it is a spiral staircase in the middle of my picture. I wish there had been less of a grey sky, but I love the effect it creates, and I would love to try this again on a brighter day.
I think this is my favorite of the experiments and I want to try it again – in color.
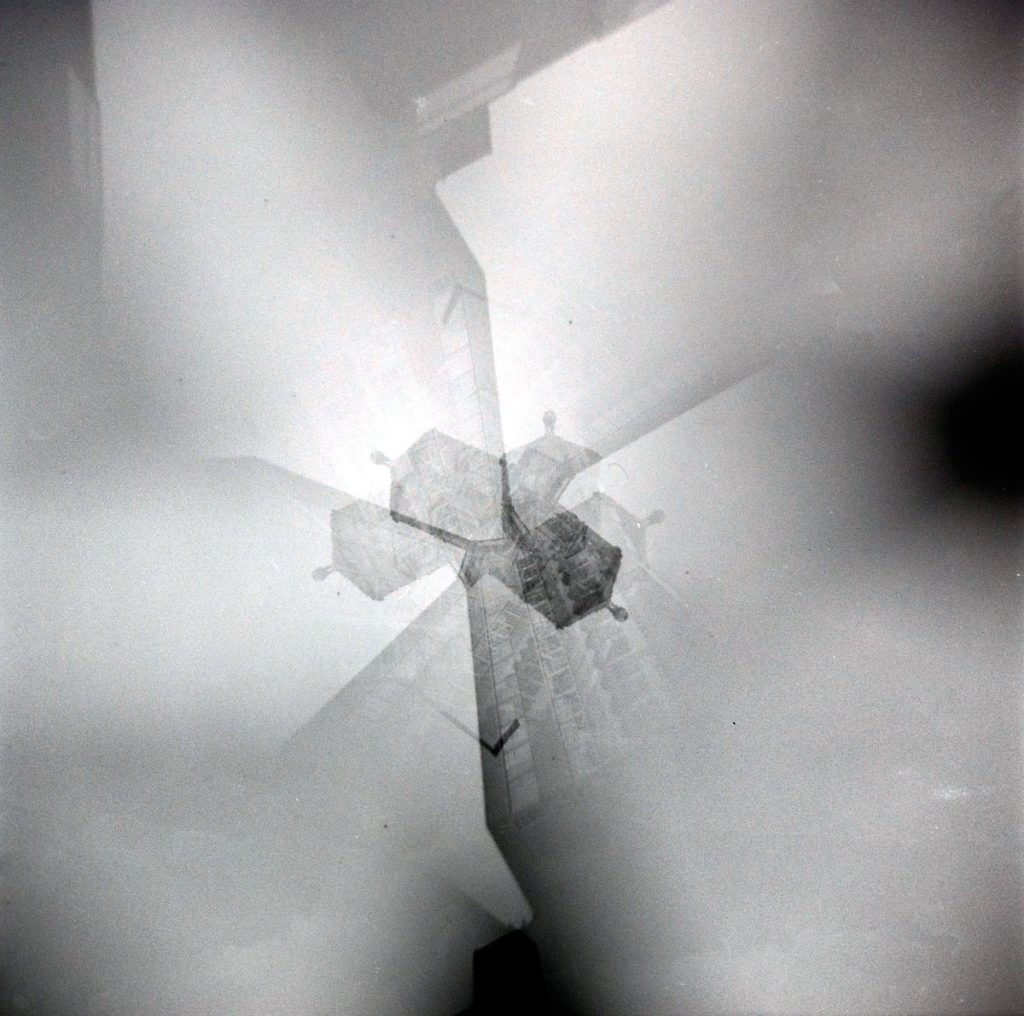
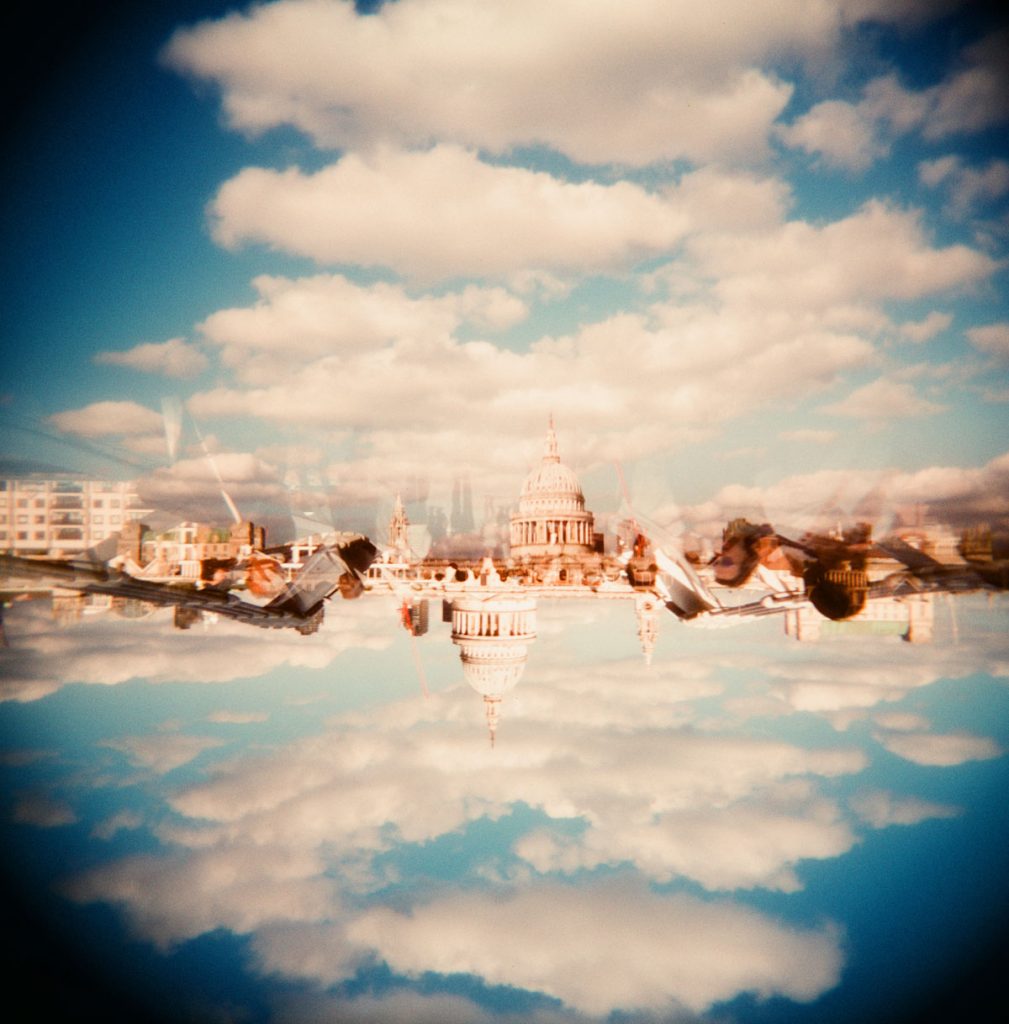
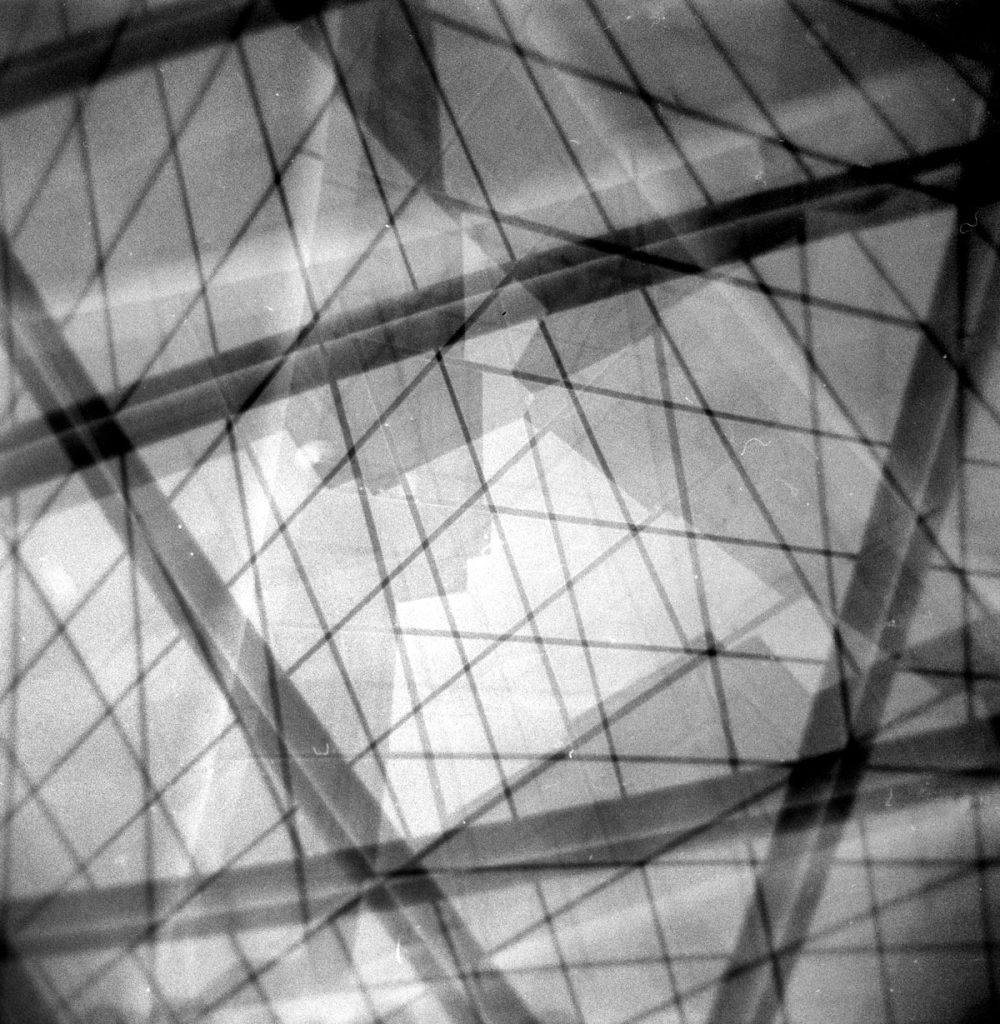
7. Four Corners (No Splitzer) (Shot 7)
Taking Holgaroundas as I call them is also great fun. I didn’t chance upon lots of tall buildings in Oxford so I tried an abstract shot of the windows of the Blavnatik building instead.
The second picture is one of the images from my Holgarounda series of tall buildings in London.
8. Free Lens (Shot 8)
There’s some great tips to free lens with the Holga from Jen Stamps here on Shoot It With Film.
The first is to twist off the cap until it comes off in your hand. Then, to hold the lens as close to the lens as you can. Warning! Read Jen’s instructions! Don’t turn the lens the other way around like I did here! This is a close-up reflection on what I thought was me, but I think it’s the building behind me!
Here’s one I did properly on a second roll of Kentmere 400. It seems to add a lot of vignetting, but you definitely get closer:
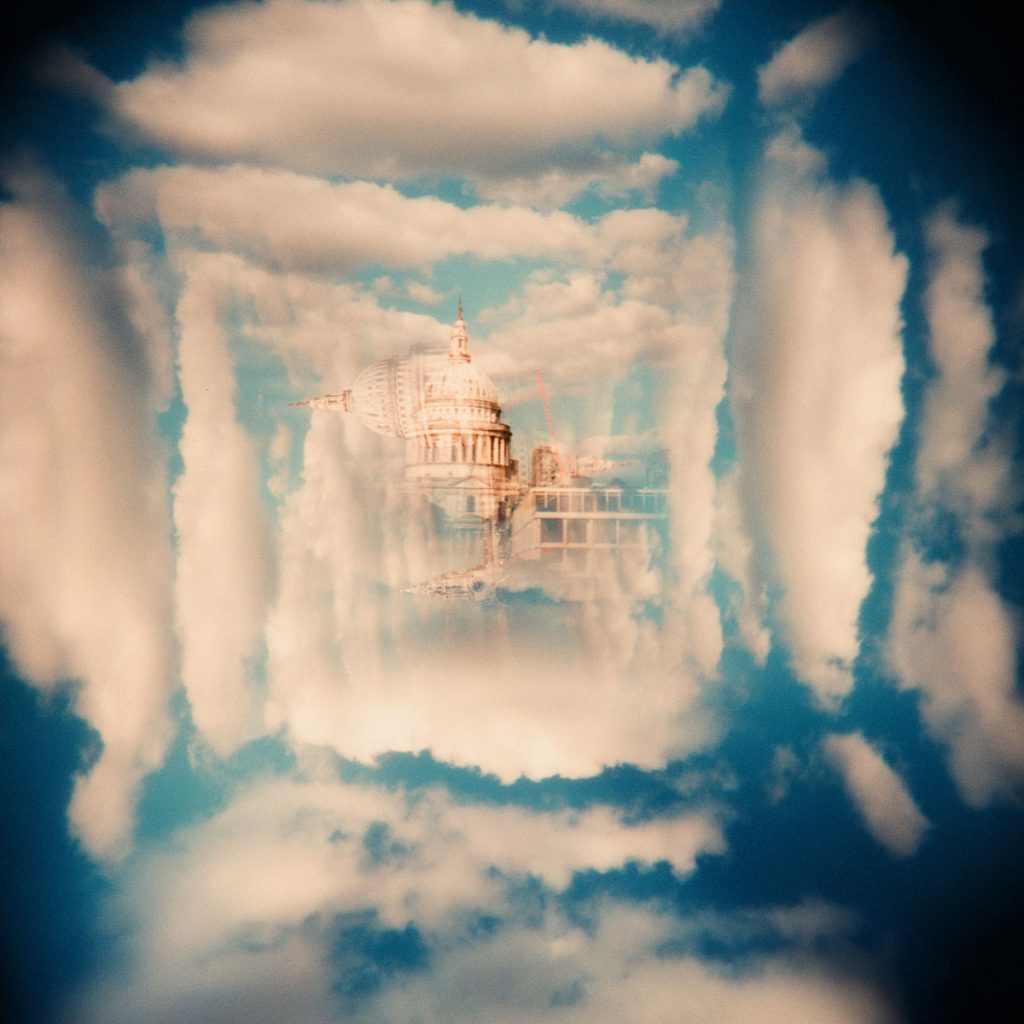
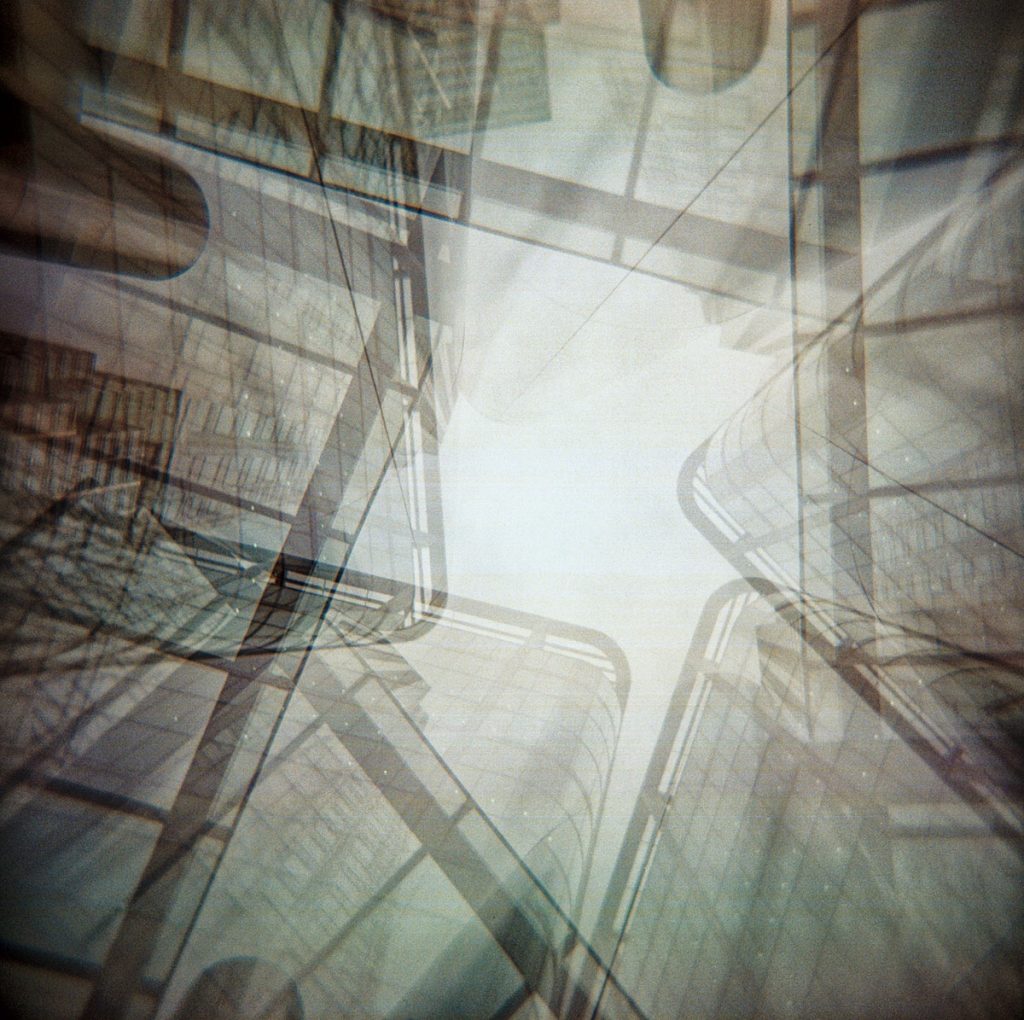
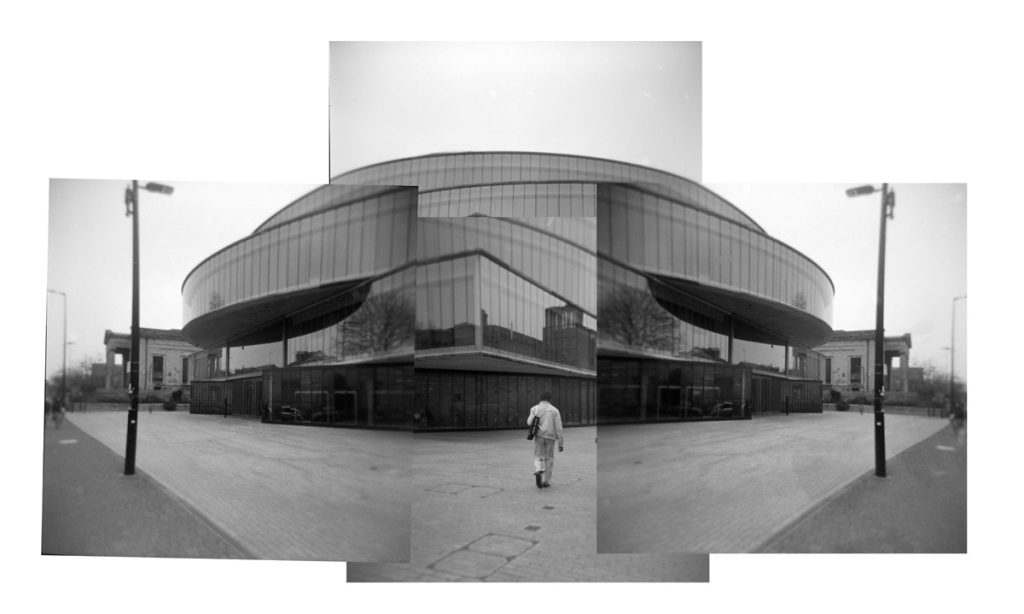
9. Collage (4 Shots) (Shots 9-12)
Lastly, why not try a collage (or a college!) of a building. Here’s four shots placed over each other of the Blavtanik building.
Try taking different angles so that you can try and piece an image together. Stand in the same place (or a different one to get different perspectives), and you can then put it all together.
It’s never an exact science, but you can have some fun with it.
In Conclusion
I love experimenting with my Holga, but you do need to be aware that you aren’t going to get perfection every time. In retrospect, I would have sent these to the Lab to get scanned as my developing always seems to be fraught with issues, and I’m also using a new workflow of scanning my pictures with a DSLR. The scans would have been a lot cleaner!
I wasn’t happy with quite a few of the shots – but I loved the horizontal splitzer image and how it turned out; the night portrait; the sky at night through the trees, and lastly, the collage. I think I would have preferred to have shot these in color, too, and waited for sunnier days. As I said earlier, time and waiting for the right shot is key to getting a higher success rate.
I hope you have enjoyed this and that the prompts give you some ideas for when you are next out with your Holga.
Thank you so much, Alec! Alec is a regular contributor here at Shoot It With Film, and be sure to check out his other articles, like Thermal Printer Camera Review: A Fun, Lo-Fi Instant Camera Alternative and An Overview of Pinhole Film Photography: Exposure, Reciprocity, & 6 Cameras I Love by.
You can also check out more of his work on Instagram.
Leave your questions about these photography prompts below in the comments, and you can pick up some Kentmere film for yourself here on Amazon.

Shoot It With Film on Instagram


Leave a Comment