
Written by James Baturin
Neutral Density (ND) filters are an amazing tool you can use to capture stunning creative effects in camera, even in the harshest lighting conditions.
Whether you’re looking to create ethereal long exposure images, or want a shallower depth of field in noonday light, here’s what you need to know about ND filters!

What is a Neutral Density Filter?
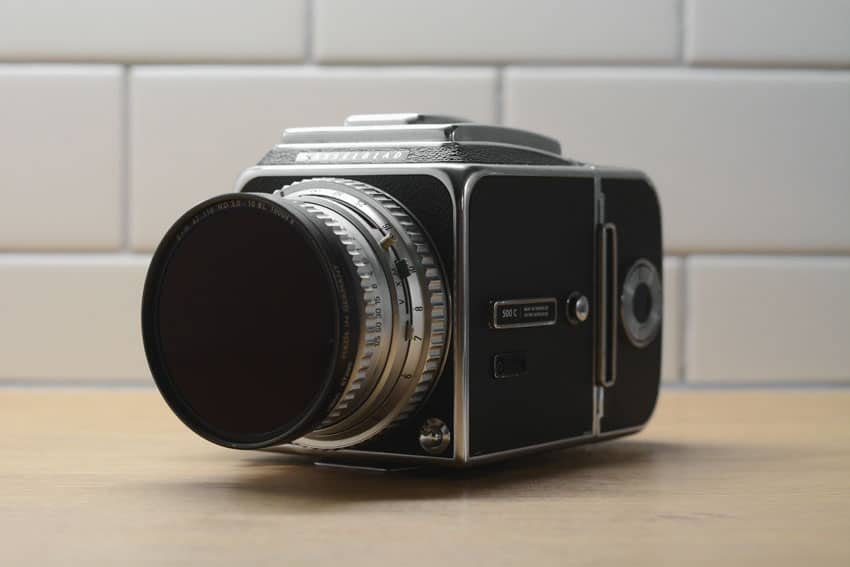
A neutral density filter is a dark-tinted filter that attaches to the front of your camera lens to control the amount of light getting through. Think of it as giving your camera lens sunglasses.
And unlike color filters, ND filters are a neutral tint, which means they can be used with any film (black and white or color) without affecting colors or contrast.
And as long as you invest in a good quality filter, using an ND filter shouldn’t affect the quality or sharpness of your images either.


Why Use an ND Filter?
Neutral density filters are used in any situation where you want to reduce the amount of light hitting your film, giving you more creative freedom with your images even in the harshest light.
For me, ND filters have been most useful in two ways:
- Creating images using slow shutter speeds, such as intentional camera movement and long exposures
- Create a shallow depth of field with a wide aperture in harsh lighting
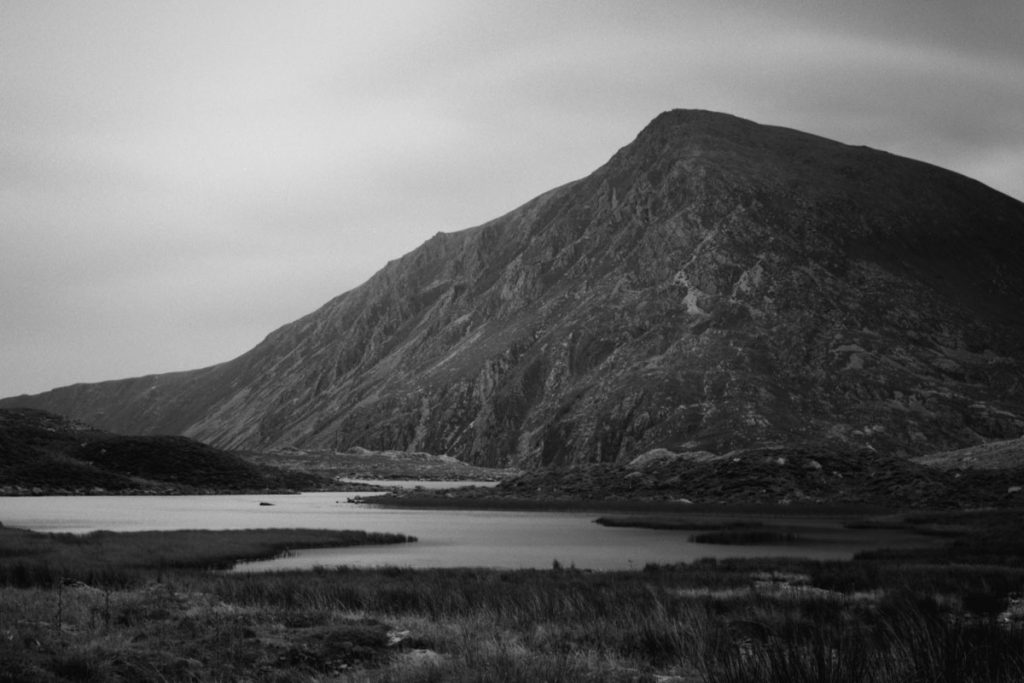
It was my draw to long exposure photography that first introduced me to ND filters and the kind of images I was able to create with them.
With different combinations of ND filter strengths, I could create ethereal images of waterfalls, or capture the movement of clouds or waves over time to create effects that wouldn’t be possible otherwise without completely overexposing the image.
You can read more about how to do long exposures on film here.

ND filters have also allowed me to experiment with slow shutter speeds and intentional camera movement, creating motion and blur in images that might otherwise be dull and ordinary.
But just like with long exposures, these types of images would never be possible without the mediation of the ND filter controlling the amount of light hitting the film.
Learn about creating images with intentional camera movement here.

I’ve also discovered that ND filters aren’t only useful in situations where slow shutter speeds are required.
Sometimes you want to use a wide aperture to create a shallow depth of field to really make your subject stand out, but your camera doesn’t have a fast enough shutter speed given the harshness of the light (the fastest shutter speed on my Hasselblad 500 CM, for example, is 1/500).
In situations like this, I’ve been able to use an ND filter to reduce the amount of light getting through the lens, enabling me to use a wide aperture and avoiding overexposure.

Types of ND Filters
If you’re looking to purchase ND filters for the first time, the process can be overwhelming given the number of specs and options available. Here’s a quick outline to help you get started.
ND filters come in two main mount types that will work for most film cameras:
ND Filter with a Screw On Mount
As the name suggests, these circular filters are threaded to be able to screw onto the front of your lens.
They come in a number of different diameters to fit different lenses, so make sure you know the size your lens needs before buying.
Advantages to the screw on option are that they are generally less expensive, they are lightweight, and they are the most secure if you move around a lot while photographing.
Disadvantages are that if your lenses are different sizes, you may have to purchase different filters to fit different lenses.
If you want a cheaper solution, you can buy the ND filter diameter that fits your biggest lens, and then get step-up ring adapters that screw onto your other lenses and will accommodate the larger filter.
The step-up and step-down rings are fairly inexpensive compared to the filters themselves, but can be a hassle if you are changing lenses a lot in the field.
The other disadvantage to to the screw on mounts is that vignetting sometimes occurs when using wide angle lenses, especially when stacking multiple filters.
ND Filter with a Slide In Mount
Slide-in filters require a special adapter that screws onto the front of your lens, into which you slide square or rectangular filters.
The biggest advantage to the slide-in filters is their one-size-fits-all nature, meaning you don’t need to buy different filters for different lenses.
The surface area of the glass is also bigger with these kinds of filters, meaning you don’t have to worry about vignetting in your images, even with wider lenses.
The disadvantages to slide-in filters are that they are generally more expensive (as you also need to buy the adapter), and more bulky for moving around.
These filters also tend to be just small sheets of glass with no protective metal ring on the edges, so are also more prone to breaking if they are dropped.

Both types of filter mounts produce quality images as long as the glass is good quality, so it really just comes down to preference.
I have been using a combination of screw on circular filters from B+W for my images in combination with the step-up ring adapters to accommodate my different lenses and am happy with the results they give me.

ND Filter Strength
Whichever type of filter mount you choose, ND filters come in a variety of strengths measured by the number of “stops” of light they filter out.
For example, a 3-stop ND filter would require a 3-stop down adjustment in shutter speed and/or aperture to compensate (e.g. a normal shutter speed reading of 1/1000 would require 1/125 to compensate for the filter).
This also means that, for example, a 10-stop ND filter is stronger, or more dense, than a 3-stop filter, and will filter out more light than the latter.
Which filter strengths you choose to go with depends on your preference and what kind of images you are looking to create with them.
All ND filters have the ability to be stacked or layered on top of one another, and so having a combination of different ND filter strengths gives you more creative options.
In my kit I have a 3, 6, and 10-stop ND filter, which in their various combinations when stacked, gives me the option of having 3, 6, 9, 10, 13, 16, or 19 total stops of light filtered out.
If you’re just starting out, I would recommend choosing a 3-stop filter or a 6-stop filter, and then experimenting with it to see what kind of effects you can achieve.


Thank you so much, James! James is a regular contributor here at Shoot It With Film, and you can check out his other articles here, including Six Composition Tips when Shooting Square Format and Best B&W Films for Landscape Photography.
You can also check out James’s work on Instagram.
Leave your questions about neutral density filters below in the comments, and you can pick some up for yourself on Amazon here.


Leave a Comment
Shoot It With Film on Instagram


Blog Comments
freia
November 4, 2022 at 5:18 pm
Hi, thank you for this really good article about ND-Filters! A few months ago I bought a ND-Filter which is variable. I also shoot with film. Now I received the first results and am very disappointed, because there are some dark shadows on it. Do you have any idea, how this could happen? For details you can have a look at my insta-account @slwrdng.
I would be very happy, if you can give me some tipps about that! Thanks in advance! Freia
James Baturin
November 7, 2022 at 10:28 am
Hi Freia! I took a look at the photos you mentioned on your account and I have never seen those results from using an ND filter before. I know that sometimes image distortion can happen if the filter isn’t good quality, especially with variable ND filters. I know the variable filters are convenient, but if you are serious about experimenting more with ND filters I’d recommend investing in a couple of good quality filters, maybe a 3 and/or 6 stop filter and see if that clears up your images! Hope this helps!
Michael Elliott
June 16, 2023 at 10:34 am
Good article James. It’s been a while since I’ve used NDs, because I don’t typically shoot long exposure, and my grad-NDs are only used for sunny days with slide film. But I do plan on taking them out to shoot the river long exposure, and this reminded me to do so.
Peace out 🙂
Ray Goulter
June 17, 2023 at 5:31 am
I have a number of different size ND filters plus a variable ND filter, and use them occasionally. The situations you describe, James, are exactly why ND filters are a necessity in those situations. One point of clarification: you indicate a ‘step-down’ ring to fit a filter with a wider diameter than the lens to which you wish to attach the larger filter. It’s actually a ‘step-up’ ring that’s required to attach a filter with a larger diameter to a lens with a filter size less than the filter. e.g. A ‘step-up’ adapter ring is required to attach a 77mm filter to a lens that accepts 62mm filters.
shootitwithfilm
June 18, 2023 at 3:31 pm
Thank you, Ray! We corrected it in the article!
Ray Goulter
December 6, 2024 at 6:06 pm
James, I’ve come back to read your article again. I can add some additional details and recommendations: (1) The slide-in type filter holder also accepts almost every other colour-correction type filter, thus reducing the overall cost of individual ‘ringed’ filters, so you’ll be able to use colour-correction filters with colour neg and slide films. (2) Different lens filter sizes also require a different diameter lens ring to which to fit a ‘slide-in’ filter adapter. This is still a cheaper option – similar to using step-up rings for round filters. (3) Graduated ‘slide-in’ ND filters, as opposed to ‘fixed-strength’ filters, are best for reducing brighter areas such as skies, as the filter can be slid into the holder at just the right place to reduce sky brightness. If the composition of the image you wish to photograph, particularly landscapes, has a small area of sky then the graduated ND filter is slid into the holder at a shallower depth than if you wish to include a larger area of sky where the graduated ND filter would be pushed in further. (4) I also recommend 1 and 2-stop graduated ND filters for use with slide film because a 3-stop graduated ND filter may darken the sky too much – and 1 and 2 filters piggy-back to give a 3 stop reduction. (5) Going even further: Graduated colour-correction filters are also great for colour work, where additional colour and saturation can be introduced to, for example, a sunset.
All-in-all though, articles like yours are important for introducing ‘new-to-film’ photographers the means to be more creative with their photography, and the use of filters applies just as much to digital as to our wonderful film cameras!
shootitwithfilm
December 8, 2024 at 3:44 pm
Thank you so much for sharing, Ray! Love these additions!
Dennis
January 3, 2025 at 7:51 pm
James. How does Reciprocity failure in film work with using ND filters. Im interested in long exposure photography at night. I use a Hasselblad CM. With a film back. Calculating exposure time gets confusing. Do I measure the light then calculate the exposure time based on the ND filter then add the reciprocity failure time?
shootitwithfilm
January 5, 2025 at 4:18 pm
Hi Dennis! Yes, you’ll measure the exposure time based on the ND filter and then add in extra time for reciprocity failure. This article on reciprocity failure might help: https://shootitwithfilm.com/understanding-reciprocity-failure/