


Written by James Baturin

Everyone has heard a version of the cliche, “A photograph is a moment in time captured for eternity.” With long exposure photography, the opposite is true: A long exposure photograph is eternity captured for a moment.
This is what intrigues me about it, and why I do it.
The way it shows the effects of the passage of time in a single frame gives it a quality of mystery that is, I think, profound and wonderful. Many photos taken using this technique have an almost dream-like quality, and, indeed, the images it produces cannot be seen in ordinary reality.
Our eyes can see only moments in succession, one at a time, one after the other. In a long exposure photograph we glimpse an answer to the question of how the world would look if we could see all moments at once. And I think that’s pretty awesome.
The following is a few thoughts from my experience with long exposure photography. The process takes some time and effort, and will force you to slow down, to pay attention, and be patient, but I think these are qualities any good photographer needs, especially when shooting film.
You can also read more of my articles about shooting long exposures here on Shoot It With Film, like Tips for Shooting Waterfalls on Film and Shooting Long Exposure Star Trail Photography with Film.

What Is Long Exposure Photography?
Any photograph taken with a shutter speed of 1 second or more can be considered a long exposure. The resulting image shows the effects of the passage of time in a single frame, which means the final image will be very different from what you see when you compose your shot.
Long exposures require you to engage your imagination, and anticipate what the effects of time and movement will be.
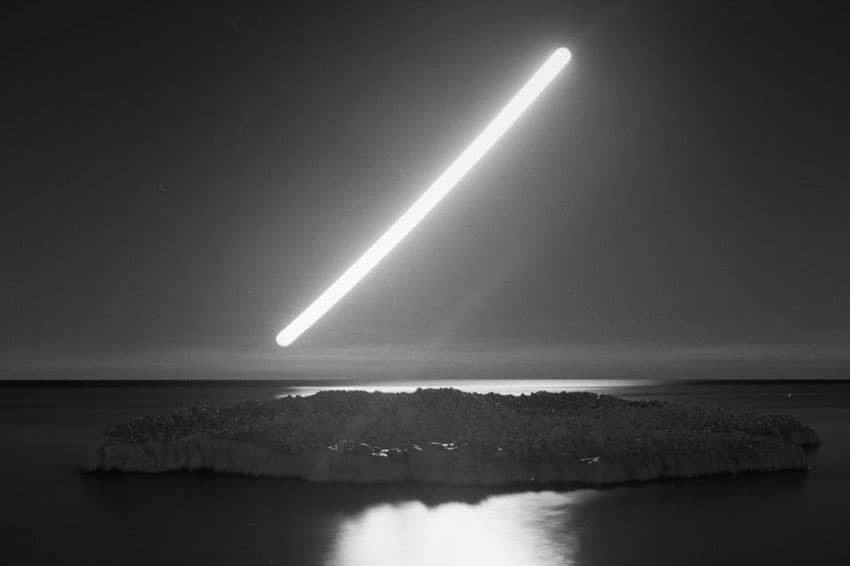
Some effects will be somewhat predictable: a wind-blown sea can appear mysteriously calm, fast moving clouds can appear as white streaks across the sky, and a crowd of people might appear as ghosts haunting a city square.
But there are always things you won’t be able to account for, no matter how imaginative you are, and this increases the sense of anticipation and excitement I have when developing a roll of long exposures.
When your exposure times are minutes (or even hours!) you never know what will make its way into the frame during that time, and how it will affect the final photograph.


Supplies Needed For Long Exposures
When it comes to long exposure film photography there are only three things that are absolutely necessary:
- A fully manual film camera with a “bulb” shutter speed setting – The “bulb” setting is typically a “B” on the shutter speed dial, and allows the shutter to be open for as long as it’s held.
- A tripod – With long exposures, any camera shake will show up in the final image. A sturdy tripod is a must. (View tripods on Amazon)
- Shutter Release Cable/Remote – In bulb mode, you need to hold the shutter open for as long as the exposure takes place. The shutter release cable/remote allows you to do this without touching the camera itself, so there’s no camera shake when the shutter is triggered. Older cameras use mechanical cable releases, while newer cameras have wireless remote options. (Amazon: Mechanical Shutter Release Cables. Wireless Shutter Remotes)
With these three items, you’ll be able to do some long exposures, but only in low light and at night.
- Neutral Density (ND) Filters – Long exposures in broad daylight will require you to get your hands on special filters, called neutral density (ND) filters, that reduce the amount of light getting through the lens during an exposure. (I use B+W brand filters. You can find them on Amazon here: B+W Neutral Density Filters)
A note about ND filters: ND filters are available in a number of different densities, and can be stacked in combination to achieve the desired reduction of light. In short, the greater the density of filter(s), the longer the exposure you are able to make.
For daytime long exposures, I almost always use some combination of 3 stop, 6 stop and 10 stop ND filters (for a maximum of 19 stops). This combination of three filters is ideal for it’s versatility.
But, unfortunately good quality filters aren’t cheap, and this might be a problem for someone just starting out. If you can only afford one I’d start with buying a 10 stop filter, or a 3 and a 6 stop if you can afford two. Two filters gives you more versatility as you can use them individually or in combination to filter up to 9 stops.
What To Look For When Planning Long Exposures
What am I looking for when I go out to shoot long exposures? I think the most effective long exposure shots contain a combination of two elements:
- An element of constant movement such as water, clouds, or people.
- A strong, stable and unmoving subject.
A long exposure photo that lacks either of these elements tends to be deficient.
If every element in the photo is moving the eye lacks a solid counter point to balance the simplicity and/or negative space, and, without movement, the long exposure becomes unnecessary as a normal exposure would produce the same result.
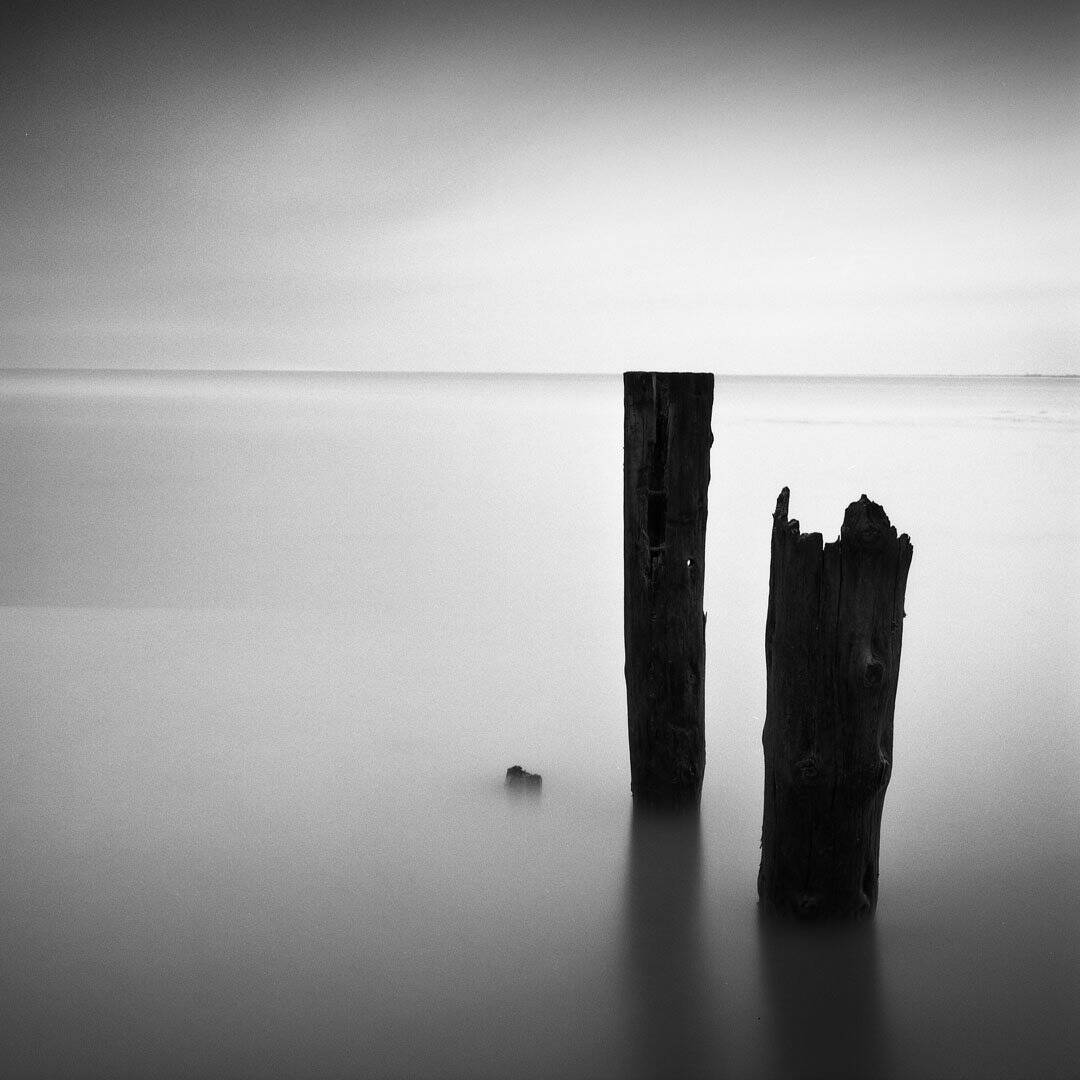
Rocks, piers, and docks standing firm against a rough body of water makes good subjects, as do towering skyscrapers against the backdrop of fast moving clouds across the sky.
Long exposures can also help you capture fog on film.

Calculating Exposure
One of the most challenging and unpredictable aspects of long exposure photography is calculating exposure. Exposure can be tricky enough when a photo is being exposed for a fraction of a second, and there isn’t a light meter around (that I’m aware of) that can give you a proper reading once you’ve added ND filters into the mix.
Luckily, experienced long exposure photographers have posted charts and resources online for this very purpose (BWvision Long Exposure Guide and Chart). I would suggest printing one off and keeping it in your camera bag for reference when you go out to shoot.
These charts don’t take into account every factor for calculating exposure, but they do give a really helpful starting point.
They work by giving you a long exposure time based on a light meter reading under normal conditions relative to the amount of ND filters you are using.
But even with these helpful charts, there is still a lot of guesswork and trial and error involved. As much as I refer to them almost every time I shoot, I think I’ve learned the most about long exposure through all of the underexposed and unsuccessful attempts I’ve made.
As I said before, long exposures do take more time and patience, but if all the calculations are bogging you down and stealing the joy that creating an image brings, then don’t be afraid to try a more intuitive approach.
Even an “unsuccessful” photograph can prove to be a “success” you didn’t expect. Some of my favorite long exposures were an uncalculated afterthought at the end of a shoot to finish a roll. Some have simply been the result of a curious question: “How would it look if I tried_______?”
Sometimes I’ll try the same composition using different lengths of exposure to see how different amounts of time convey the sense of movement in each. Sometimes it doesn’t work out, but I’ve also been pleasantly surprised by the unexpected.
Take your time, enjoy the process, enjoy the place; be attentive to it and what it’s giving you. Take good notes, and learn from the mistakes that you’ll inevitably make. The resulting images for me are worth the extra effort.

Reciprocity Failure And Choosing A Film
When shooting long exposures with film, there’s one more factor that affects exposure to be considered. It’s called “reciprocity failure.” Reciprocity failure is basically a fancy word that means the longer film is exposed to light, the less sensitive to light it becomes.
This means that a long exposure shot is going to need more exposure than initially calculated (i.e. from what the chart says).
It took me a number of rolls of film and some research to figure out why most of my long exposures were underexposed, and reciprocity failure was my hidden culprit.
To complicate the fact, each film stock is affected by it differently.
Film manufacturers will have information on reciprocity failure for each specific type of film, but I recently discovered an app called “Reciprocity Timer” that calculates long exposure times for a good selection of major film types, taking reciprocity failure into account.
My exposures have been much more accurate since. If you don’t have access to the app, as a general rule it’s a lot harder to overexpose a long exposure than to underexpose, especially if your exposures are over 1 minute.
For most films, if you’re initial exposure calculation is 2 minutes you could safely expose for 3 or even 4 minutes to get a proper exposure and account for reciprocity failure.
If you want to understand more about reciprocity failure, this article takes an in-depth look at it.
That being said, any B&W film will work for long exposures, and which you decide to use will largely come down to personal preference.
In my experience, I really like shooting with Fuji Acros 100 (find on Amazon or on eBay) for two reasons: 1) It has a very high resistance to reciprocity failure, meaning long exposure times will be much shorter than other films, and in general easier to calculate; and 2) Long exposures tend to increase the grain in an image, which may or may not be desirable depending on the look you are going for. Fuji Acros has a very fine grain.
For those looking for more long exposure inspiration, here are some of my favorites: Michael Kenna, Rolfe Horn, Alexey Titarenko, Darren Kelland
Remember to be patient, and enjoy the process!

Thank you so much, James! Read more of James’s articles here, including an article on shooting waterfalls on film and shooting star trails on film. You can also see more of James’s amazing work on Instagram.
Leave any questions about long exposure film photography below in the comments, and check out all of our tutorials on experimental film photography here!


Leave a Comment
Shoot It With Film on Instagram


Blog Comments
Iain Watson
September 2, 2019 at 2:46 pm
Hello, thanks very much for your informative articles on long exposures for black and white film. Whenever I perform a a night long exposure on my canon elan 7 in manual mode, it always works out the exposure time based on my F Stop setting I choose. The higher the F stop the longer the exposure.
Do I need to circumvent this to get better pictures as some are not that clear or focused even though I had the focusing set correctly.
Thx
Iain
James Baturin
September 7, 2019 at 6:53 am
Thanks for your comment, Iain. I’m not familiar with the Elan 7, but from what you’ve described it sounds like the camera itself calculates the exposure time? Is there a way you can override that (i.e. put the camera in full manual mode) so that you can control your own exposure time? Night photography is tricky, and usually light meters (like the one that is probably calculating the exposure in your camera) are rendered useless because there isn’t enough light for them to give an accurate reading. And as a general rule, I’d say expose longer than you think you need to for nighttime long exposures on film; the reciprocity failure of most films makes them pretty resistant to overexposure. If the focus is the problem, make sure your camera is set to “manual focus”, and set it to focus at infinity for things like star trails. Hope this helps! All the best!
James
andrew brown
September 14, 2019 at 12:16 am
Thanks for the article.
I’m a complete beginner who has just received my first decent film camera as a gift recently. As soon as I realised that it had the b setting I’ve been researching long exposure and this article is the best. Incredibly useful and informative.
James
September 14, 2019 at 12:39 pm
Thanks Andrew! Long exposures take a little extra effort but for me the results make it so worth it! Happy shooting! 🙂
Rene Limjoco
October 9, 2019 at 1:53 am
Hi,
I’ve recently been shooting film coming from digital and indeed film behaves very differently from a digital sensor and I’m starting to develop my patience to set up correctly, meter, calculate reciprocity, etc. This has to be done because unlike digital you don’t have an instant gratification/confirmation with an LCD preview.
I’ve been relatively successful with daytime long exposures with a spot meter. Where I have been struggling is with nighttime long exposure. Even considering the cumulative compensation for ND, GND and reciprocity my shots always appear underexposed. The areas where I want to be exposed correctly are fine but the whites/highlights tend to be overexposed and generally the output has very large and rough grain with too much contrast.
Is this a hard limitation of film particularly for night photography long exposure?