
Written by Jennifer Stamps
I recently shared my experience with creating a photography zine. I’ve created a handful of magazines at this point, and, today, I want to share some of my tips for actually sitting down to design your zine.

Organizing Content for Your Photography Zine
First thing is first… you need to organize your content. You should already have a theme by now, so gather all of the content you want to include in your zine. You could do this electronically or you can print the images you’re considering for your zine.
I encourage you to have two piles: the YES pile and the MAYBE pile. The YES pile is your strongest content. The MAYBE pile should still be very very strong. Why have the MAYBE pile? For page count… You might need a few images, a story, a poem, etc, to come up with a correct number of pages.
Note on page count: you must print in numbers of four. Four pages not four pieces of paper. So if you’ve created your zine and your YES pile gives you a total of 10 pages, you will either need to delete two pages to get eight or add two pages to get 12. In comes your MAYBE pile.


Creating a Rough Draft of Your Zine
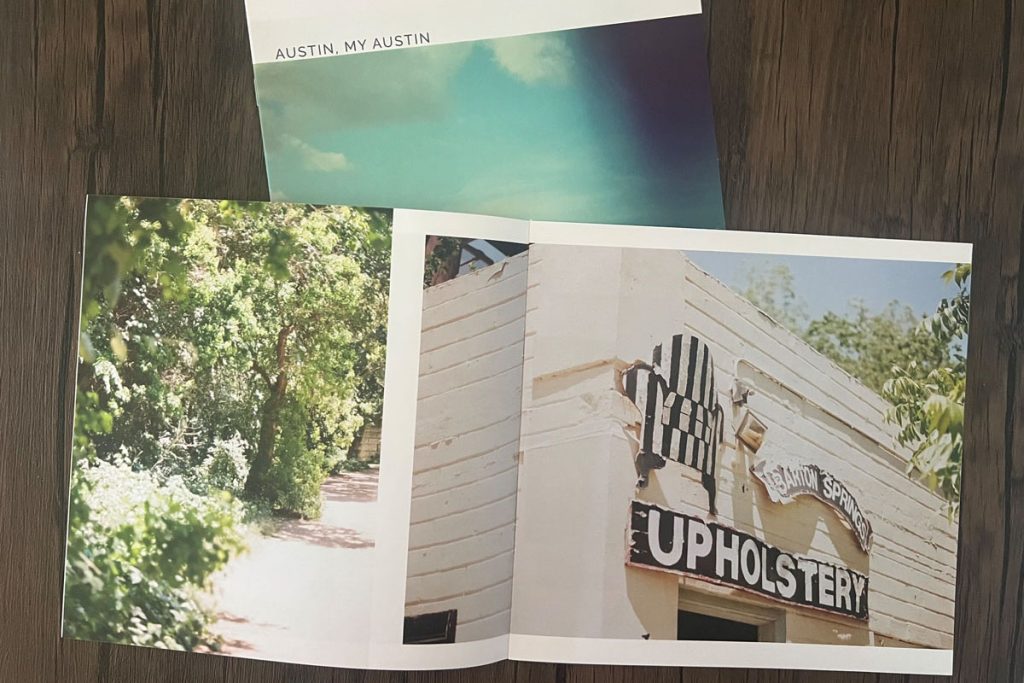
Next, sketch out a rough layout of your zine. You can quite literally sketch it out if you’d like, or create more of an outline. You don’t need to get fancy—just jot down where you’d like the text, images, and other elements to go. This rough draft is like a blueprint that helps you visualize how the content will flow.
While designing your draft, consider the flow and narrative. Even if your zine is all photography, there is still a story to tell. Be mindful of the story you want to tell while laying out your zine. You can do this by allotting more space for images or clustering images.

Including Text in Your Zine
Not all photography zines will have text content. It’s completely up to you. But if you feel like a few words about the images would help the viewer, consider including them.
My zine, Retold Stories, is a collection of old photographs I found in thrift shops embroidered to Holga photos I’ve taken of my travels. Each piece is given a new story. However, some of the found images had names, dates, and locations written on the back of them. I wanted that information to be a part of the zine, so I included it with text.
For the Framed Instant zine, I encouraged photographers who submitted to the zine to include information about the image. Some have a title and camera info – but some also have a back story. It was important to me to include those snippets from the artists.
Don’t be afraid to share some of the story with the images.


Four Tips for a Clean Magazine Layout
While it’s great to experiment, remember that the content still needs to be easy to read and navigate. Here are a few tips for balancing creativity with readability:
1. White Space
Don’t overcrowd your pages. Give your content room to breathe by balancing a lot of images with blank space. One of my favorite ways to make a photo stand out is by offsetting the image on a spread (making sure it’s not dead center) and then surrounding it with white space. The eyes are drawn directly to the image making it stand out even more.
2. Visual Hierarchy
This is important if you’re going to include text. Whether it’s info about the image, camera, or location; or a brief article within the zine, a clear visual hierarchy is crucial.
Create a clear visual hierarchy by using different font sizes and styles. For example, titles should be the most prominent, with subtitles and body text scaling down appropriately. This helps guide the reader through the zine.
3. Page Numbers and Consistency
If your zine is long, include page numbers so readers can keep track. If you do include page numbers, keep in mind that page one is the cover, page two is the inside front cover, etc. You can also consider including a table of contents so your viewers can browse different sections at a time. It’s also important to maintain consistent margins and grid alignment across pages for a polished look.
4. Use Contrasting Colors
It’s a lot of fun experimenting with color, but make sure your zine is legible. If you opt for a color background, make sure your font is white. If you opt for a white background, use a bold color as your font.


Give Yourself Credit
Yes. You. The artist or editor. Give yourself the credit you deserve. At the very least, include your name and links. You can even include your location, bio, artist statement, and/or a little about the project you’re sharing. Help people learn about the artists as well – not just the art.
Finally – Laying Out Your Zine
If you have access to and are comfortable with the Adobe Suite, I highly recommend using Adobe InDesign. You can create your zine so the font, gutter, colors, etc are all consistent. You can easily add or remove pages as needed.
If you do not have access to Adobe Suite, no worries. There are some amazing tools out there that are free and easy to work with – you might just need to play around with it for a little bit.
Canva is the free/easy tool I recommend. Once you have your account, you can create a zine any size you want and start creating. They even have templates you can use to get started.
Don’t overthink it. The zine doesn’t need to be fancy. Use your software as a tool to help you tell the story. Don’t worry about trying to show off our design skills. Unless of course, your zine is all about how awesome your design skills are.
I hope these tips help you take your zine from the idea book in hand! Have fun with it, and remember, there are no rules in the zine world!

Thank you so much, Jen! Jennifer is a regular contributor here at Shoot It With Film, and be sure to check out her other articles, like How to Create Your Own Photography Zine: Step-by-Step Guide and Organizing Your Film Negatives, Scans, and Instant Film.
You can also check out more of Jennifer’s work on her website, Instagram, and Etsy shop.
Leave your questions about designing your own photography zine below in the comments!


Shoot It With Film on Instagram


Leave a Comment