
Written by Alec Pain (Alastair Place)
I came late to the EBS (Expose Both Sides of your film) party. I hadn’t really considered it until I saw the incredible shots that Laura Yurs made of Chicago (and later New York) with Lomography Turquoise.
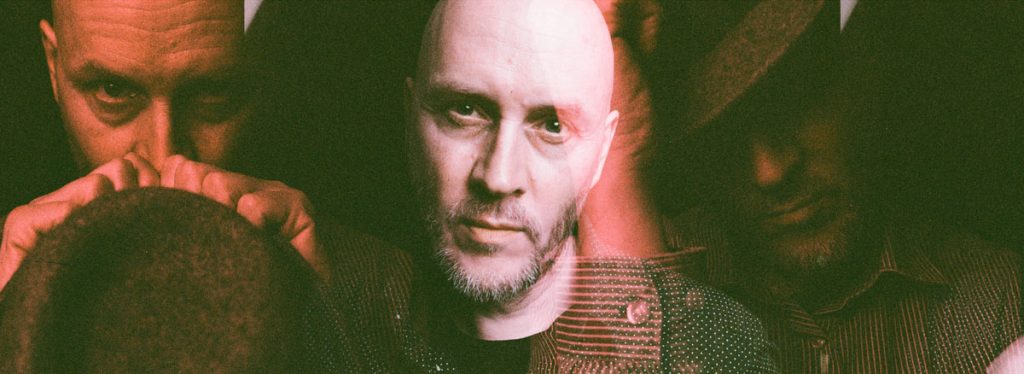
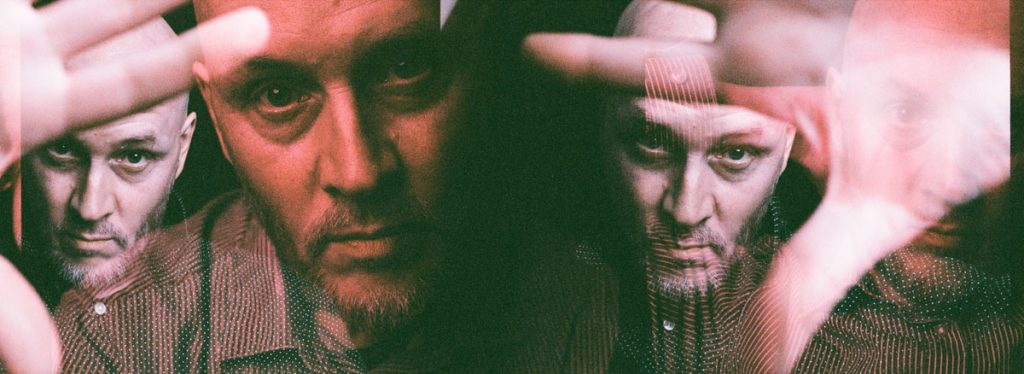
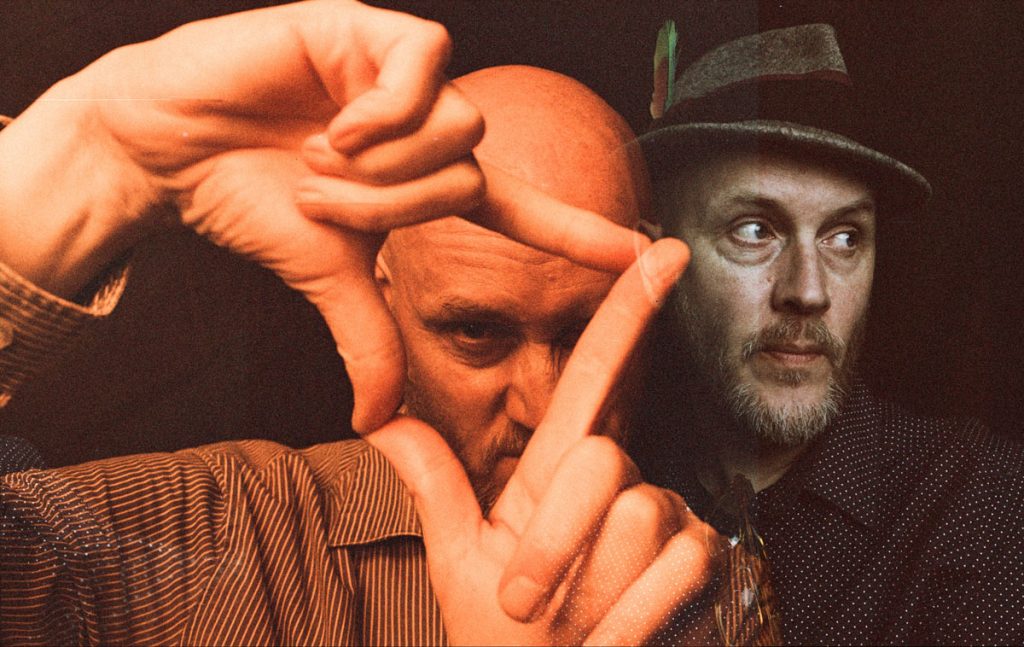
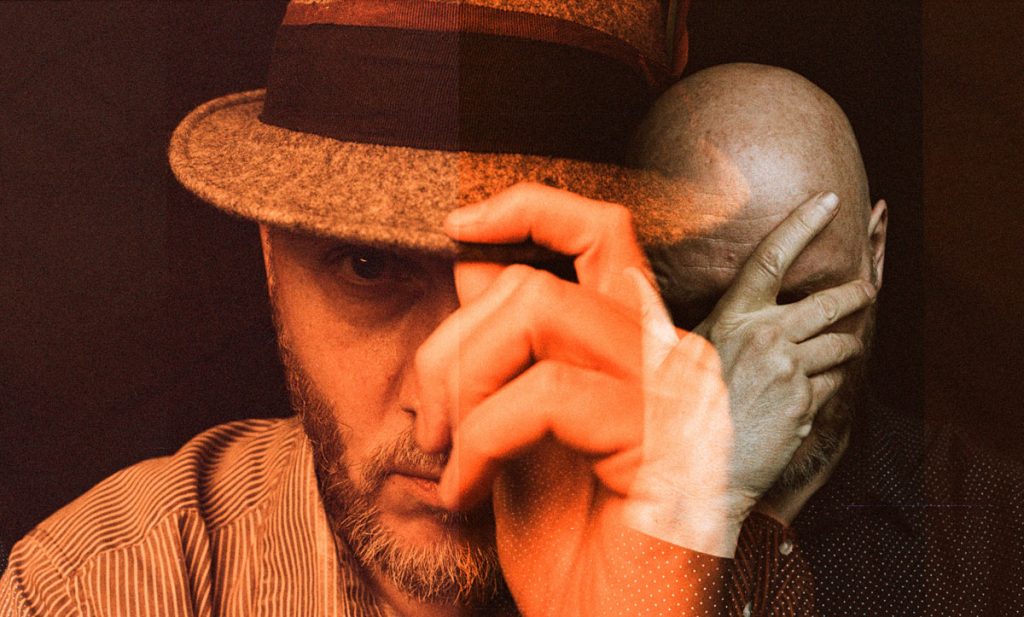
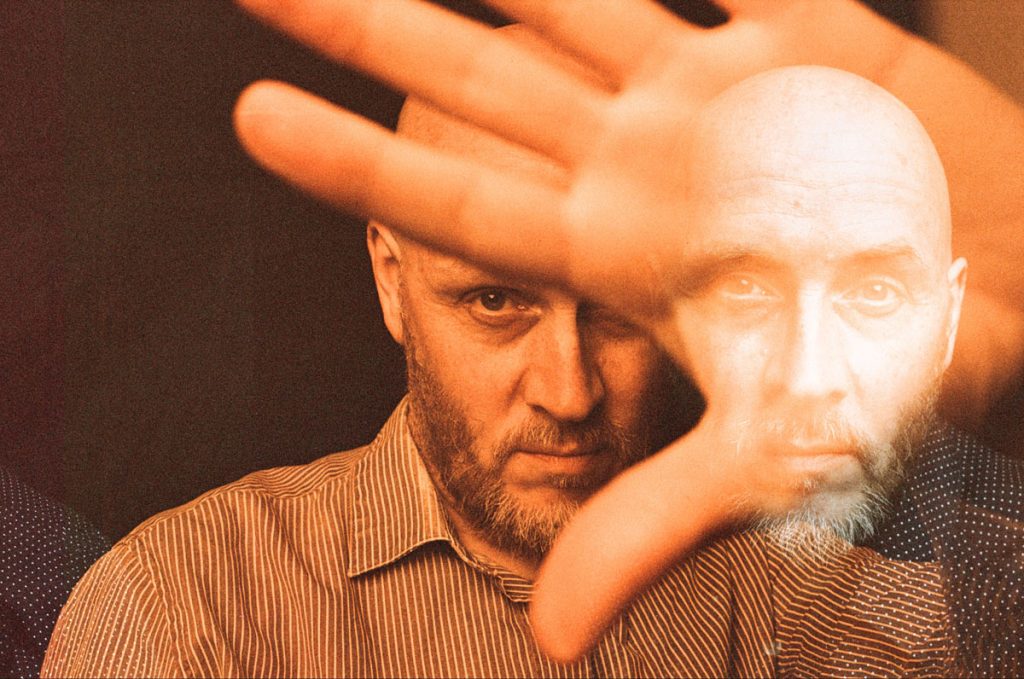
I wanted to do it too, but I also wanted to do something different with the technique. So, I decided to try it out with self-portraits. The aim was to expose both sides of Lomography Turquoise, Lomography Purple, and Lomography Metropolis film.
How to Expose Both Sides of Your Film
Now if you don’t know how to do EBS, then you would do well to explore the Shoot It With Film archives. There’s an article called Exposing both sides of your film: EBS Technique from Amy Elizabeth that shows you exactly what to do.
Essentially the process requires you to shoot on the first side of the film, then rewind the film and turn it around so that you are shooting on the other side of the film.
In addition to the article, here are a couple of tips I have for you – especially if you are like me – you make plenty of mistakes on the way.
- Remember to tape over the film cassette’s DX code (there’s another article on this one which also gives you a DX code chart!). When I’d completed the Turquoise side (which I shot at 400 ISO), I rolled my film (in a darkroom bag), into a spare cassette. I needed to shoot the second time at 100 ISO as per Amy’s instructions from the article, but my Nikon N50 doesn’t allow me to change the ISO. Cue me having to then rewind the film again. I couldn’t work this out the first time, how to change the ISO, so I used a Holga 135 camera to take my second set of images.
- With the Purple and Metropolis films, I masked off the DX code, and the Nikon then allowed me to change my ISO.
- Cut a long enough leader, and don’t cover the holes over – I sellotaped mine in the middle as my Nikon N50 couldn’t catch them in its grooves.

Shooting with Strobes
Did I mention going through the Shoot It With Film Archives already? Well, I shot these with a Godox AD300 strobe, and like John Adams III’s article: Flash and film photography: taking the fear out of using flash with film, I use my digital camera to work out the correct exposure.
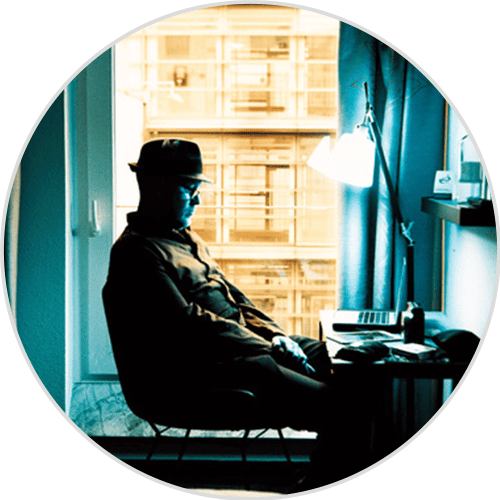
These were all shot in my backroom with a black backdrop. There’s not a lot of space in there but just enough to set up one strobe and connect them to my digital Nikon Z6, my analogue Nikon N50, and my Holgas.

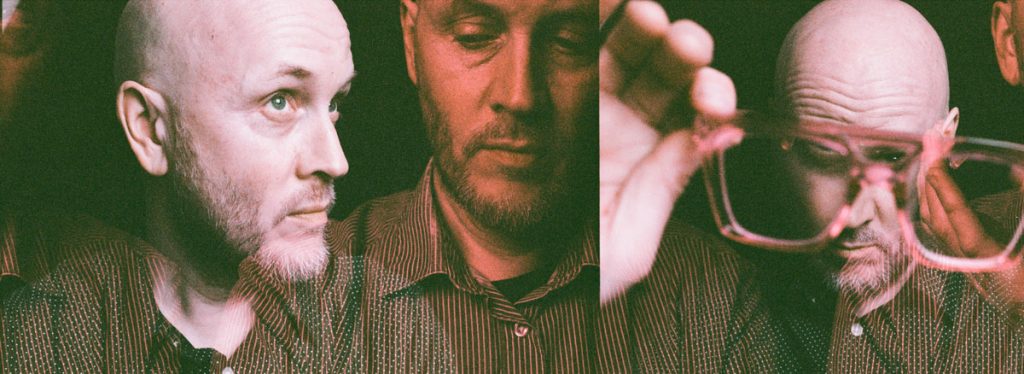
Practicing Double Exposure Self-Portraits (not EBS) with Ilford HP5
I had tried these double exposure portraits before – with black and white Ilford HP5. These are without trying the EBS technique, so I wanted to try the same process but with EBS.
Technically, you can do EBS with b&w film, but it is much more common with color film. With b&w, the EBS images will be slightly sepia toned in color and it usually results in extra scratching on the negative.
The Nikon N50 is fairly consistent when loading the film again so that you can pretty much line your exposures up, if not your subject:
With EBS, I guessed that I would get a continuous roll of portraits, alternating both sides with a little more variation – there is little probability that you will get individual shots.
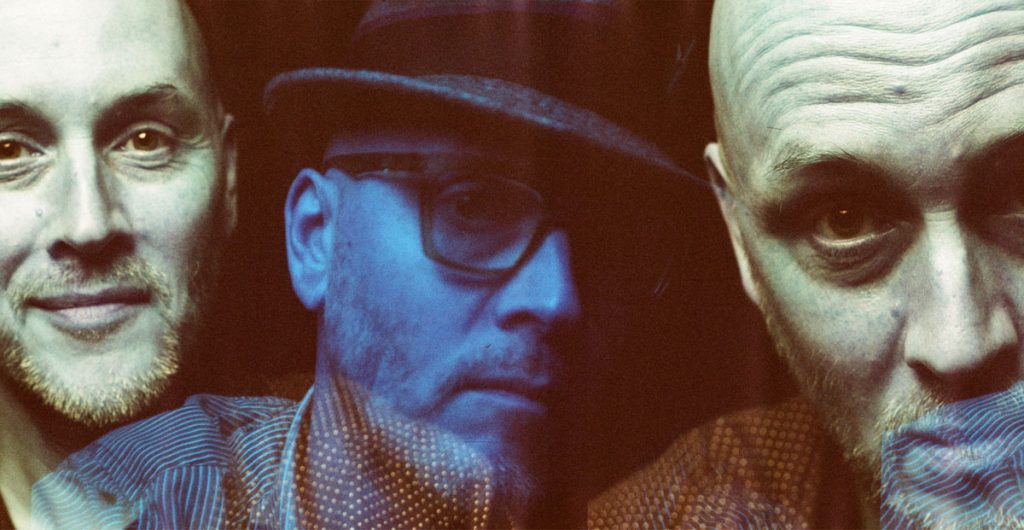
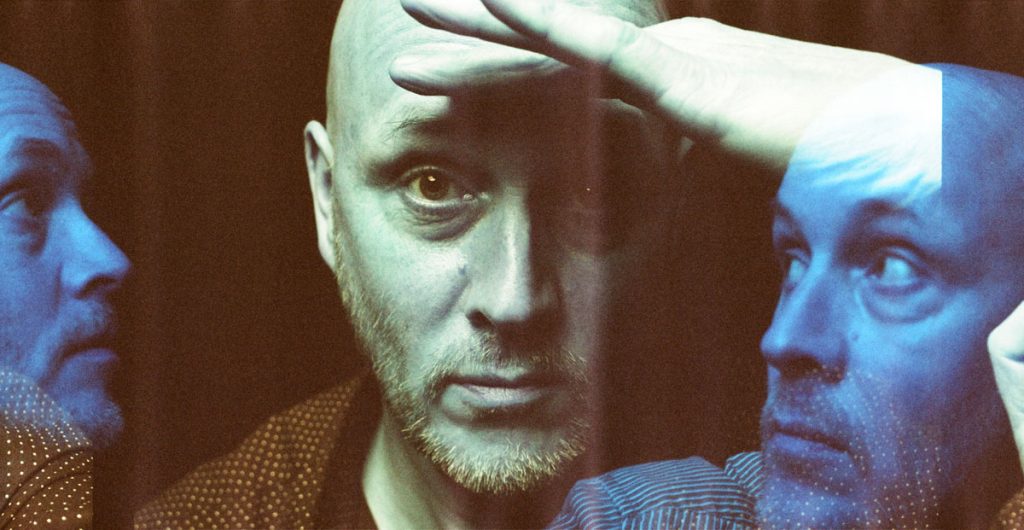
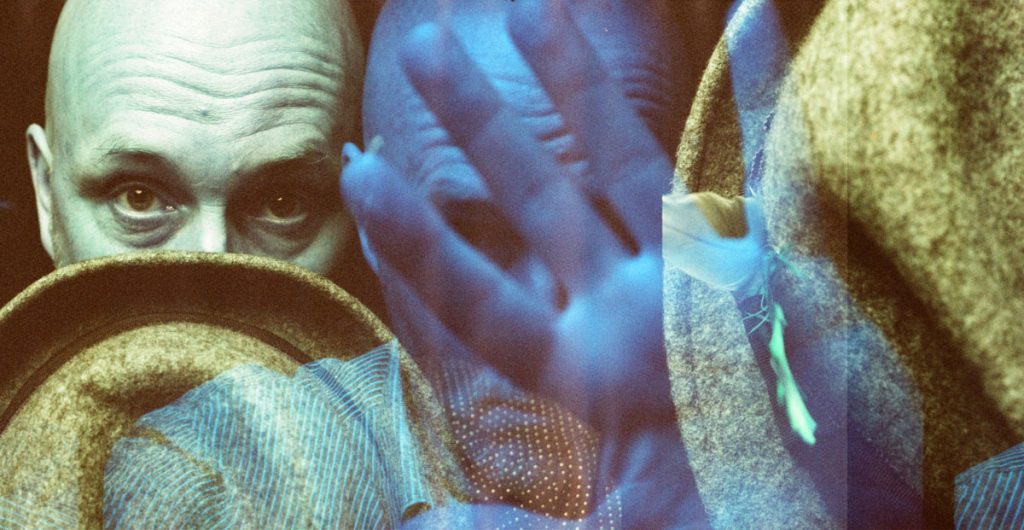
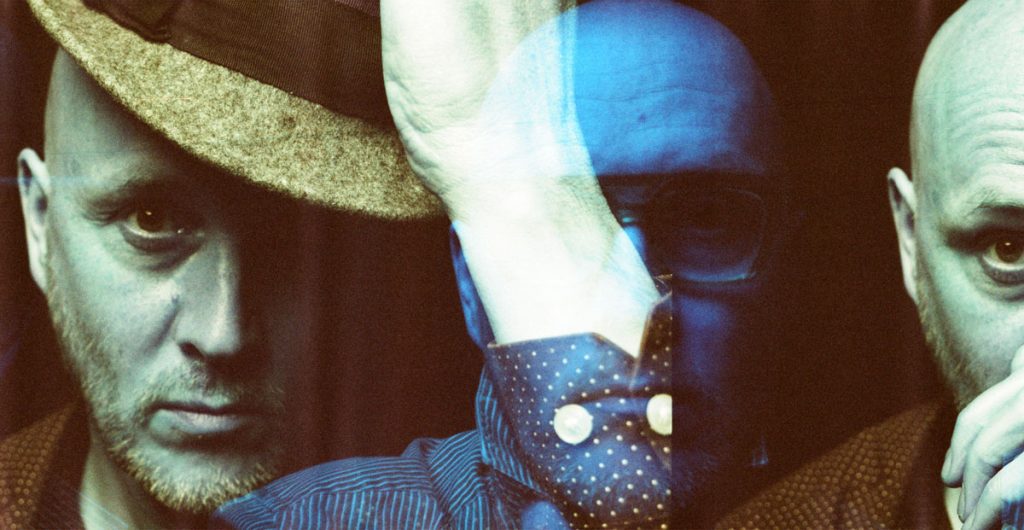
What I hadn’t expected was the colors: redscale in Lomo Turquoise turned blue.
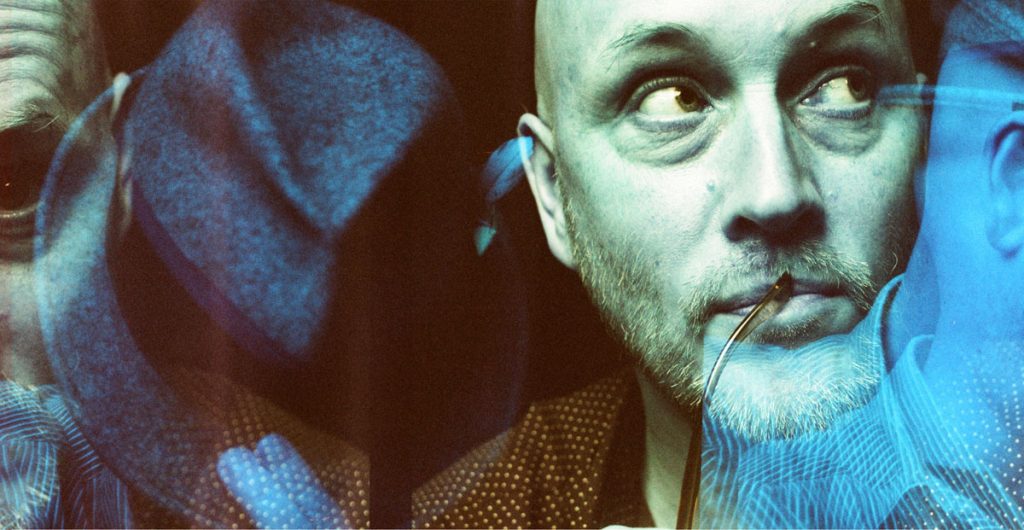
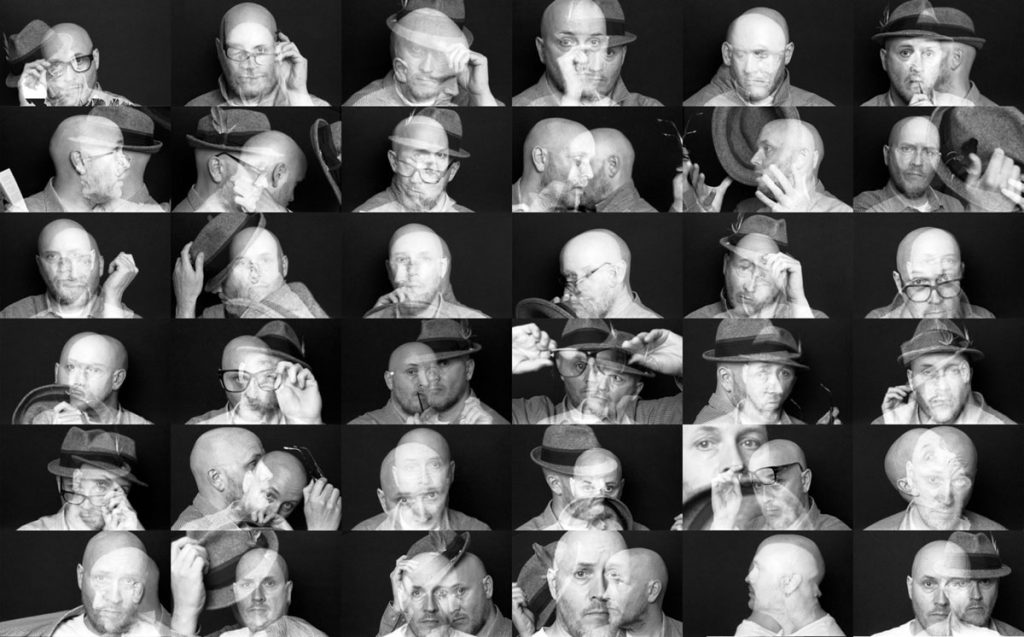
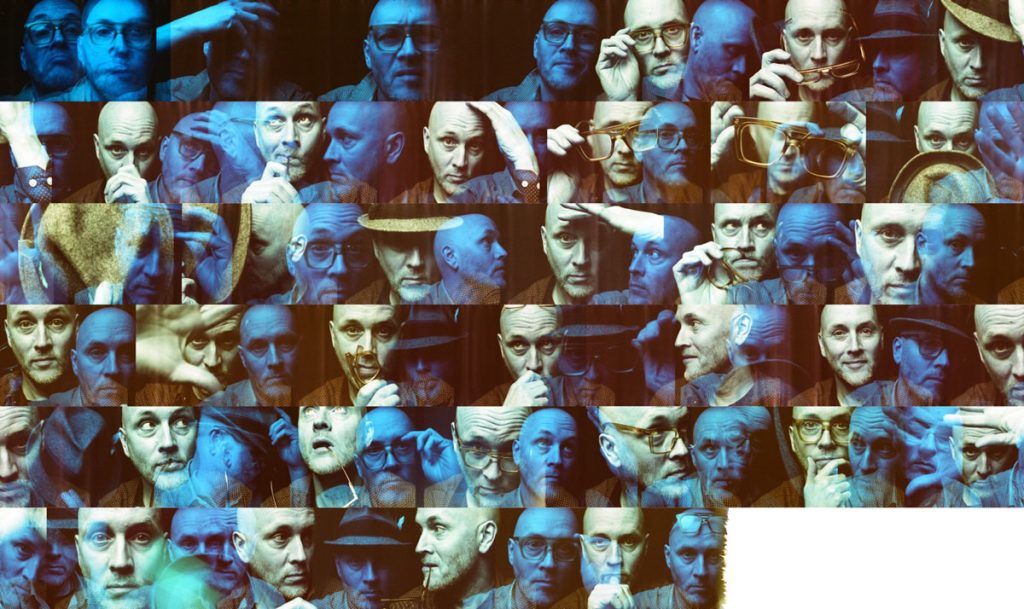
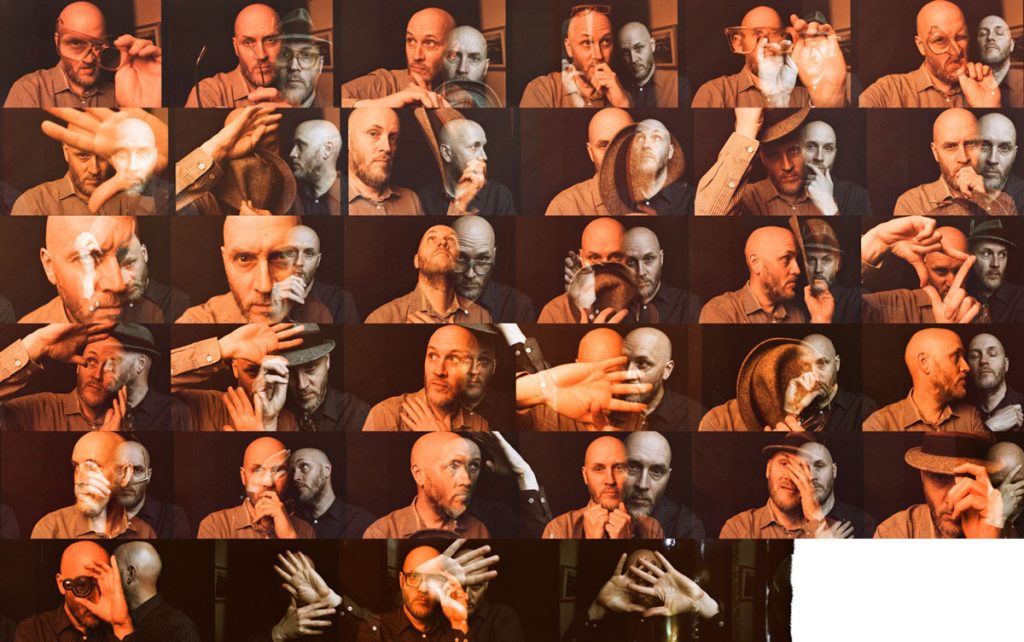
EBS Self-Portraits on Lomo Turquoise
Lomo Turquoise turned out to be my favorite. The blues were a great contrast to the light turquoise faces:
Here’s the whole roll:
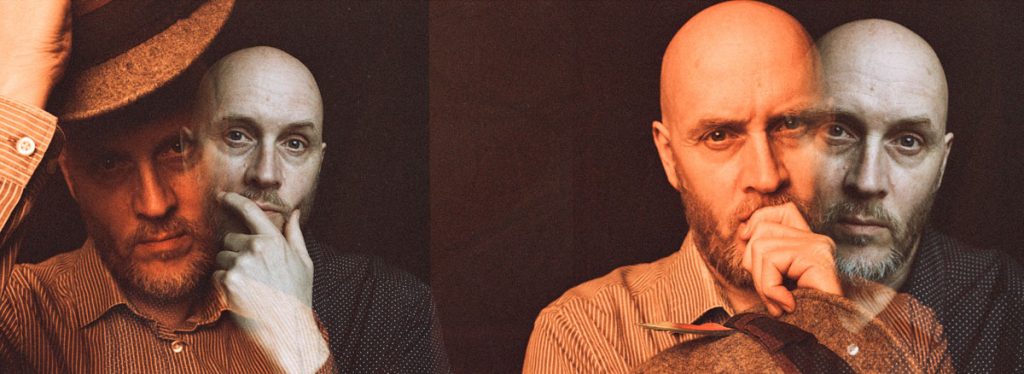
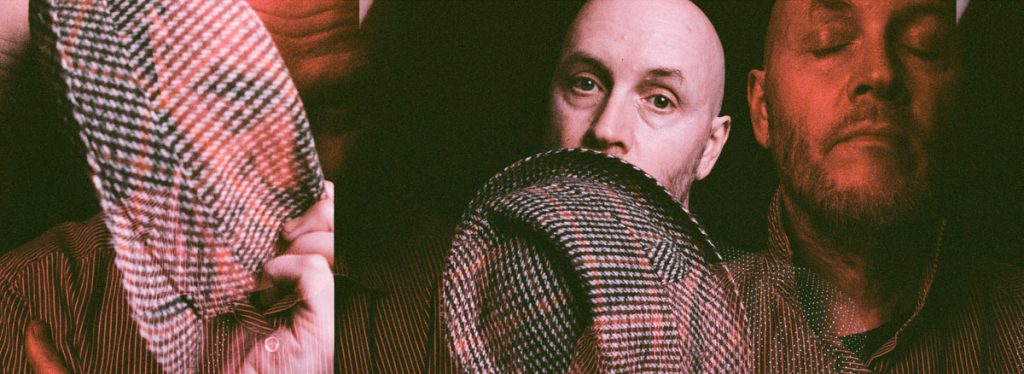
EBS Self-Portraits on Lomo Purple
The Lomo Purple definitely showed more red against the muted purple:
Here’s the whole roll (I opened the roll by accident at the end hence the bizarre light leaking):
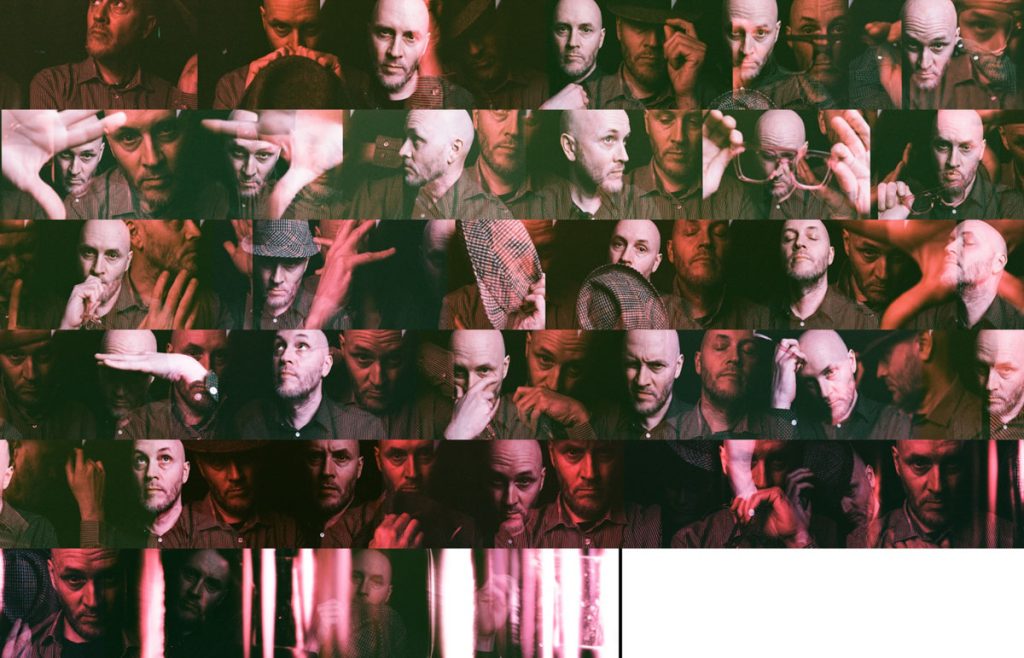
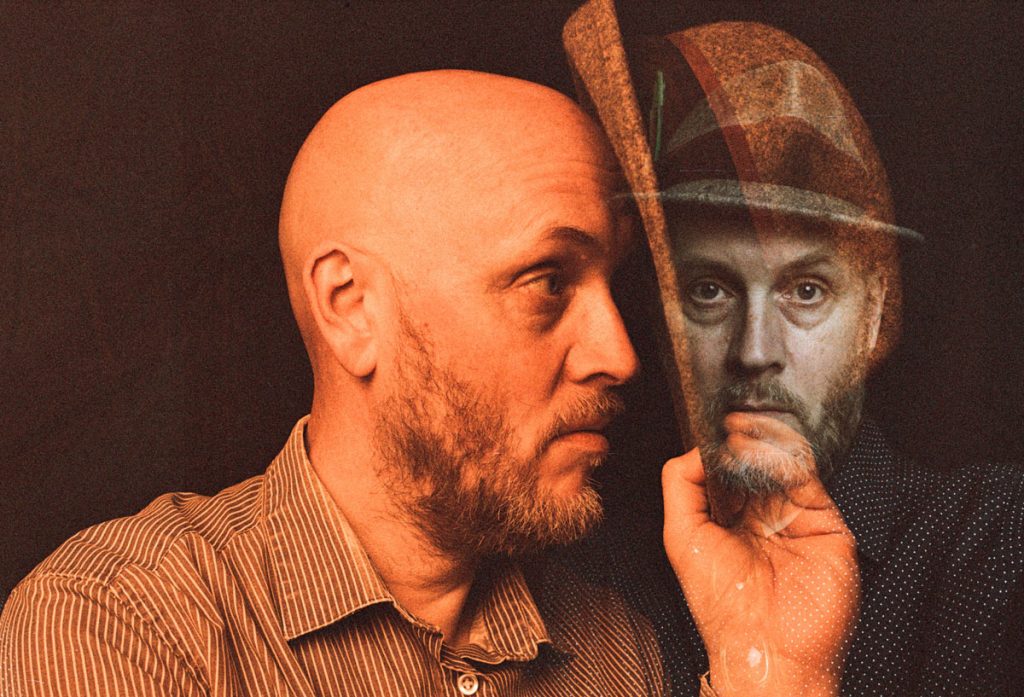
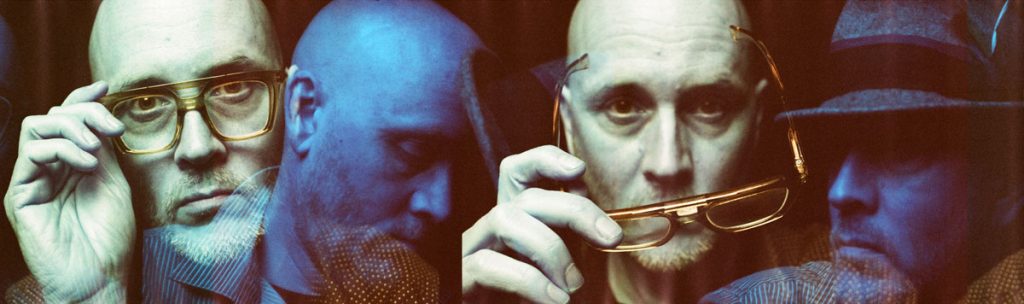
EBS Self-Portraits on Lomo Metropolis
The redscale in Metropolis became a little more orangey, but, again, proved a lovely contrast:
Here’s the whole roll:
Scanning EBS Negatives With a Lab
My film rolls were scanned by The Mini Lab in Northampton. I have worked with them for a long time now, and they very kindly scan my negatives so that I can then stitch the whole roll together.
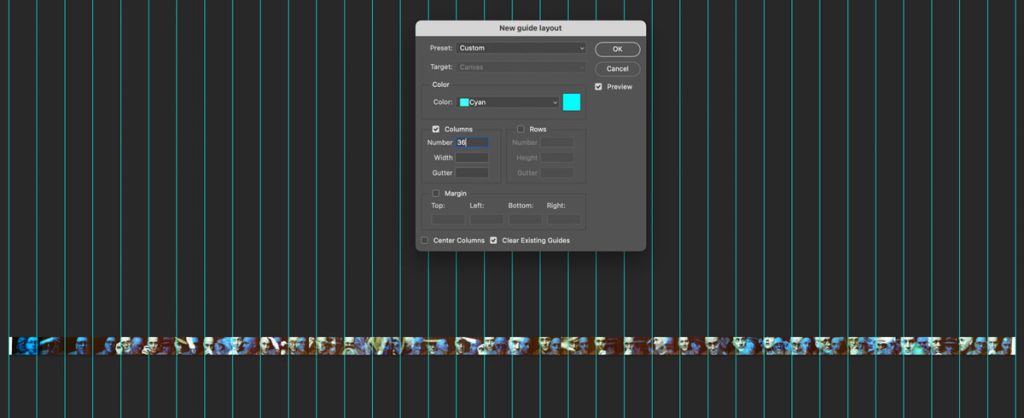
The images above are the scans they provided me. I like to present my work on Instagram as 36 separate posts, so once I have stitched them together in Photoshop, I then export them out by using Photoshop’s Guides > View New Guide Layout. You can then split out your files for Instagram.
The only issue with this is that the file is huge. Around 1.36GB! You can then reduce the size of the file – once you are happy by flattening it.
I would also recommend using Snap to Guides, and then cropping each individual process as Photoshop’s Save for Web (Legacy) has a pixel width maximum of 8192px.
Scanning EBS Negatives Yourself
Scanning yourself does have its benefits. You can scan the sprockets, and make a contact sheet.
I’m weighing this option up, but what has stopped me so far is that I will have to cut my negatives! Currently the negatives that The Mini Lab have sent me back are rolled up. I would need to cut them somewhere (but where?!!) to then scan them in.
In conclusion, I loved comparing the colors on all three Lomography films, and it has helped me to produce a set of images – and plenty more to explore with EBS.
Perhaps I might try shooting some neons and some EBS portraits together, or more buildings like Laura’s – and mixing them with portraits also.

Thank you so much, Alec! Alec is a regular contributor here at Shoot It With Film, and be sure to check out his other articles, like Self-Portrait Experiment Using a Holga & Flash and Finding Photography Inspiration Where You Live.
You can also check out more of his work on Instagram.
Leave your questions about shooting EBS self-portraits on film below in the comments!


Leave a Comment
Shoot It With Film on Instagram


Blog Comments
Taylor Blanchard
August 24, 2024 at 7:40 am
Alec – I’ve always loved this series and thank you for sharing more about your process!
Jess
August 24, 2024 at 9:13 pm
Absolutely blown away by these EBS self-portraits — so inspired to try my hand at these!