
Written by Amy Elizabeth
In 2010, I was gifted an Instax Mini 25, and I thought it was basically the coolest thing ever. (I was correct.)
Polaroid had recently stopped making film, and it felt like instant film and film photography was dying a slow death. So the fact that Fuji was still making Instax film and coming out with new cameras was a true win.
It seems like, at least in my photography bubble, that the fascination with instant photography has grown greatly in the last few years.


Fuji keeps coming out with new cameras and Polaroid has rejoined the game (and is reintroducing their circle film and has the NEW Polaroid Go out now!)
Instant film is becoming its own art niche in the film world with people experimenting in such rad ways. From multiple exposures to long exposures to Polaroid emulsion lifts and black and white transparencies, I’ve watched in awe as people take instant film to new heights.
But my camera (and I subsequently acquired an SP-1 printer to add to my arsenal) doesn’t do doubles, long exposures, and isn’t a Polaroid so can’t do emulsion lifts or transparencies.
Womp. Womp.


Related: How To Do Polaroid Emulsion Lifts
Creating Instax Transparencies
But then Cami Turpin sent me info about creating Instax transparencies and I WAS OVERJOYED.
She found an outline of the process, but it was up to us to experiment to figure out specifics. I spent more time at my basement sink than I care to admit to figure out exactly how to make them work, but oh, I am so glad I did.
Cami has been my go-to for all things instant film and she has just put out a guide to shooting instant film. If you enjoy or are looking to get into this medium, do yourself a favor and snag it.


What is an Instax Transparency?
An Instax transparency is the process of removing the backing and multiple layers from an exposed Instax image, leaving behind a transparent version of your image.
Once I figured out how to make the transparencies, I started to layer them on top of one another, spaced just a bit apart, so when you move around them they create an almost 3D or holographic effect.
It’s my way to create bits of surrealism without having to use Photoshop. (Film photographers, I know you feel me. I film because I don’t want to Photoshop.)
My eventual goal is to take some of my faves and hang them in the window, so I will have to report back when I figure out the best way to do this. (Because art belongs on walls. Not in drawers or on hard drives.)

How to Create Instax Transparencies
BUT FIRST let’s dive into how to create the transparencies themselves. So here is the super-easy, but kind-of-specific, process for Instax transparencies!
Supplies:
- Instax camera or printer (find an Instax camera or the Instax printer on Amazon)
- You can use any kind of Instax camera (Instax Mini, Instax Wide, and Instax Square) or printer for this project.
- Instax film (find on Amazon)
- Sink with hot, running water
- Scissors
- Gloves (find on Amazon)
- Soft, cotton cloth (NOT microfiber) (find on Amazon)
Video Walkthrough
Here’s a walkthrough of the entire process from my IGTV, and there are also written directions of each step below.
Step 1: Take Your Photo
First of all, here is the unfortunate truth: Instax transparencies have to be made within minutes of printing.
If you wait too long, some of the layers will harden and won’t wipe off. For this reason, I use my Instax SP-1 printer, so I can print one photo at a time and create the transparency on the spot.
You can also do this with photos from a camera, but beware that the transparency process has to start 3-5 minutes from the time you take the photo.
So get your supplies ready, take your photo, and be prepared to just hurry in and get going.
As soon as my photo prints, I set my phone’s stopwatch to keep an eye on time. You want the photo to be just developed, so 3-5 minutes is when you want to get going.
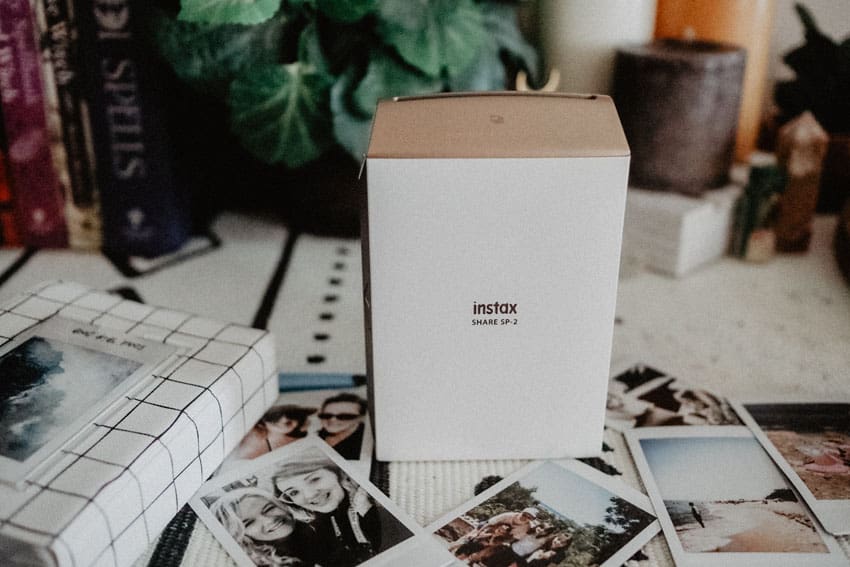
Related: Fujifilm Instax SP-2 Printer Review


Step 2: Cut Around the Edges
While I’m waiting for my print to develop, I cut around all the edges of the frame, leaving a thin strip.
You’re going to need to peel off the back, and cutting off the frame will help make this happen.
Step 3: Start Warming Up Your Water
I use water that’s around 120-125ºF or right around 50ºC, so start getting your water up to temp.


Step 4: Peel Off the Plastic Backing
I’m sure everything we do goes explicitly against everything Fujifilm tells us to do, but….art.
At around 3’30”, I start trying to peel off the plastic.
The long sides of the film are easier to pick apart, so attack the plastic at one of those parts. The top and bottom are more adhered, but once you get your nail under one of the sides, you can just rip it away from the entire back very easily.
I find it difficult to do this step with gloves, because I need to be able to use my nail and actually feel what I’m doing, but if you can do it with gloves, that’s preferable.
Step 5: Put on Gloves
Right after I rip the back off, I put on my gloves. The purpose of the gloves is two-fold:
- It protects your hands from the chemicals you’re about to rub off, and
- It helps you tolerate the heat of the water you’re about to encounter.

Step 6: Grab Your Cloth and Start Rubbing Away the Chemicals
This is really your last step. The only thing we do now is grab that soft cloth and start rubbing away the layers.
There are actually quite a few layers in an Instax, but when you’re doing transparencies, there are really four layers you’ll see as you work.
The first layer will come off easily, and you probably will just let the water do its thing.
The next layer will require some gentle rubbing, but will start coming off in spots rather easily. You can see some blue in this layer on the underside.
Then you will hit another black layer, and here’s where you want to start watching your pressure. If you rub too hard, you will take off bits of the image, so be careful. I think of it more as wiping away layers, rather than forcefully rubbing them off.
This black layer will be much harder than the other two, so be patient. Let the hot water loosen it up and keep wiping away. I typically keep a circular motion and try not to go over the same spot too many times.
Underneath this layer, you will see the final layer, which is a milky white. This layer is the MOST DIFFICULT one to remove, so keep that circular motion with soft pressure to clear it off.
Sometimes bits of the image will wipe away, and it seems as if it’s luck of the draw.
Sometimes I have been super, extremely careful and have had bits rub off. Other times, I have gotten a little haphazard and had the image remain intact. So please drop all perfectionistic tendencies when taking on this task.

Layering the Transparencies
You can also stack multiple transparencies on top of each other with a bit of foam board in between to create a 3-D effect.
I take my photos, sandwich them between foam board and place them on top of my light table to take a video and photo to share!
For layering, I often pick an image with a lot of white/light areas to be on top, because the lighter parts will turn clear-ish when the transparency is done, and the bottom image will show through nicely.
My fave lately is to have some sort of picture of a person layered with a nature shot. Pictures of windows also make perfect top images.
I hope you use this transparency technique to create dreamy, surreal combos. As always, let me know if you have any questions!

Thank you so much, Amy! Amy is a regular contributor here at Shoot It With Film, and you can check out her other articles here, including How to Develop B&W Film at Home and Self-Portraits on Film: Tips to Get You Started!
To see more of Amy’s work, be sure to visit her on her website and Instagram! Amy also shares tips and tutorials for shooting film over on her IGTV channel. Go check it out!
Leave your questions about creating transparencies with Instax film below in the comments, and you can pick up some Instax film for yourself on Amazon!


Leave a Comment
Shoot It With Film on Instagram


Blog Comments
Jen Stamps
May 7, 2021 at 9:57 am
This is one of the coolest things in the world! Such a fun way to take the tangible to that next level. Thanks for sharing all of this, Amy!!
Amy Berge
May 8, 2021 at 6:50 pm
Jen, you are such an encourager. Thank you. I hope you DO try this! I wanna see what you create!!!!!
Cami Turpin
May 8, 2021 at 8:29 am
This is a phenomenal description of the process, and Amy, your examples are just incredible!! I love transparencies but I usually stick to Polaroid just because it’s easier. But wow, that color, and somehow the magic of those little mini bits of surrealism! Love!!! Thanks so much for the shout out to my guide!!
Amy Berge
May 8, 2021 at 6:51 pm
Well, Cami, I have YOU to thank for this! THANK YOU for showing me this process and watching me struuuuuggggggggle to figure it out. Why did I struggle so hard? lol
Frank
September 23, 2021 at 7:47 pm
Have you tried using anything other than hot water to clean away the layers, soap, bleach, ?
Thanks,
FW
Jodi
November 14, 2021 at 2:34 pm
I definitely have to try this! Especially after getting a cheap secondhand Instax printer! Thanks for another great tutorial!!
Amy Berge
November 19, 2021 at 4:07 pm
Please do! Coincidentally, mine stopped working with my phone shortly after writing this article! I wonder if there was a phone update that did it. I’m so sad!
Harmony
February 3, 2024 at 10:53 am
I’m curious about the foam board you use. It says that you stacked the transparencies with foam board in between? Is the foam board transparent? What am I missing? I miss alt processes and am hoping to get back into it. Thank you for the inspiration!
shootitwithfilm
February 3, 2024 at 1:19 pm
Hi Harmony! It’s regular foam board with a hole cut in it slightly smaller than the transparency. Then you can place one transparency on top of the foam board and one on the bottom to create a layering effect.
Kit
September 16, 2025 at 6:16 am
I also have another idea for you. Some of these spinning holiday projectors use what looks like a round negative transparency as the GOBO to project the image. I am wanting to try and use this process to try and make some images to replace the stock cartoon ones with some of my art.