
Written by Amy Elizabeth
Early on in 2020, I decided to take on a few film photography projects to make me uncomfortable and stretch me as an artist. One of these projects was self-portraiture.
Self-portraits on film were something we had to do in high school photo class, but I hadn’t thought much about since then (only a mere 20 years later, LOL).
I remembered it being a fruitful exercise to step on the other side of the lens, and, as someone who is rarely in front of the camera, I recognized the importance of intentionally getting in the frame.


This self-portrait film photography project grew into something more than I could have imagined as the pandemic wore on and as I am often my only willing subject.
I have a compulsion to create on a highly-regular basis, and self-portraiture has helped me do that when I feel out of inspiration.
It has also been a powerful act to become the director, photographer, and subject of my own work, which is why I have encouraged quite a few photographers around me to have their hand at this process at least once.
So consider this my appeal to you to have a go at it.


What Counts as a Self-Portrait?
In high school photo class, we had a lengthy discussion about what qualifies as a self-portrait.
My teacher’s theory is one I still ascribe to: if you compose the shot and do the settings, the person who takes the photo is a mere button-pusher and the shot counts as a self-portrait.
If this button-pusher method is the only way to achieve your desired shot, then go for it and know I personally still think it counts as a self-portrait.
BUT I highly recommend getting alone in a room with just you and your camera. There will be an intimacy and freedom that occurs by committing yourself to this alone time.

How to Press the Shutter Button for Self-Portraits
There are four ways to get that button depressed while you’re in front of the camera and shooting self-portraits on film:
- Have someone else press it
- Use a reallllllly long shutter release
- Use a camera with a self-timer
- Use a camera that takes a remote shutter release
My personal favorite is the fourth technique. It lets me know exactly when the shutter will fire, and I am not stuck to a cable length. I use a remote shutter with my Nikon F100 because it has a 10-pin remote terminal.
I bought this remote off Amazon about a decade ago, but any sort of trigger/receiver system will work as long as you also have the cord that plugs into the remote terminal. I have used my strobe trigger/receiver plus the 10-pin cord when I couldn’t locate my designated remote.
If I am also using my strobe, I plug my strobe directly into the sync terminal instead of stacking a trigger on top.
I have found there’s a slight delay if trying to stack the two remotes, and the strobe doesn’t time correctly with my shutter release. Because my camera is stationary on a tripod, having it plugged in isn’t bothersome like it is when you’re behind the camera trying to move around.


How Much Space Do I Need?
How much space you need for self-portraits depends on a couple things: how much of yourself you want in the shot and the focal length of the lens you’re using.
When I’m just trying to get a portion of my body (like a headshot), I typically use my 85mm lens on my Nikon F100. I’ll put my camera about 4-5 feet away from me and stand or sit about 2 feet away from my seamless backdrop.
But you definitely do not need that much space. When it’s sunny outside in the wintertime (and only in the wintertime because of the lack of leaves on the trees), light streams in through our front door, creating stripey shadows from the blinds that are built into the door glass.
One day, I decided to set up my camera and do a couple self-portraits in this light that I love so much.
The problem is that my entryway is literally as wide as a hallway (3 feet). So I stuck my 50mm lens on my camera, leaned directly up against the wall, and shot a few.

So, basically, you’re not allowed to use ‘lack of space’ as a reason to not undertake this project.
In fact, sometimes lacking something helps push our creativity to new heights. It’s within parameters that we often feel safest to experiment.

Setting Up Your Light Source
I most often use my strobe for self-portraits, and I place it slightly to the side of my camera and angled to face me.

Same thing if I’m using window light.
I try to place myself about 45 degrees to the window and have my face going toward my light source if I want a “pretty” picture, which I don’t often do with self-portraits. I like to do a whole lot of mess-making.
If you want to play around with light and shadows, then change up the direction of the light source completely.
As stated further down, I have used my strobe for back-lighting just to have a whole ton of dramatic shadows on the frame.
Light is your biggest tool to accomplish what you’re after, so use it wisely and creatively.

How to Focus Your Shot for Self-Portraits
Sometimes I actually don’t WANT the shot in focus, and that’s easy. Just make sure your camera is on manual focus and front focus until it makes your messy, blurry heart happy.
But if I want my shot IN focus when I’m shooting self-portraits on film, that’s another story.
If your camera allows, one option is to set the camera to auto-focus.
When I’m using my Nikon F100, I can set my focus point, half depress the remote to find focus, and then fully press down to take the picture.
The major caveat is that if you’re not directly over your focus point, it could end up focusing on the background (which you may or may not want).

My preferred method is to keep my camera on manual focus, place an object where I will be, focus on that object, and then stand in place of that object for the photo.
I often use a chair, stool, or another tripod to accomplish this.

But I Need to Know Where I’ll Be in the Photo!
I’ve had photos I’ve taken where I needed the frame to capture a very specific viewing angle.
In these cases, I have cheated and put the lens I was going to use on my digital camera, took enough photos to figure out how to align and place my tripod in order to capture just the angle I needed.
Then, I put the same lens back on my film camera, focused on my stationary object, and then shot away.
You could also enlist the help of a friend or family member to stand in your place while you figure out juuuuuust exactly where you need to align everything.
If you enlist the help of someone, it also makes focusing easier. But I tend to just do everything all on my own to do it the hard way, because that’s how I am.
If these aren’t options for you, you could also tape off the backdrop exactly the angle of viewing you want to appear in the shot. Align your camera with the tape, and you’re good to go.

I’m in Front of My Camera….Now What?
For a photographer, this is THE WORST STEP OF THEM ALL.
Like, you want me to get in front of my lens and take a photo? That’s kind of a nightmare.
This is also where being alone frees you from feeling like an idiot (at least a little bit).
If you’re really concerned about how you look, you can put a mirror behind your camera. I don’t do this because it makes me feel even more self-conscious, but it’s a possibility.
My strategy is to basically just try all the things.
I will admit that the one thing I’m worst at doing is looking directly into the camera and trying to take a “normal” (non-experimental) self-portrait…I promise to do a better job of that this year. It’s the thing that makes me the most uncomfortable, which is also the reason I need to do it.

Posing for Self-Portraits
As far as posing, what I most often do is just try out lots of angles: I’ll face the camera and look away, or go perpendicular to the camera and look over my shoulder, turn the other way and try new angles, and just kind of keep moving around, looking up and down and all sorts of directions. After a roll of this, usually something turns out okay.
I rarely face my camera straight on. Facing the camera dead-on will make you appear broader than if you work those angles more. So keep that in mind when posing to see if it fits your vision.
I typically make a 45-90º angle with my camera, and, then, rotate the top part of my body toward the camera.
I’m always “dropping” something to create more angles, usually it’s my front knee or the shoulder turned toward the camera.
I also really love completely turning away from my camera and looking off to the side


Working Those Angles
Keep in mind when you’re turning toward the camera, there could be parts of your skin that will start to wrinkle up, so if you want to avoid that, be sure to elongate anything facing the camera that you don’t want to wrinkle.
This also includes relaxing your face so your brow doesn’t furrow.
And this ESPECIALLY includes avoiding the dreaded double chin. If this is a concern for you, think about stretching your neck (think of someone pulling up the very back of your head), and then push your face out slightly toward the camera, making sure that your chin doesn’t pop up too far.


Facial Expressions
If you’re not going to smile for the camera, be very cognizant of your expression, because nothing is worse than a lifeless face.
Keep in mind Tyra Banks’s classic advice to SMIZE.
The basic premise of the smize is to “smile with your eyes,” because when you smile with your mouth your eyes automatically gain a certain look of life within them.
If you’re not smiling, just be sure to give that life to your eyes. To achieve this, think of having a slight smirk, and then squinting your eyes ever-so-slightly to get that “I’m powerful and I know it” look.
Feel the freedom in this first roll to try it all. It will teach you a lot about which directions and angles turn out best.
I will note this is when self-developing and scanning wins because I get that quick turnaround, so it’s all fresh in my mind. Then just keep shooting and learning and experimenting.
Check out these articles to learn more about developing your own black and white film and developing your own color film.


Experimenting with Self-Portraits on Film
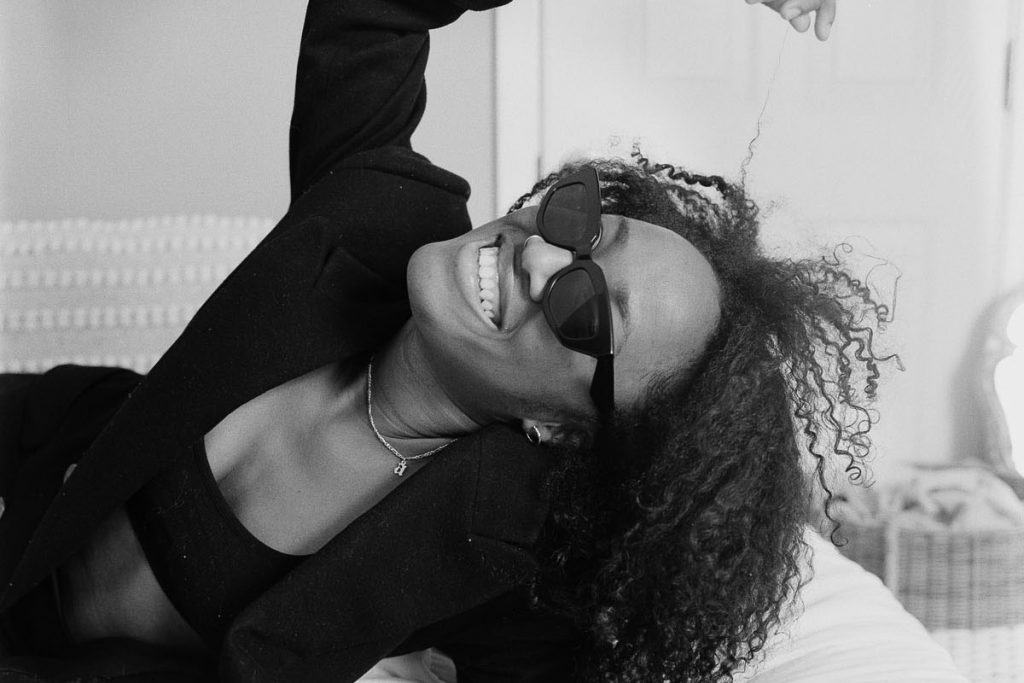
Experimenting is my favorite thing to do with self-portraits.
Since I’m my own subject, I am always available for a shoot, so as soon as I get an idea, I can just hop into my studio and shoot away, unwashed hair, no makeup, and all. (Creators gotta create.)

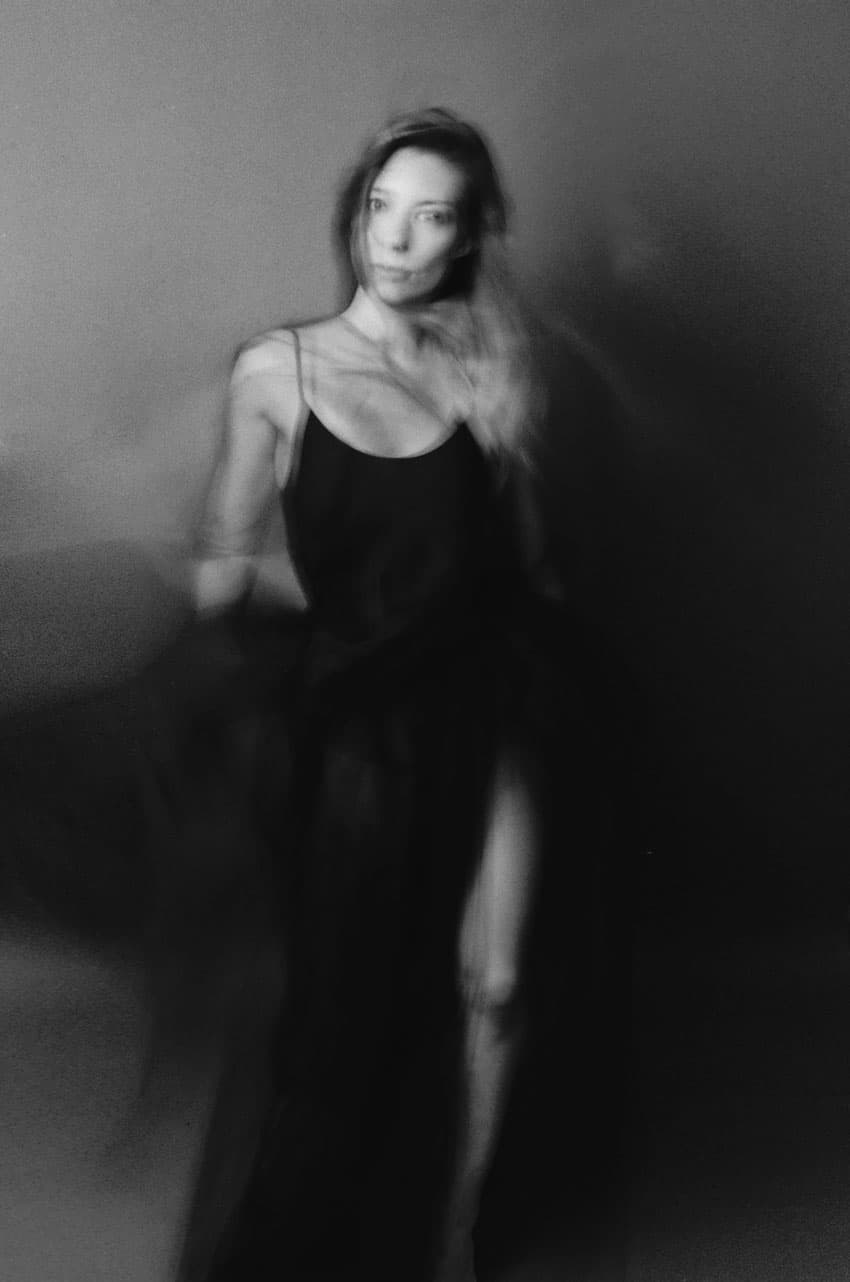
Using Motion
One of the major ways I love experimenting is with motion.
I will set my shutter speed to somewhere around ⅛ of a second and move around while I press the button.
This creates a significant amount of motion blur. This is also a perfect technique for people who are scared of getting in front of that lens. Knowing you’re going to look like a moving mess is very freeing.


Using Multiple Exposures
Set your camera to overlapping exposures, and go to town.
Look at the camera and look away, cover your eyes and uncover them, face to the left then face to the right….the options here are endless.
Bonus: if you forget to turn your knob back after taking a double, you might end up with 15-ish shots on a frame and that could be cool, too

Using Film Manipulations
You can also use light leaks, film soup, and other film manipulation techniques on your film rolls after you shoot self-portraits.
If you’ve heard me talk (basically ever), you’ve heard me say that light leaks and film soup just know where to go.
So much of self-portraiture on film already feels like it’s left to chance, so adding in these extra elements just feels natural.
Here are a few articles to help you light leak your own film, how to do film soup, and film soup recipes.


Using Backlighting
Recently, I got the idea to experiment with backlighting, basically creating a silhouette.
I actually placed my strobe behind me and a little to the side so that the light would peek in juuuuust a little bit on the side of my body.

I then ran the film through my camera a second time to fill in the dark spaces with whatever I shot second.
For this black and white roll, I specifically just shot around my house and out my windows, intentionally never stepping foot outdoors (because that feels like pandemic life and how I’ve had to create recently…by living and creating in these new boundaries.)


Final Thoughts
But my most important tip is to just rip off that band-aid and try it.
Don’t expect your first roll to be amazing, not because they won’t be amazing, but because part of self-portraiture on film is dropping expectations altogether.
Heck, part of shooting film is dropping expectations altogether.
So often, when I have strong expectations and my image doesn’t meet them, I have to let the image sit for a few weeks, months, years in order to truly appreciate it.
And trust me, your future self will thank you for taking the time and having the courage to capture these shots.

Thank you so much, Amy! Amy is a regular contributor here at Shoot It With Film, and you can check out her other articles here, including How to Develop B&W Film at Home and Scanning Film Negatives with a DSLR!
To see more of Amy’s work, be sure to visit her on her website and Instagram! Amy also shares tips and tutorials for shooting film over on her IGTV channel. Go check it out!
Leave your questions about shooting self-portraits on film below in the comments!


Leave a Comment
Shoot It With Film on Instagram


Blog Comments
Andy
March 8, 2021 at 8:30 am
Thanks – That was a really interesting read
Pier Paolo
July 18, 2022 at 5:57 am
Modern digital camera allow you to autofocus then to switch to manual keeping the focus taken automatically . Could you do the same with the f100?
Great article btw!
Amy Elizabeth
July 25, 2022 at 6:39 pm
Hi Pier! Yes! I will often autofocus on an object I’m using as a stand-in, then switch the camera to manual focus before stepping in the frame!