
Written by Alec Pain (Alastair Place)
I’ve been working on sets of images using neon and LED screens for a couple of years now.
Being out late at night (often having an hour or so to kill before my train departs to take me home) and without a tripod, I wanted to experiment with Neon signs and then rewind the film and shoot over the top of them with fresh images, creating double exposures.
Experimenting with Neons & Double Exposures
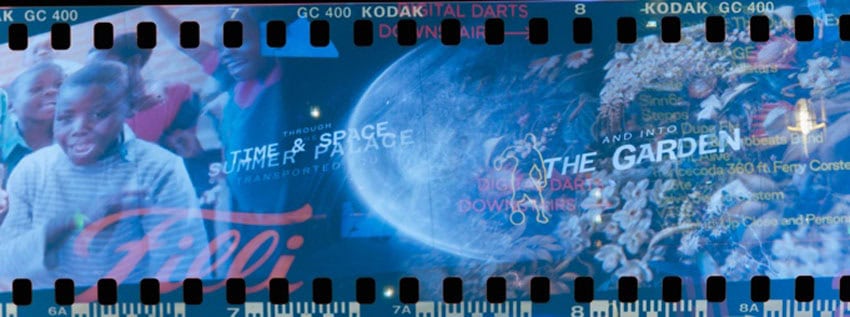
I had been wandering around Oxford’s Westgate shopping centre – with all of the shops closed and only the odd person heading up the escalators to the second-floor restaurants and only had some expired Ferrania Solaris film left to play with. I hadn’t thought much beyond the neon signs and, so, once I had finished the roll, I simply rewound the film and though perhaps I would just shoot more neons.
There are plenty of options for you to double expose – if your camera can double expose straight away then that’s a bonus. If not, you will have to rewind the film and shoot the same roll again.
The Minolta CLE has a manual winder so it is relatively easy to reload the film. Hold the camera up to your ears until you hear the click of the film being released from its holder and the leader will be sat there waiting for you.
I’ve done similar double exposures with an old Nikon and this does require that you have either a film retriever or a spare piece of film to get the leader back.
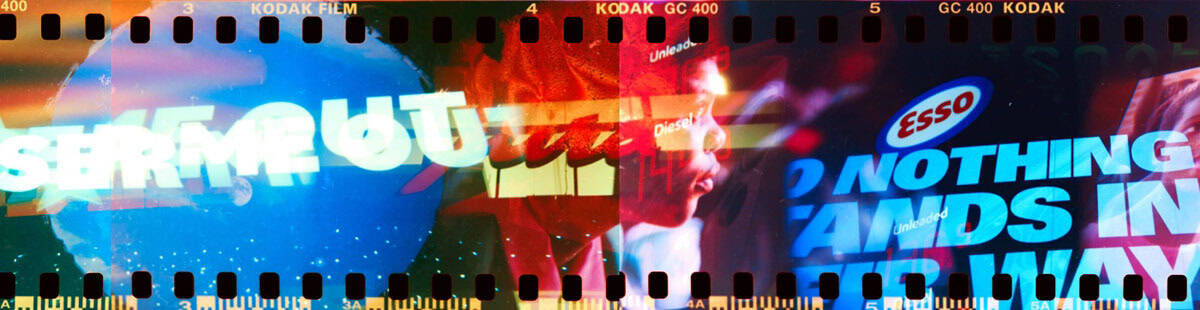
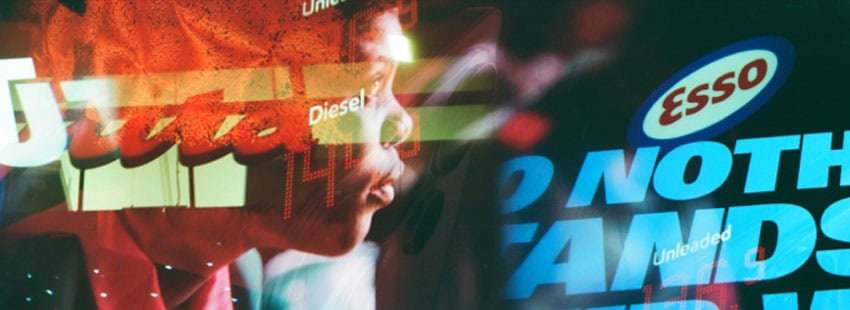
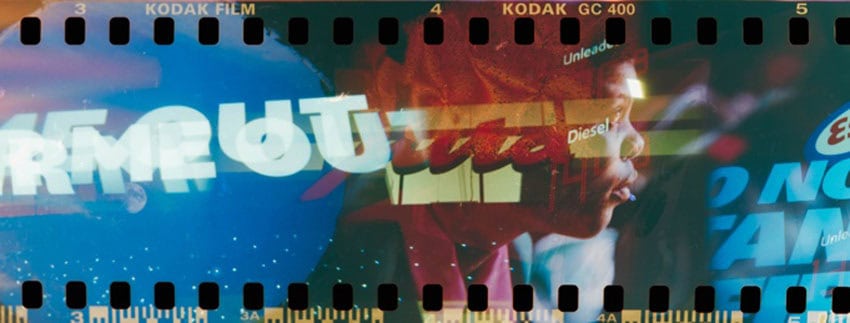
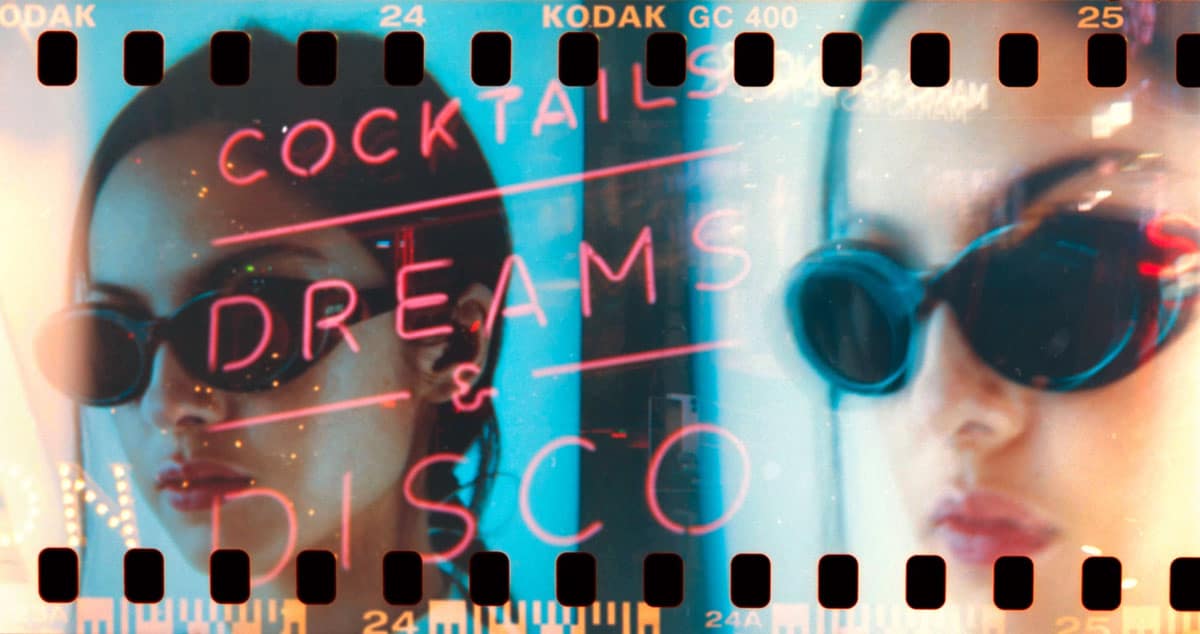
For the second set of shots, I walked around and happened upon an LED screen in the Flannels window playing adverts for various items of clothing. As it was dark, the bright lights of the LED screen gave enough light to get sufficient exposure and bring out the neons I had shot earlier.
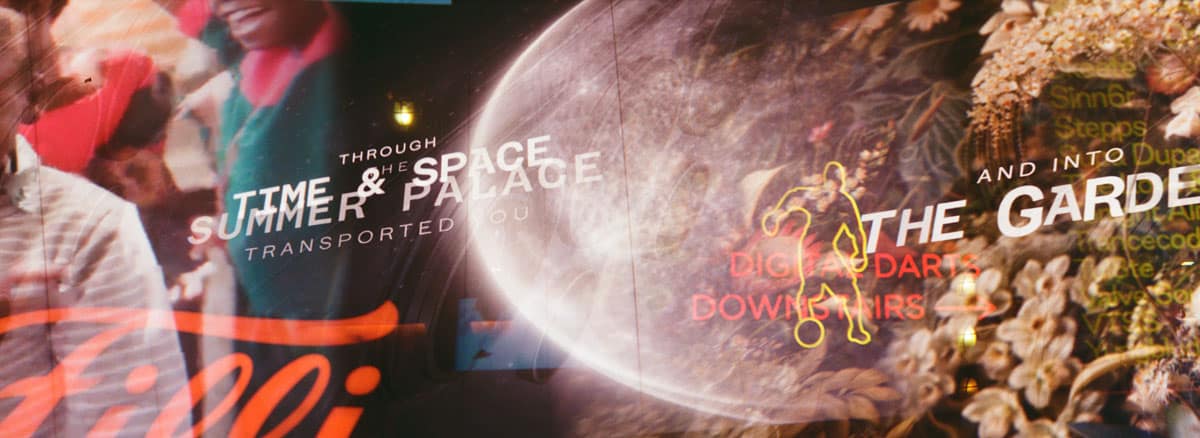
I love the way that it worked out. Seemingly random neon signs – like the “fussy suckers” one here below lined up perfectly with the Gucci kids looking mardy.

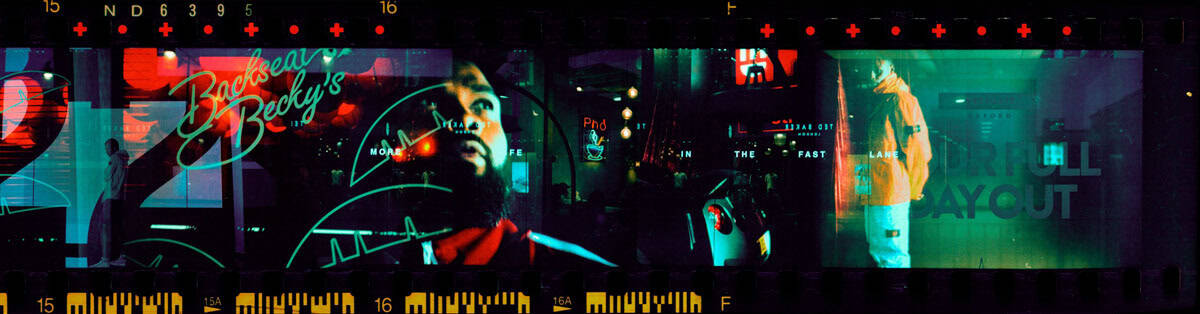
There were other moments of synchronicity. This chap’s red jacket and the green of the Backstreet Becky’s (and the Pho sign too), also seemed to match perfectly.

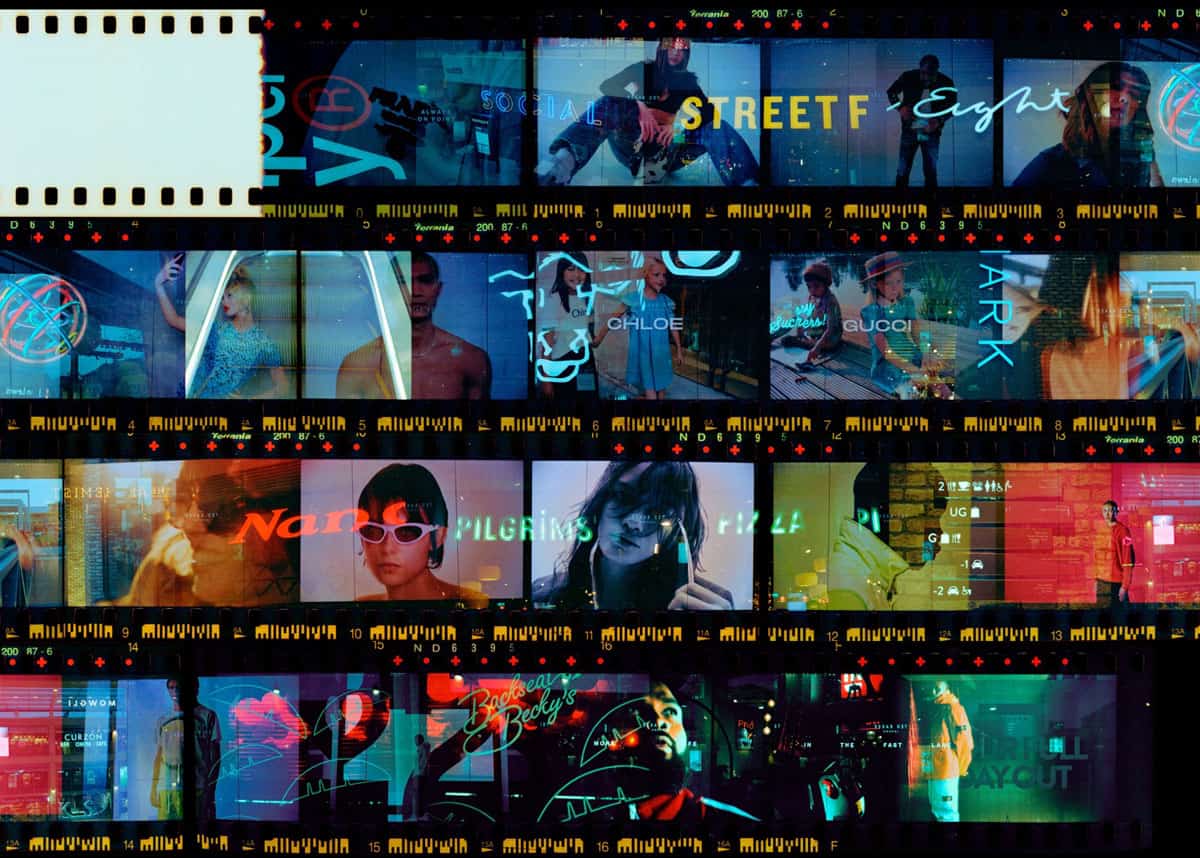
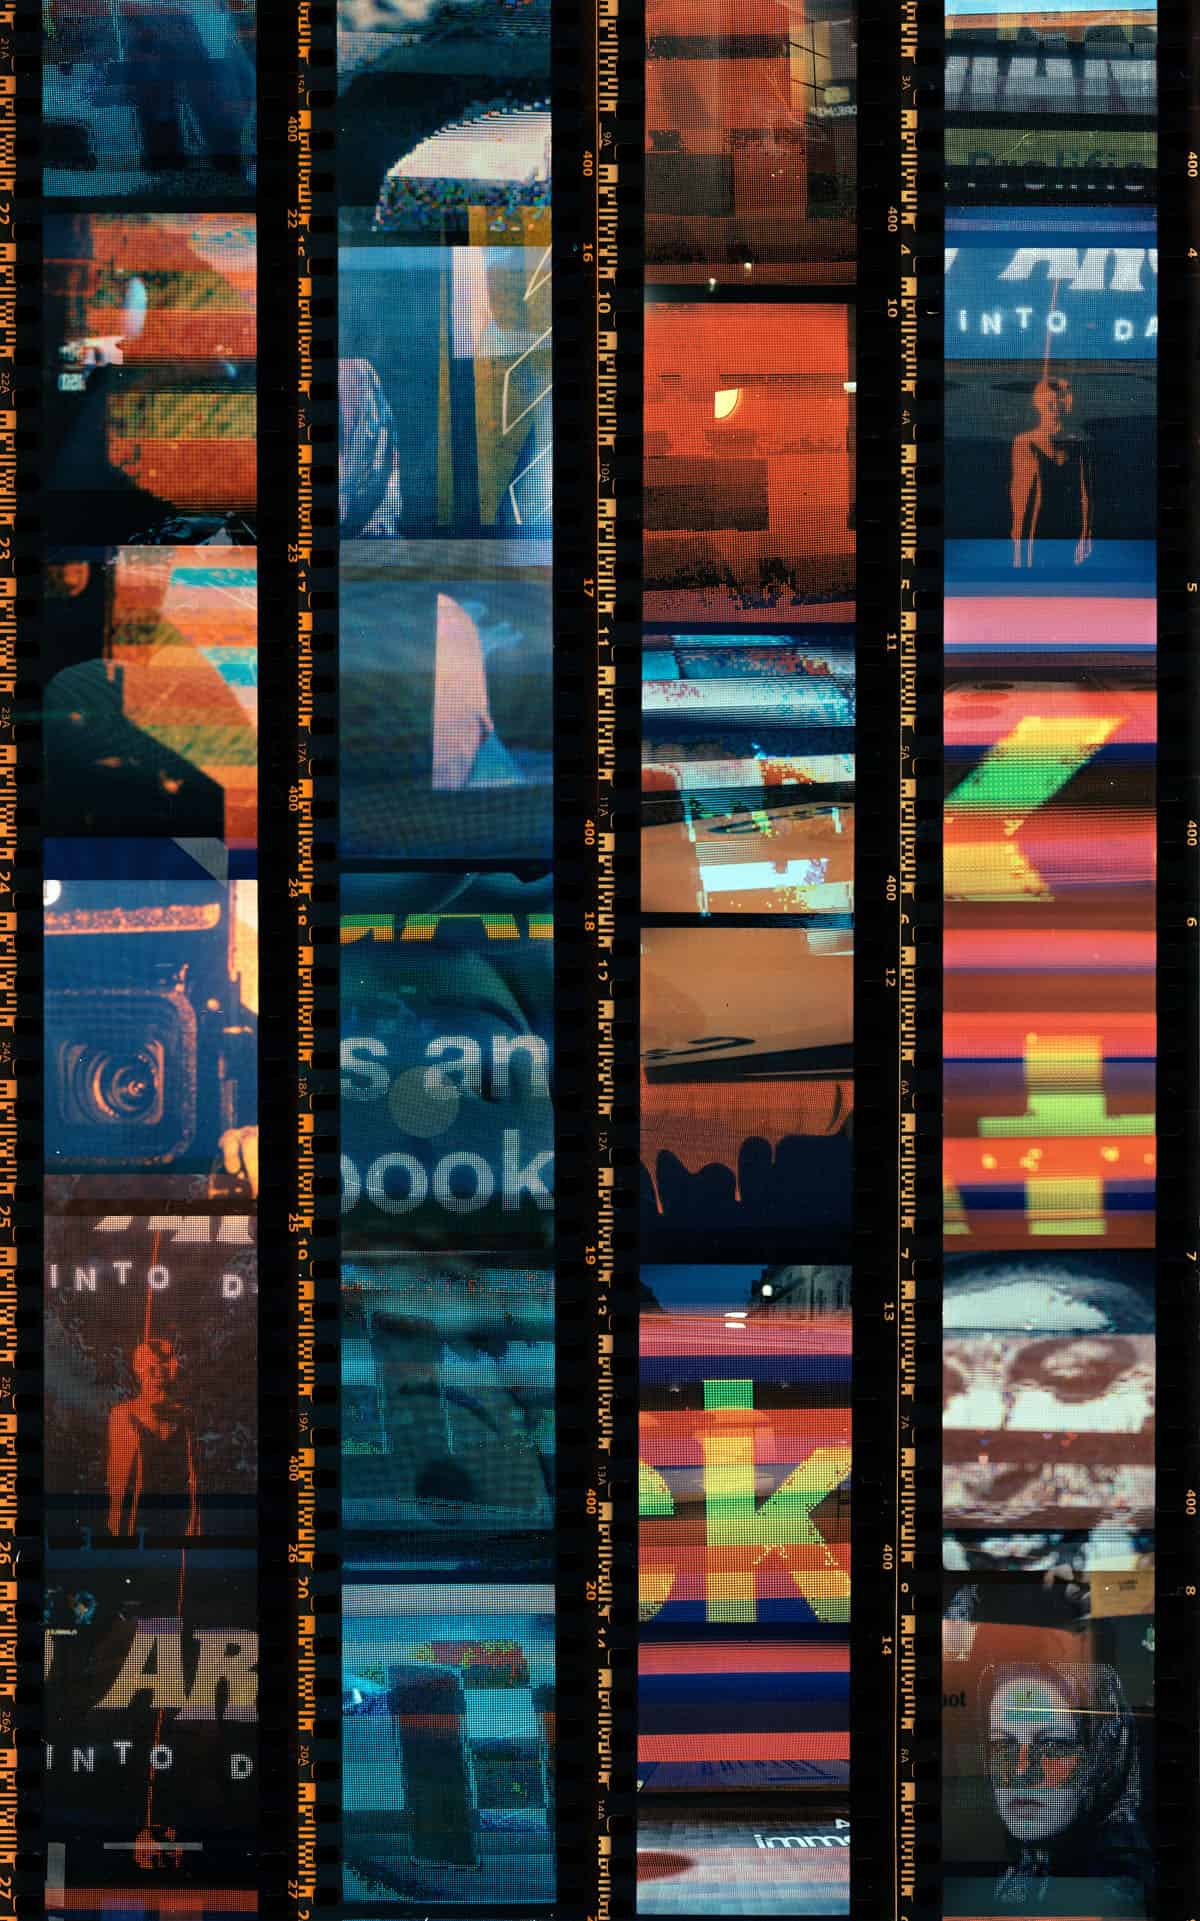
Film Edges & Making the Images into Art
My lab – The Mini Lab – provide me with superb scans – and they’ll scan the film in longer strips so that I can join the film up into one long piece – but they don’t, as yet, scan the sprocket/edges of the film.
This means I often do some scanning of my own once I get the negatives back. This is easiest with a larger scanner, but you can do this with a DSLR and a stand.
I own an Epson v550 scanner which has now stopped scanning negatives. Getting a consistent exposure on the whole roll (and lining up of everything is a slow and laborious process but one that I think is worth your while). The scans aren’t quite as vivid as the ones you get from a lab, but I believe that the whole reel scanned in (a little like a contact sheet) makes roll itself a work of art – a beautiful larger format image for my wall.
This is done by stitching everything together in Photoshop (or other image editors). I usually line everything up as one long strip, before cutting it down into a contact sheet. (See my article here).

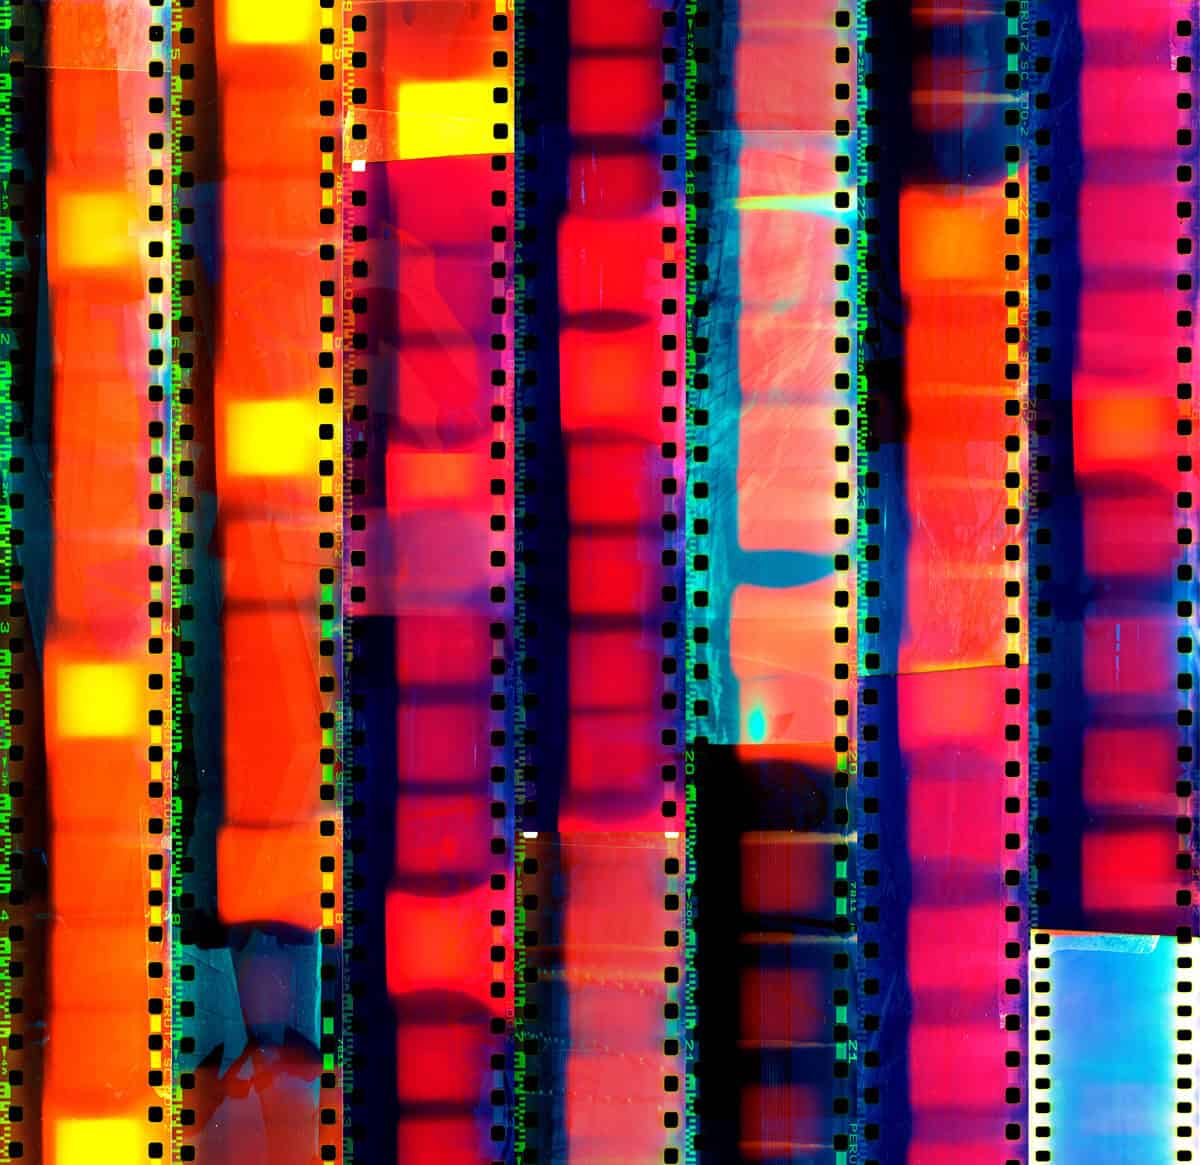
Scanning the end of the film and the start of it also adds some variety. It turned out that Ferrania Solaris also had some beautiful red circles and + signs on the sprockets and really fit in well with the red feeling of some of the images.
I then cropped it down to form a 4×6 image which was more easily printable than a longer format. I love the way the people interact with the neons and the film edges:
Vertical Contact Sheet
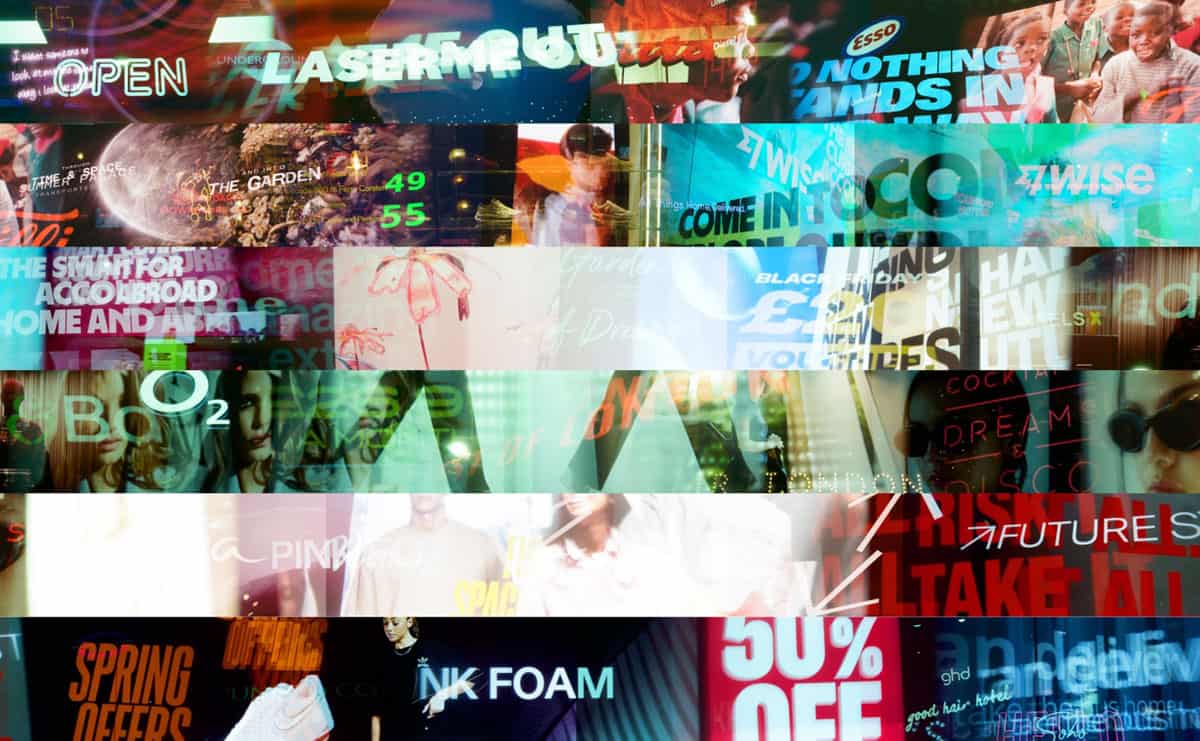
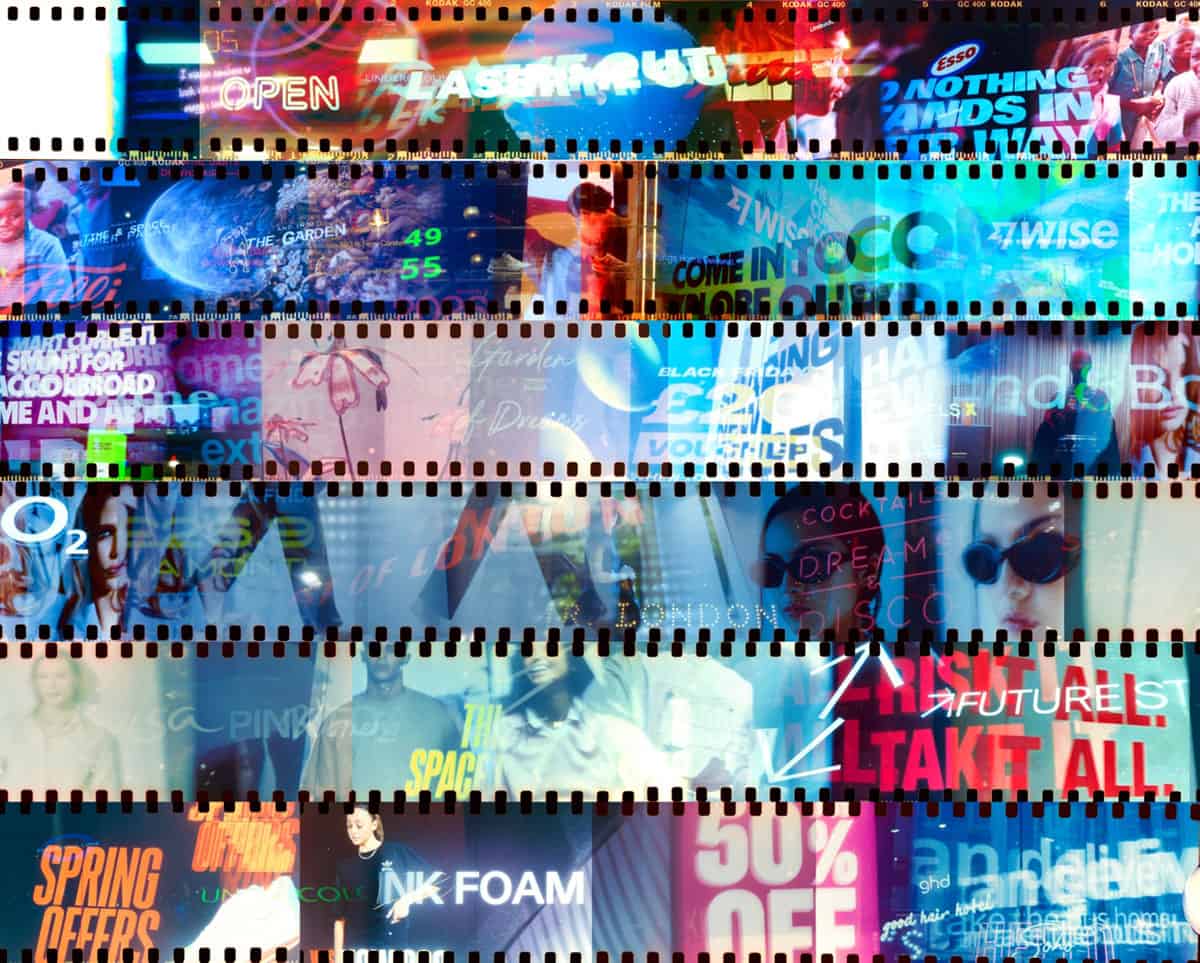
I tried the same technique using portrait images.
This time I used the screens at London’s famous Piccadilly Circus as my first set of exposures. I then rewound the film and used the LED screen at the British Film Institute (BFi) on London’s South Bank.
This is Candido 800 and the film didn’t have the visual interest on the edges of the film that Ferrania did, but again I got some lovely color and cross over images with it.

It’s a lot grittier than the “Fussy suckers” roll – but I love the final piece of jagged pixelisations and eerie imagery from the films that were on show at the BFi.

Using the Holga 120N for Sprockets.
Scanning film with sprockets can be even more time consuming. I shot the sprockets using the Holga 120N. You can learn how to do that here.
I found it difficult to line up the sprockets – especially when scanning with my DSLR and then color correcting. The labs scans were so much more vivid – and it’s always really interesting to see what your own edit brings to the piece.
Mine aren’t anywhere near the quality which a lab can bring to your scans, but unless you can get your lab to scan them, you make a trade off with colors and some sharpness.
It’s up to you what the final finished piece looks like and finding detail and bringing it out of the negative to me is more important than “well that’s how the scanner scanned it in”!
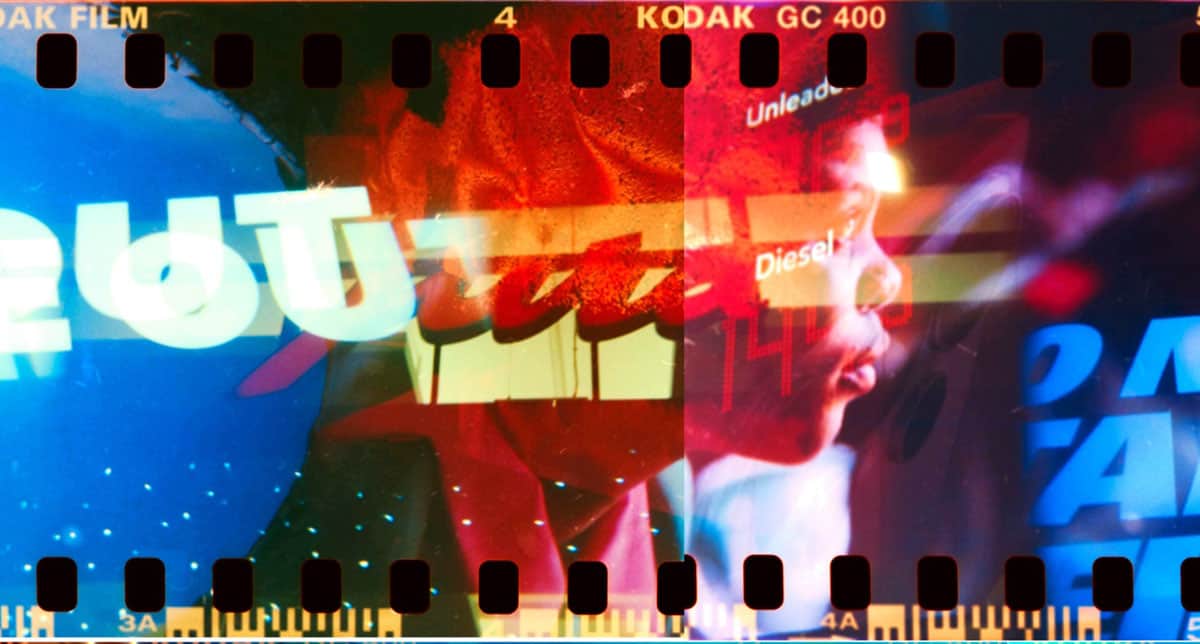
These exposures are both from a walk down Oxford Street (and possibly Marylebone), some nine to twelve months apart. The problem with the Holga is that you need a dark bag to rewind the film (unless you intentially double expose whilst you are shooting), so I had to wait till the next time I was in London late at night to take the second lot of images! I have a portable dark bag now which I’ll take along with me in order to rewind the film in future.
I’ll continue working on these and try and get my scans less blue (and I’m looking at a new scanner) but when seen as a whole I love the complete set. You can see the difference in scans from the lab as opposed to mine below:
Again, picking out some of the bits that work together produce several works of art as well as the overall one.
I particularly loved the juxtaposition of the young boy and the Unleaded Diesel petrol station neons.
Failure Sometimes Leads to Success
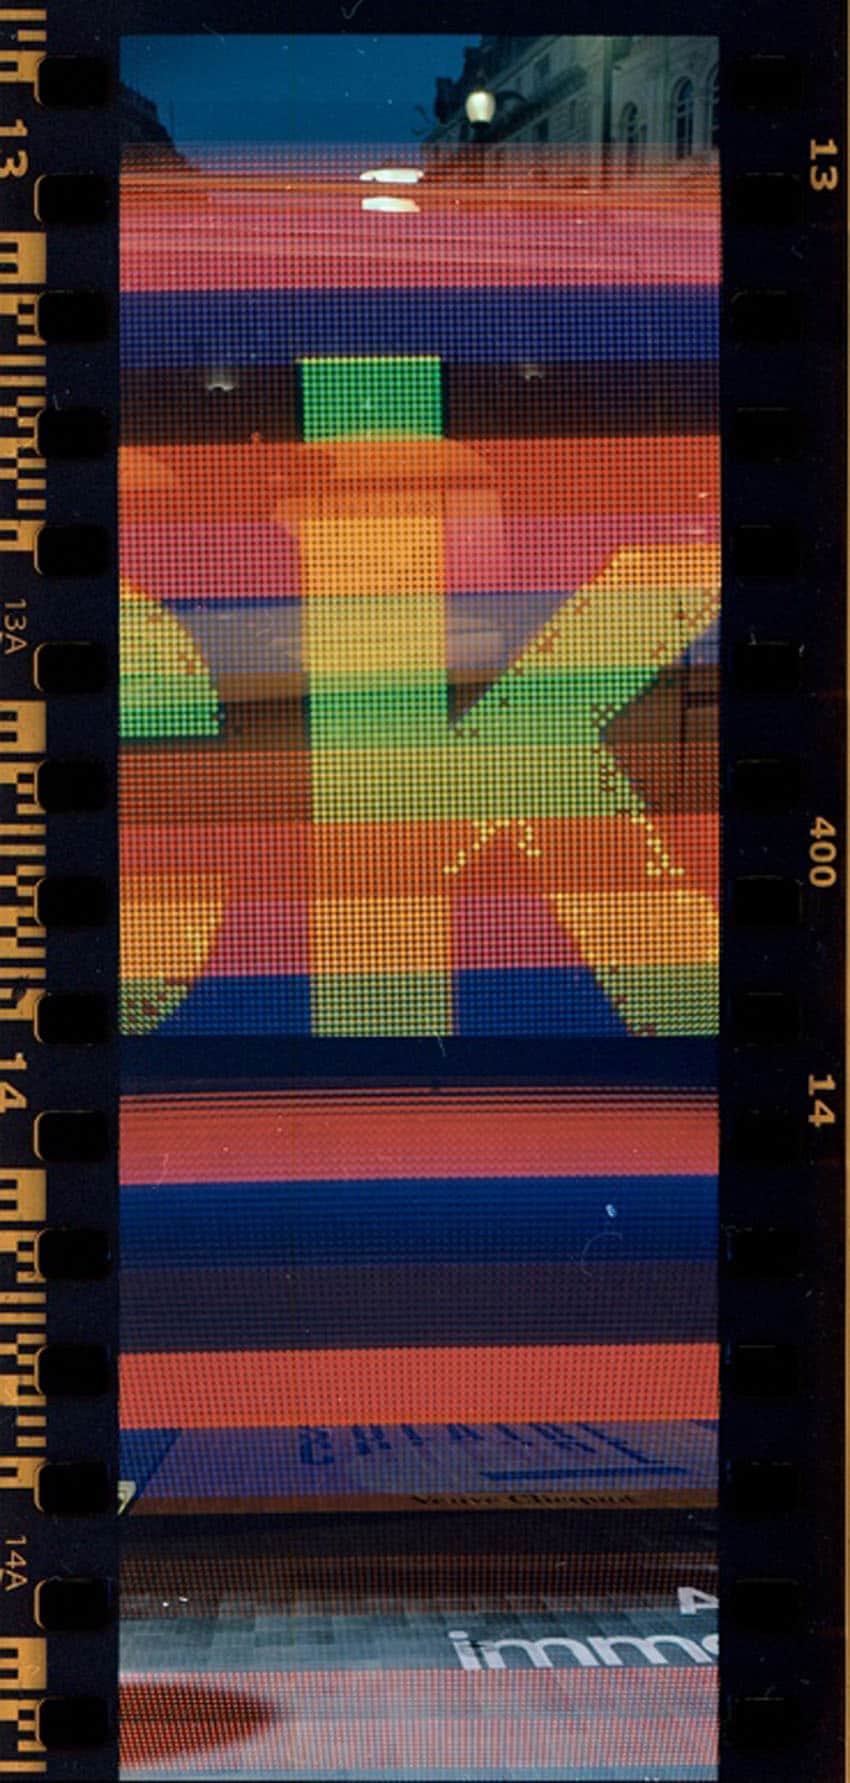
Sometimes a whole roll has failed me totally, and, yet, I’ve still created an artwork from the ruins!
This one was an attempt at using the very wide Holga 120PAN with 35mm film – in an attempt at getting the sprockets filled with color.
I don’t think it was actually at night! The back of the Holga wasn’t sufficiently taped up leaving a square block where the light leaked through. I turned it into a full roll of abstract art:
In Conclusion
I hope you love this technique of shooting double exposures at night and creating digital contact sheets. I can’t wait to try this out further.
Thank you so much, Alec! Alec is a regular contributor here at Shoot It With Film, and be sure to check out his other articles, like The Holga Challenge: 18 Photography Prompts with the Holga & Kentmere Film and Thermal Printer Camera Review: A Fun, Lo-Fi Instant Camera Alternative.
You can also check out more of his work on Instagram.
Leave your questions about double exposures with neon, LED screens, and contact sheets below in the comments!


Leave a Comment
Shoot It With Film on Instagram


Blog Comments
Eddy
July 3, 2026 at 11:41 am
Nice work. I love double exposures. Hodachrome is the master of multiple exposures. Reminds me of the famous Albert Watson photo where he took a photo of a Leopard and then Mick Jagger. It’s one of his famous works.
Catarina
July 7, 2026 at 2:42 pm
I loved it! Coincidently I’m shooting a film just at night these days, and some led light including. But double exposing with it I haven’t tried yet. Amazing article.
Adam
July 8, 2026 at 9:28 am
Multiple exposure photos usually don’t do much for me, but these were terrific! Thanks for sharing.