
Written by James Baturin
If you’ve ever wanted to try macro photography but don’t have a macro lens (or the money to buy one), an extension tube might be a cost effective and easy to use alternative.
An extension tube is essentially a light tight cylinder without optical elements.
This makes them relatively cheap, because you aren’t paying for glass, and they work in tandem with the lenses you already have, which means no new lens required!
Find extension tubes for your camera system at KEH Camera or on eBay.


Extension Tubes and Magnification
Extension tubes mount directly to your camera, and extend the distance between the lens and the focal plane to increase magnification.
The shorter the focal length of the lens you use, the greater the magnification will be. In fact, you can calculate how much your image will be magnified by dividing the lens focal length by the extension length.
So, using my 55mm extension tube with my 80mm lens gives me a magnification of 0.69x.
If I wanted to increase it further I could use a lens with a shorter focal length, or I could attach another extension tube if I had one.
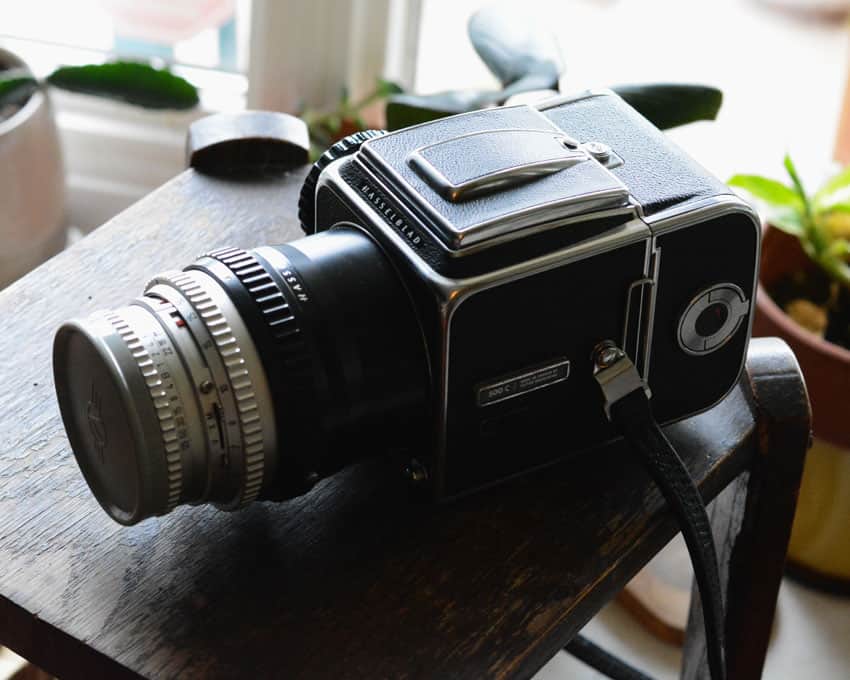

Using Extension Tubes with the Hasselblad 500 C/M
I was looking for a way to shoot macro photos with my Hasselblad 500 C/M, and ended up buying a used 55mm extension tube from a local camera shop for $50.
You can find them on eBay as well or at KEH Camera for anywhere between $50 and $150 depending on the size and condition.
I shot two rolls of film with the extension tube, using both my 80mm lens and 150mm lens.
The shorter focal length of the 80mm allowed me to get as close as a couple of inches to an object and still focus. The 150mm allowed me to step back a couple of feet and fill the frame with the subject and more detail with a larger depth of field.
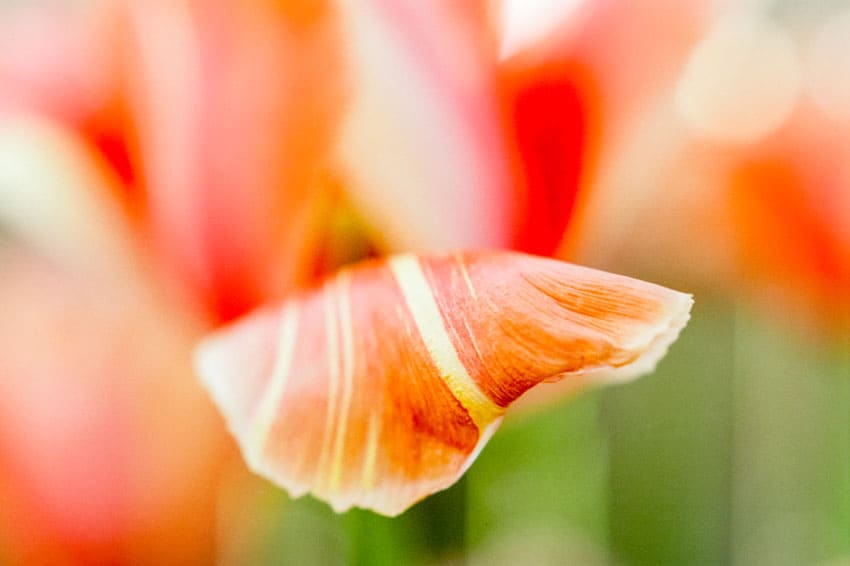
Overall, I was really impressed with the details I was able to capture with it!


Tips for Using Extension Tubes
After seeing the results on film, here are a couple things to note when using extension tubes in general, and some that are specific to using them with the Hassleblad 500 series cameras.
Focusing and Shooting With a Small Depth of Field
First, extension tubes are going to drastically reduce the depth of field, even at smaller apertures.
On the one hand, this opens up creative avenues as you’re able to focus in on a single delicate detail of an object. As I was experimenting with it myself, I was blown away how close I was able to get to a small subject, and have the entire frame filled with a world of intimate texture and detail.
On the other hand, I found that this made it challenging out in the field where conditions aren’t as controlled, especially with the 80mm lens.
Trying to nail down the focus on a specific part of a plant or tree while it’s swaying in the breeze is almost impossible with such a shallow depth of field, especially if you’re trying to do it handheld.
For this reason, shooting with the extension tube during still conditions outdoors, or in a controlled indoor setting is more ideal. Using a tripod is also a helpful way to make sure that you are able to nail the focus.

Calculating Exposure with Extension Tubes
Before purchasing the extension tube, I had read that in using one you lose about a stop of light, and therefore have to compensate by overexposing the shot.
In the photos I took, I did compensate a stop for some, but others, I just shot at the reading my meter gave me (I use an external meter as the Hasselblad 500 C/M does not have an internal meter).
To be honest, I didn’t notice much of a difference in results.
This could be because film is fairly forgiving when it comes to getting good exposures, or because most of the settings I was shooting in were filled with good light.
Either way, the compensations didn’t seem to make much of a difference for this particular extension tube, but I can’t speak to how other sizes or types would affect exposure.


Attaching and Removing Extension Tubes on a Hasselblad
Now, if you’re using an extension tube with a Hasselblad V system camera, there is a proper sequence you have to follow when attaching and removing extension tubes.
These Hasselblad cameras have a leaf shutter that’s located in the lens, and if you don’t attach/detach the tube and/or lens properly, you can trigger the shutter, which then requires you to recock it manually.
Here’s the sequence:
First, attach the extension tube to the camera, making sure first that the camera body is cocked.
Next, attach the lens to the extension tube that is already mounted to the camera body.
To remove the extension tube, simply do this sequence in reverse order. First remove the lens, and then remove the extension tube from the camera body.

Overall, I’m really impressed by the detailed images I was able to take using an extension tube!
If you’re looking for an affordable way to take macro shots you should definitely consider it!
Thank you so much, James! James is a regular contributor here at Shoot It With Film, and you can check out his other articles here, including Understanding Reciprocity Failure in Film Photography and Fujifilm Acros vs Acros II Film Stock Comparison. You can also check out James’s work on Instagram.
Leave any questions you have about using extension tubes for macro photography below in the comments, and you can pick up some extension tubes for your camera system at KEH Camera or on eBay.


Leave a Comment
Shoot It With Film on Instagram


Blog Comments
Richard J Ries
October 2, 2021 at 9:32 pm
Back when I was living in NY, I bought a “rail adjuster” (son’t remember the real name) from Adorama. It would go between my camera and the tripod. The knurled knob moved the camera very slowly, which allowed me to get very good focusing with my DIY extension tube – a broken telextender from which I had removed the glass.
Another trick I used was to hold my 50mm fixed lens in front of my 80-135mm zoom, filter ring to filter ring.
I never combined the two – exposure time could have been in centuries! 🤣
Regards,
–Rich